Showing posts with label chocolate. Show all posts

Sunday, May 4, 2014

Chocolate cream pie

Chocolate cream pie

I took a new job fairly recently, and I was excited to have some new coworkers to bake for. In fact, since I work in a small department now, I thought that maybe I'd bake something for each coworker's birthday. So nonchalantly, I asked all of them one day what their favorite birthday cake was. What I didn't really expect was "I don't really like cake." But alright, my husband's like that... pie, then, that should be fine, right? Well, no, not for my boss, who said that he doesn't like pie unless it has a non-fruity filling, like pumpkin pie or pudding pie. And oh, he really likes pudding.

Thank goodness for Baking Illustrated. It seldom lets me down, so despite the fact that I'd never tried to make chocolate cream pie before, I went for it. It's entirely scratch-made except for the cookies in the crust -- I would've made those, too, but the recipe said not to, that using whole Oreos was actually the best bet.

I have to say, this came out pretty damned good. The only thing I did wrong, really, was that I was so concerned about getting the crumbs to go up the sides of the pan that the bottom crust ended up a bit too thin -- but the filling was just firm enough to serve without that being an issue. It was delicious. And best of all, my boss was so thrilled that I'd made it for him that he literally did his happy dance -- that kinda made my whole week right there. :) (It did mean, though, that I didn't get a nice photo of the pie sliced, 'cause he massacred it pretty quickly. :) )

Chocolate Cream Pie
From Baking Illustrated

16 whole Oreos
2 tbsp melted butter

2 1/2 c half-and-half
Pinch of salt
1/3 c sugar
2 tbsp cornstarch
6 egg yolks, room temperature
6 tbsp cold butter, cut into chunks
6 oz semisweet chocolate, cut or broken into chunks
1 oz unsweetened chocolate, cut or broken into chunks
1 tsp vanilla

1 1/2 c heavy cream, cold
1 1/2 tbsp sugar
1/2 tsp vanilla

1. Pulse the Oreos in a food processor until broken up, then process until the crumbs are uniformly fine.
2. Pour the crumbs into a bowl, then pour in the melted butter and combine thoroughly with your fingers. Press crumbs into the bottom and up the sides of a pie plate.
3. Chill the crust for 20 minutes to firm up the crumbs, then bake at 350 degrees until fragrant and set, about 10 minutes. Cool on a wire rack.
4. In a saucepan, bring the half-and-half, salt, and 3 tbsp of the sugar to a simmer, stirring to dissolve the sugar.
5. While that's coming to a simmer, combine the rest of the sugar and the cornstarch in a small bowl. Then, in a medium bowl, whisk the egg yolks thoroughly, about 30 seconds. When the half-and-half mixture is near a simmer, sprinkle the cornstarch mixture over the egg yolks and whisk until the mixture is glossy and the sugar has begun to dissolve.
6. Slowly drizzle about a half-cup of the hot half-and-half over the egg mixture, whisking constantly. Continue to slowly whisk in the half-and-half until the egg mixture is warm, then slowly whisk this mixture back into the pan. Return the pan to a simmer, whisking constantly, until the mixture is thickened and glossy and bubbles start to form and burst on the surface.
7. Remove the pan from the heat and whisk in the butter until incorporated; then, whisk in the chocolates and whisk until fully combined. Whisk in the vanilla, then immediately pour the mixture into a mesh strainer that has been set over a bowl.
8. Scrape the strained filling into the crust, smooth out the top with a spatula, then place a piece of plastic wrap over the top of the pie, pressing it down so it makes direct contact with the filling.
9. Chill until firm, at least 3 hours.
10. Whip the cream and sugar to soft peaks, then add the vanilla. Continue to whip at high speed to barely stiff peaks. Spread over the pie. Top with chocolate shavings if desired. Serve immediately.

Wednesday, December 18, 2013

Buckeye cookies

Buckeye Cookies

I did a similar cookie to these last year, Rolo-stuffed cookies. But knowing how popular the combination of chocolate and peanut butter is, I couldn't resist trying these.

I made a few modifications to the instructions for these, but they came out great. The only thing I wasn't thrilled with was that I didn't think the cookie part was quite chocolatey enough; next time, I'll use the cookie from the Rolo-stuffed ones and see if I like that better. But I imagine even as-is, these ought to go over well with the Reeses-lovers in your life.

Baked cookies

Buckeye Cookies
Adapted from Baking and Mistaking

3/4 c confectioners' sugar
3/4 c peanut butter

1/2 c butter, softened
1/2 c sugar
1/2 c brown sugar
1/4 c peanut butter
1 tsp vanilla
1 egg
1 1/2 c flour
1/2 c cocoa
1/2 tsp baking soda

1. Mix together the confectioners' sugar and peanut butter. Form into marble-sized balls, place on a cookie sheet lined with waxed paper and freeze until firm (they'll be easier to work with this way).
2. Beat the butter, sugars and peanut butter together. Beat in the vanilla and egg. Beat in the flour, cocoa and baking soda just until blended.
3. Take the centers out of the freezer. Grab a tablespoon or so of dough, roll it into a ball and flatten it. Tuck a peanut butter center in the middle and wrap the dough around it, re-rolling it between your hands until you can't see any of the peanut butter. Flatten it a bit between your palms. Repeat with the rest of the dough and centers.
4. Bake at 375 degrees for 8 minutes or so, until the cookies look dry and just begin to crack. Cool.

Friday, March 23, 2012

Cinnamon-cocoa meringues

Cinnamon-cocoa meringues

When life gives you lemons, you make lemonade. And when life gives you not one but two lousy recipes for lemon curd (of which we shall never speak again -- maybe someday, I'll muster the enthusiasm to try making it again, but not soon), causing you to waste six egg yolks... well, at least you can make something good with the whites.

Finding this recipe was actually perfect timing, too, 'cause we'd only had a Penzeys open around here for one day before I was there, buying ridiculous amounts of stuff, including what ended up to be four different kinds of cinnamon. Good thing I like cinnamon, but I definitely need to come up with more uses for it now.

These came out pretty good, but I'm not sure if they're something I'd want to eat all the time. And I'd cut back further on the cinnamon next time -- I knew to use less than the recipe said, 'cause I'm using fresh, good-quality stuff, but I also used one of the hotter kinds (China Tung Hing), so it was still a bit much. Also, I had an awful time trying to figure out when these were done. I ultimately just went ahead and overbaked them, erring on the side of caution, 'cause they're on low heat anyway, so it's not like they'll burn soon, but you definitely want them nicely dry, not sticky in the centers.

Cinnamon-Cocoa Meringues
Adapted from Eating Well

3 egg whites
1/4 tsp cream of tartar
3/4 c sugar
1/2 tsp vanilla
3 tbsp cocoa
1 tbsp cinnamon (or much less if you're using high-quality stuff)

1. Beat the egg whites with the cream of tartar on high until soft peaks form when you turn off the mixer and pick up the beaters. Beat in the sugar a bit at a time until combined, then continue to beat until stiff and glossy. Beat in the vanilla, then the cinnamon and cocoa.
2. Drop 1 1/2-inch-wide mounds a half-inch apart on a parchment-lined baking sheet.
3. Bake at 200 degrees (yes, that's not a typo) until dry and crisp, about an hour and a half (or longer if you made your meringues too big, like I probably did).

Tuesday, February 14, 2012

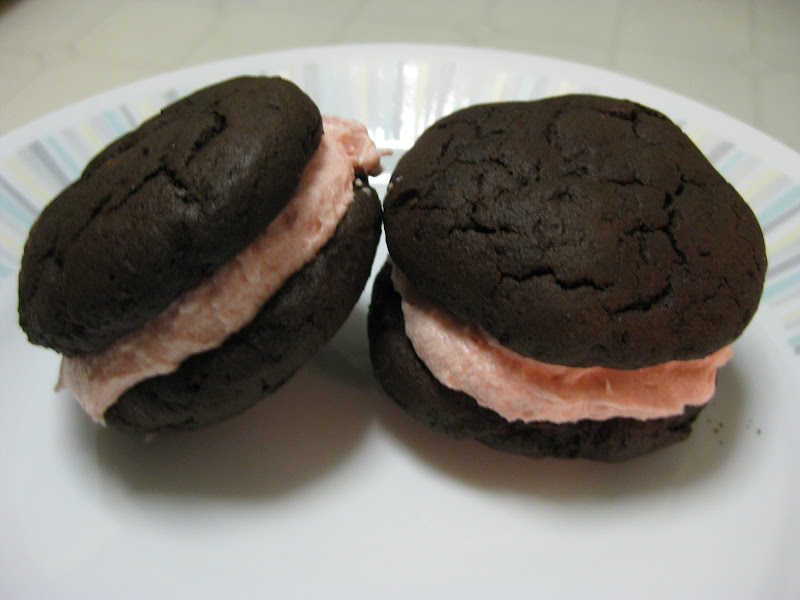
Chocolate-strawberry whoopie pies

Chocolate-strawberry whoopie pies

It's Valentine's Day eve, and I now own a wedding dress! The wedding planning is humming along quite nicely -- but I haven't neglected the kitchen, fret not. In fact, I couldn't let Valentine's Day pass without one more chocolate recipe, so when I saw a recipe for a raspberry-filled whoopie pie, well, that seemed perfect, especially since I'd been meaning to try my hand at whoopie pies for quite some time (they're the latest baking trend, y'know). What better time for making whoopie (pies) than Valentine's Day? ;)

Of course, I couldn't leave the recipe alone, not when I have lots of fresh-picked-in-season strawberries stashed in the freezer that need to be used up. Plus, the cake part of the 'pies looked a little flat in photo that went with the original recipe -- why not sub in another cake recipe that looked much more promising?

The only major problem I ended up having with these was that as often happens, I ended up with way too much buttercream (and the original recipe's yield actually indicated that I wouldn't have enough). Next time, I might half that recipe.

These came out really delicious, though, like a cakey version of a chocolate-covered strawberry. I'm sure your Valentine would really appreciate them. I know mine will -- he loves anything strawberry. :)

Chocolate-Strawberry Whoopie Pies
Adapted from this recipe, with a version of this filling, both from Baking Bites

2 c flour
1 c cocoa
Scant 1/2 tsp salt
1/2 c butter, softened
1 c sugar
1 egg yolk
1 tsp vanilla
1 tsp baking soda
1/2 c hot water
1/2 c buttermilk

1 c butter, softened
1/4 c strawberry puree (blend berries until no chunks remain, then pass through a sieve)
1 tbsp milk
1 tsp vanilla
3 c confectioners’ sugar

1. Whisk together the flour, cocoa and salt and set aside.
2. Beat together the butter and sugar, then beat in the egg yolk and vanilla.
3. Combine the baking soda and hot water.
4. Into the butter mixture, stir in a third of the hot water, a third of the buttermilk and a third of the flour mixture, stirring after each addition. Repeat until everything is mixed in.
5. Form into 1-inch balls and place on a parchment-lined cookie sheet. Press down on each to flatten.
6. Bake at 400 degrees for about 6 minutes, until the tops are cracked and the cakes look set. Remove to racks to cool.
7. Beat the butter, then beat in the milk, vanilla and strawberry puree. Beat in the confectioners' sugar until combined, then beat on high until fluffy. Sandwich between the cooled cakes.

Saturday, February 11, 2012

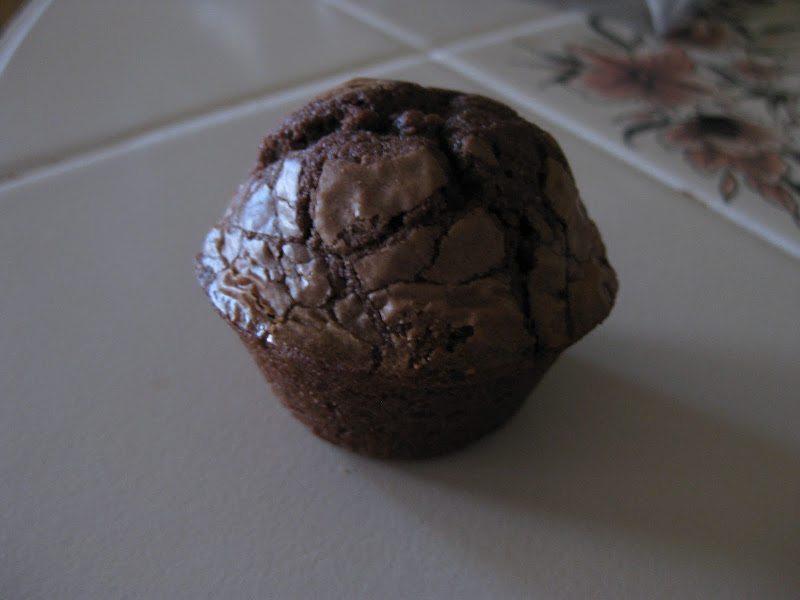
Nutella brownie bites

Nutella brownie bites

It's so hard to find the time to bake and blog when you're caught up in a whirlwind of wedding planning. But that doesn't mean I don't still love to do it, and so, when I came across this recipe on Pinterest for three-ingredient Nutella brownie bites (so quick, so simple!), I had to try it. After all, I've had a craving for chocolate and brownies for weeks, because Valentine's Day is approaching, so this was perfect... and a perfect excuse to buy a jar of Nutella, of course. :)

My verdict on these is that while they were indeed quick and easy, I'm not sure if they were worth the amount of Nutella used in them. If you want a nutty-tasting brownie, go for it, but some of the fudginess of the Nutella gets lost in this recipe, so they're more nutty than chocolatey. They're not bad by any stretch, and they're sure worth the tiny amount of effort that goes into them, but I think I'd rather make a more chocolatey brownie and save the Nutella for eating straight from the jar, myself.

Nutella Brownie Bites
Adapted from a Savory Sweet Life recipe

1 c Nutella
2 eggs
10 tbsp flour

1. Mix together the Nutella and the eggs until well combined. Stir in the flour until blended.
2. Spoon into a greased mini-muffin tin.
3. Bake at 350 degrees for about 10-12 minutes, until a toothpick comes out with crumbs clinging to it. De-pan, cool and serve.

Friday, December 30, 2011

Triple-chocolate cupcakes

Triple-chocolate cupcake

The holidays are over, mostly... but it's never a bad time for chocolate, right? Especially sinfully rich, dark, fudgy goodness. And especially when all of that is packaged in a deceptively cute cupcake.

This one takes a bit of work, but it's totally worth it if you're a serious chocolate lover. Also, one big, blinking caution light: This recipe yields 12 cupcakes. Twelve. Just 12. So you'll probably want to double it.

Triple-Chocolate Cupcakes
From "Cooks Illustrated

Ganache:
2 ounces bittersweet chocolate
1/4 c heavy cream
1 tbsp confectioners' sugar

Cake:
3 ounces bittersweet chocolate
1/3 c cocoa
3/4 c hot coffee
3/4 c bread flour
3/4 c sugar
1/2 tsp salt
1/2 tsp baking soda
6 tbsp oil
2 eggs
2 tsp white vinegar
1 tsp vanilla

Swiss meringue buttercream:
1/3 c sugar
2 egg whites
Pinch of salt
12 tbsp butter, cut into pieces
6 ounces bittersweet chocolate, melted and cooled
1/2 tsp vanilla

1. Make the ganache: Place the chocolate, cream and confectioners' sugar in a bowl and microwave until melted together, stirring frequently. Chill about 30 minutes, just until firm.
2. Place chocolate and cocoa in a large bowl and pour in the hot coffee, whisking until melted and smooth. Chill until cooled.
3. Whisk in the oil, eggs, vinegar and vanilla.
4. In another bowl, whisk together the flour, sugar, salt and baking soda. Whisk into the wet ingredients.
5. Divide batter evenly among paper-lined muffin cups. Onto each, drop one rounded teaspoon of ganache.
6. Bake at 350 degrees for 17 to 19 minutes, until set and just firm to the touch. Cool in the pan about 10 minutes, then remove and cool on a rack.
7. Combine the sugar, egg whites and salt in a bowl and place it atop a pan of simmering water. Whisk gently and constantly until the mixture is slightly thickened and reaches 150 degrees.
8. Pour into a larger bowl (if you're using a small one) and beat with a mixer until the consistency of shaving cream.
9. Beat in the butter one piece at a time. At some point, it will start to look curdled. Do not panic! Just keep beating it and adding the butter; it will come together eventually.
10. Beat in the melted chocolate and the vanilla. Beat on medium-high until light and fluffy. Frost cupcakes.

Tuesday, December 20, 2011

Mexican hot chocolate cookies

Mexican hot chocolate cookies

I just had to get fancy, didn't I?

The annual cookie contest was coming up at work, and I was mulling over my options. Snickerdoodles? Or maybe this new recipe I had for espresso fudge cookies? Neither looked terribly difficult, just make dough and put it on the pan and bake it.

But no. I couldn't take the easy way out, now, could I? I had to find a recipe that was way fancier, way more difficult, too, 'cause tasting good apparently wasn't enough for me. I couldn't just bring in a delicious cookie. I had to wow them.

And this is how I found myself in the kitchen at 1:30 a.m., swearing profusely, every surface and utensil (and of course my fingers, on both hands, somehow) sticky with dulce de leche, the pastry tips clogged, the counter covered in almond bits. Bleh. I spent hours on these damn cookies, and I'm sure that at least two curse words were said for every damn cookie that resulted.

And to add insult to injury, I didn't even win the damn contest. The winner was someone who made cookies into ice cream sandwiches. I thought this was a cookie contest, not an ice cream (with cookies added to the outsides) contest, but oh, silly me. (My boyfriend, upon hearing of this, suggested that next year, I should make a layer cake with tiny cookies as garnish. Fair point, I think.)

But anyway. *ahem* These cookies did come out really good, after all of that work. I might even make them again, now that I've learned a few things about them, though not at 1 a.m. this time. They're a very complexly flavored cookie, cinnamon-chocolate with a hint of black pepper and cayenne, a little sweetness and a bit of crunch. They're sort of addictive, really. And they look impressive on a cookie tray (assuming you can display them in a way that they won't stick together).

Mexican Hot Chocolate Cookies
Adapted from a Food Network recipe, with help from Cooking for Engineers

1 c flour
1/2 c plus 1 tbsp unsweetened Mexican cocoa powder (or substitute by adding 3/4 tsp cinnamon to unsweetened cocoa powder)
1/4 tsp baking soda
1/4 tsp salt
1/2 c plus 1 tbsp light brown sugar
1/2 c plus 1 tbsp sugar
3 tbsp butter, softened
3 tbsp margarine (yes, margarine, do not substitute)
1/2 tbsp cinnamon
Generous pinch black pepper
Generous pinch cayenne pepper
1 tsp vanilla extract
1 egg white
1 can sweetened condensed milk
Chopped almonds

1. Whisk together the flour, Mexican cocoa powder, baking soda and salt. Set aside.
2. Mix together the sugars in a large bowl, making sure that there aren't any lumps. Beat together with the butter and margarine. Beat in the cinnamon, peppers and vanilla, then the egg white. Beat in the flour mixture until incorporated.
3. Press together into a neat log about an inch and a half in diameter, then wrap in plastic wrap and chill.
4. Slice about a quarter-inch thick, place rounds on a cookie sheet an inch apart and bake at 350 degrees for 12 minutes. Remove from pans and cool on a rack.
5. Make dulce de leche: Some people will tell you to just boil the entire can in a pot of water, and that sounds great if you've got four hours. Me, I took the shortcut method: Pour the contents of the can into a huge bowl, the biggest one that you can use in your microwave -- it will look like overkill, but this stuff will swell up a ton, trust me. Then, cook on medium (NOT high, MEDIUM) for 2 minutes at a time, whisking in between, until thickened and caramel-y. If it gets too thick, you can whisk in a bit of water to loosen it up.
6. Spoon the dulce de leche into a pastry bag with a somewhat small round tip, or spoon it into a zip-top bag and snip the corner off. Drizzle the dulce de leche onto the cookies.
7. Sprinkle with chopped almonds, pressing them into the dulce de leche a bit so they stick.

Sunday, December 18, 2011

Espresso fudge cookies

Espresso fudge cookies

I went to my first From Scratch Club food swap last week, and since it's December, it was a cookie-themed swap. As I'd hoped, I went home with lots of cookies and a few ideas for my holiday baking, and when I got home and taste-tested all of my swap booty, these were the clear winners.

I added them to my cookie list for this year, and I'm really glad I did -- they're amazing, sinfully rich and fudgy and delicious, with the espresso serving to deepen the chocolate flavor even more. These cookies would be on Santa's naughty list for sure, 'cause they're simply decadent. :)

Espresso Fudge Cookies
Adapted from a recipe from Love & Olive Oil via @talkanatalka

3 ounces unsweetened chocolate, chopped
2 c semisweet chocolate chips
8 tbsp butter, cut into pieces
3 eggs
1 c plus 2 tbsp sugar
2 tsp instant espresso powder
3/4 c flour
Heaping 1/4 tsp baking powder
1/4 tsp salt

1. In a microwavable bowl, melt the unsweetened chocolate, 1 cup of semisweet chocolate and butter (do not overcook -- microwave it for a minute or 30 seconds or so, stir and repeat until just melted).
2. In a separate bowl, whisk together the flour, baking powder and salt.
3. In another, large bowl, beat the eggs, sugar and espresso powder on high until very thick and pale. Beat in the chocolate mixture, then beat in the flour mixture until just combined. Stir in the remaining chocolate chips.
4. Drop heaping tablespoons about 2 inches apart on a cookie sheet.
5. Bake at 350 degrees for 10 minutes, until puffed and cracked on top. Cool on the pan for 1 minute, then remove to a cooling rack.

Friday, August 19, 2011

Homemade Oreos

Homemade Oreos

One day, I brought something a bit frou-frou in to share with my coworkers — macarons, I think it was. People ate them, but they weren't enthusiastic, and one coworker remarked, "see, the problem is, these are too fancy for us. Just bring in a bag of Oreos or something, we'll be happy."

You know you've got the baking bug when someone says something like that and your reaction is "hey, I wonder if I could make Oreos!"

Many months later, after this idea got shoved to the bottom of the to-bake pile, there was another work night and another coworker who got me talking about Oreos. And I was reminded that I never did try that recipe, never did answer that question.

Well, here's the answer: Yes. Yes, I can make Oreos, and so can you. And these are actually better than Oreos, in a few ways. First, they're thicker and a trifle softer, and on top of that, the recipe makes a lot of filling, so you can double-stuff, even triple-stuff these, if you want. And second, have you seen the ingredients list for those ones Nabisco's selling us? High-fructose corn syrup. And what's "soy lecithin," anyway? I can pronounce everything in the ones I made. And they tasted just as good.

Portioning out the dough Baked cookies

Homemade Oreos
From Smitten Kitchen

1 1/4 c flour
1/2 c cocoa powder
1 tsp baking soda
1/4 tsp baking powder
1/4 tsp salt
1 c sugar
1/2 c plus 2 tbsp butter, softened
1 egg
1/2 c butter, softened
2 c confectioners' sugar
2 tsp vanilla

1. Whisk together the flour, cocoa, baking soda, baking powder, salt and sugar.
2. If you have a food processor, mix on low speed with the butter and the egg. If you don't, like me, you can just mush it all together in a big bowl with your hands. The object is to combine everything until it's a dough, either way.
3. Roll a rounded teaspoon of dough into a ball. Place it on a parchment-lined cookie sheet, flatten with your hand a bit, then poke the center with your fingertip. Repeat until you've filled two cookie sheets.
4. Bake at 375 degrees for 9 minutes, rotating the sheets top to bottom halfway through. Place the pans on racks to cool. Repeat to use up all of the dough.
5. Beat together the butter, confectioners' sugar and vanilla. Sandwich between two cooled cookies.

Wednesday, March 2, 2011

Chocolate peanut butter cup cookies

Chocolate peanut butter cup cookies

I'm sorry, Martha Stewart. I'm sorry I doubted you.

See, I've always thought of Martha Stewart as a crafter, a home-decor maven, someone who will show you how to make something pretty with some paint and some cardboard. I knew that she had recipes posted online, and I'd heard people talking about her cookbooks, but she hadn't really earned any cred with me. I knew she could work with wicker, but flour and shortening and such? I was dubious.

But I also have a stockpile of candy to use up. (Yay for after-holiday sales -- they're a good time to stock up on things you can bake with later. And don't forget about those miniature chocolate bars and pieces, 'cause there's no difference between those and chocolate chips except their size.) And I thought, y'know, I have yet to find a good chocolate cookie recipe that's all-purpose, something to throw chocolate chips in, or nuts, or candy, or anything that might go in a cookie. So I typed in "chocolate cookies." And Google gave me a Martha Stewart recipe. Sure, what the heck.

These are gooooood. They're the sort of cookies where when you're baking them, you just sort of have to trust that they'll be alright once they're cooled. But they're chewy and delicious and take well to mix-ins, and they don't even require you to cream butter and sugar together, which is nice. They were also very well-received when I took a plate of them to a homemade banquet with my boyfriend's family. After all, who doesn't like chocolate and peanut butter? I'll definitely hang onto this recipe.

Chocolate Peanut Butter Cup Cookies
Adapted from Martha Stewart

8 ounces (1 1/3 c) semisweet chocolate chips
4 tbsp butter
2/3 c flour
1/2 tsp baking powder
1/2 tsp salt
2 eggs
3/4 c brown sugar
1 tsp vanilla
About 12 ounces of mix-ins -- I used chopped-up miniature peanut butter cups, but you could use chocolate chips or chunks, any chopped-up candy that sounds good to you, nuts or a mix of the above

1. Place chocolate chips and butter in a small bowl and set aside.
2. Whisk together the flour, baking powder and salt in another bowl.
3. In a third, larger bowl, beat together the eggs, brown sugar and vanilla on high speed until light and fluffy.
4. Microwave the chocolate and butter, stopping and stirring every 30 seconds or so, until melted. Beat this into the egg mixture on low.
5. Beat in the flour mixture, then mix in whatever chunky ingredients you're using.
6. Drop heaping tablespoons 2 inches apart and bake in a 350-degree oven for about 12 minutes, until cookies are shiny and crackly but still soft in the centers.
7. Let cool on the cookie sheet for 10 minutes, then remove cookies to a rack to finish cooling.

Friday, December 17, 2010

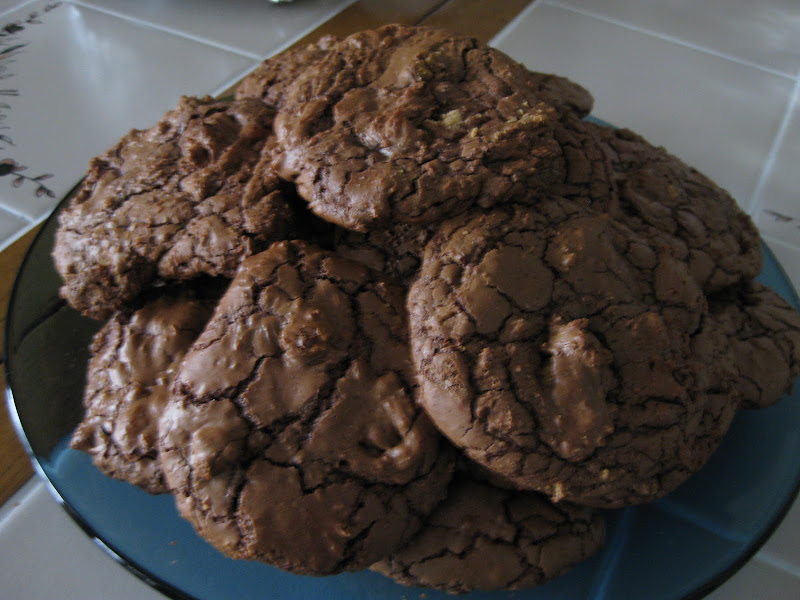
Chocolate toffee cookies

Chocolate toffee cookies

I probably don't need to say anything besides "chocolate," "toffee" and "cookies," do I?

Oddly enough, these ended up being those cookies that sound great but look totally unimpressive and really don't go over that well right away. But later... later, a few hours or a day later, you pick one up and take a bite, and then you notice how awesome they are, how almost brownie-like, how rich and fudgy and delicious. And then you wonder where they all went, 'cause surely, there was a full plate here a minute ago. :)

Chocolate Toffee Cookies
From Smitten Kitchen

1/2 c flour
1 tsp baking powder
1/2 tsp salt
16 oz bittersweet chocolate, chips or chopped
1/4 c butter
1 3/4 c brown sugar
4 eggs
1 tbsp extract
5 1.4-ounce Heath bars, coarsely chopped (I used the same weight in fun-size bars -- in hindsight, the toffee-to-chocolate ratio was a bit off, so I might use more if I used the little ones next time)
1 c chopped walnuts
Sea salt for sprinkling (optional)

1. Whisk together the flour, baking powder and salt in a small bowl.
2. In another bowl, microwave the chocolate and butter, stirring and heating until smooth.
3. In a larger bowl, beat the sugar and eggs together until thick. Add in the chocolate, then the vanilla, then the flour mixture. Stir in the nuts and toffee.
4. Chill until firm, about 45 minutes. Optionally, form into logs and chill in plastic wrap, so you can slice and bake them later.
5. Drop by spoonfuls onto parchment-lined baking sheets (the parchment keeps the toffee from sticking to the pans). Sprinkle with sea salt.
6. Bake at 350 degrees for about 13 minutes, until the tops are dry and cracked. Cool on sheets (they'll continue to bake slightly as they cool).

Linzer cookies

Linzer cookie

It's cookie season!

Every year, I try to do at least three new kinds of Christmas cookies -- you know, the fancy ones you only make in December, not the regular kind you make the rest of the year. I try to balance out my picks between chocolate, fruit and spice kinds. And this year, I upped the ante by deciding to put the results into gift packages for a few people on my holiday card list.

I picked out my recipes, which in itself can take a week or two. I plotted out the perfect date to do all of this baking. And then... I had surgery on my finger, which severely impeded my ability to bake (as well as to blog, sadly). But fear not, 'cause there's always Mom, and she was eager to help. With her assistance, I got everything done, including these delicious Linzer sandwich cookies.

The only trouble I ran into was that I didn't have a cutter small enough for the centers -- I ended up using the mouth of an empty (cleaned) soda bottle. Well, there was one other problem, too, I guess, and that was that these were really awesome, but by the time I packed some up to ship, there were hardly any left. I'd make a double batch next time.

Linzer Cookies
From Baked Perfection

2 1/3 c flour
1 tsp baking powder
1/2 tsp cinnamon
1/2 tsp salt
1 c sugar
3/4 c butter, softened
2 eggs
1/2 tsp almond extract

1 c chocolate chips
1 c seedless raspberry jam

1. In a small bowl, whisk together the flour, baking powder, cinnamon and salt.
2. In a large bowl, beat together the sugar, butter, eggs and almond extract until creamy. Add the dry ingredients, a bit at a time.
3. Chill dough until firm, at least 45 minutes.
4. Roll out 1/8-inch thick and cut with a scalloped 2-inch cutter, cutting the centers out of half of them.
5. Bake at 350 degrees for about 8-9 minutes. Let cool.
6. Melt the chocolate chips. Spread about a teaspoon of chocolate on the flat side of each whole cookie. Let sit for a moment, then spread a bit of raspberry jam over the chocolate and top with the cookies with holes.

Tuesday, November 30, 2010

Chocolate gingersnap tart

Chocolate tart

Thanksgiving this year presented a challenge, in that not only did I overextend myself for my parents' holiday, but my boyfriend was going to spend the holiday with his parents instead and was wondering if I could whip something up for him to contribute to the holiday table. It had to be something sort of holiday-ish, fancy enough for a holiday dinner, but it also had to be something that would keep in the fridge for a couple of days, 'cause I was already booked up in the days before Thanksgiving with making pies for my parents' dinner.

And then, I came across this recipe. It's holiday-ish, in that it has a gingersnap crust and ginger is a good fall/winter holiday flavor, and everybody loves deep, rich chocolate. Plus, tarts always look fancy, even if they're simple, and this one's pretty easy to put together. And it kept just fine in the fridge for a few days, too. The only thing I didn't like about this was how the crust came out, 'cause this is another of the umpteen recipes that calls for a food processor, and I don't have one, so I couldn't get the crumbs as small as I'd have liked.

I'd advise you to keep the slices tiny when serving this. The filling is like a truffle, super-rich, so you probably won't want a whole lot of it.

Chocolate Gingersnap Tart
From Smitten Kitchen

8 oz gingersnap cookies (about 32 cookies), pounded (or food-processed) into crumbs
1/4 c butter, melted
Pinch of salt
12 oz bittersweet chocolate, chopped (60% cacao; use chips if you can find them)
1 c heavy cream
2 egg yolks
1 egg
1/4 c sugar
1 tbsp flour
1/8 tsp pepper
Pinch of salt
1/4 tsp cinnamon

1. Pound or process the cookies into crumbs. Add the butter and salt and mix until moistened. Press into the bottom and sides of a tart pan with removable sides. Place pan on a baking sheet.
2. Whisk together the eggs, sugar, flour, pepper, salt and cinnamon in a medium bowl.
3. In another bowl, cook the chocolate and cream together in the microwave until just melted, then whisk together to combine.
4. Slowly whisk the chocolate into the egg mixture. Pour mixture into crust.
5. Bake at 325 degrees for about 30 minutes, until the edges puff and the center is set. Cool on rack 20 minutes, then remove sides of pan and cool completely before cutting.

Tuesday, August 17, 2010

Babka

Babka

Didja ever have one of those recipes that you look at and think, "oh, I should make this... but now is not the time, I don't really have the time to make this," and then you keep thinking that for months? The recipe just keeps taunting you, every time you think of making something, "y'know, I haven't made that yet, and I keep thinking I should make it ... but not today, I don't have the time today." For me, this recipe has been babka. Ever since I made pierogis a while back, I've been thinking about this recipe, how it would be nice to get more in touch with my culinary roots ... but it's yeasted. Yeasted means waiting all day for dough to rise, and I just haven't had it in me. Until now, anyway.

This recipe reminds me a lot of cinnamon bread, and like cinnamon bread, I was kicking myself later for following the recipe -- it seems like they never tell you to roll the dough out very much, and then, you just don't get enough layers of filling. It was even more pronounced with this recipe, 'cause the filling layer was really thick -- my boyfriend said that eating this sort of reminded him of a chocolate-filled doughnut, except not creamy. It's still pretty tasty, but next time, I'd definitely roll the dough out way larger, so when you roll it up, you get more, thinner layers.

Filling the dough Fresh out of the oven

Babka
From The Bread Bible
1 package active dry yeast
1/4 c sugar
1/4 c warm water
8 tbsp (1 stick) butter, melted
1 1/2 tsp salt
2 tsp vanilla
1/2 tsp almond extract
3/4 c warm milk
3 eggs, room temperature
4 c flour
1-2 tbsp butter, melted, for brushing dough

3/4 c sugar
1/3 c flour
3 tbsp cocoa
1 tsp cinnamon
4 tbsp butter, cut into pieces

1. Pour the warm water into a small bowl. Sprinkle the yeast over the top, then sprinkle on a pinch of the sugar. Let stand until foamy.
2. Whisk together the butter, the rest of the sugar and the salt, vanilla, almond extract, milk and eggs. Add in 1 cup of flour and whisk until smooth. Whisk in the yeast mixture.
3. Add in the rest of the flour, 1/2 cup at a time, stirring with a wooden spoon, until a soft dough is formed.
4. Turn the dough out onto a lightly floured surface and knead until smooth and silky. Be certain that the dough remains soft.
5. Place the dough in a greased bowl and turn it over to coat all sides. Cover with plastic wrap and leave to rise until doubled, about 1 1/2 hours.
6. Meanwhile, combine the filling ingredients in a small bowl and crumble them together.
7. Deflate the dough and turn it out onto a lightly floured surface. Roll or pat it into a 10-by-12-inch (or larger if you prefer) rectangle and brush with melted butter. Spread the filling on top, leaving a 1/2-inch border around the edges. Roll up the dough into a log and pinch the seams together. Holding one end, twist the dough six or eight times to make a rope. Grease a tube plan and place the rope of dough inside, pinching the ends together and patting it so it's even in the pan.
8. Cover loosely with plastic wrap and let rise 45 minutes.
9. Bake in a 350-degree oven for about 40-45 minutes, until the loaf is browned, a toothpick or cake tester comes out clean and the loaf sounds hollow when tapped.
10. Let stand 5 minutes in the pan, then depan and let cool on a rack before slicing.

Monday, August 9, 2010

S'more bars

Smore bars

Here's a fun fact for you: Aug. 10 is National S'more Day! What a good excuse to make s'mores or, if you can't be out in front of a campfire that day, the next best thing -- s'mores in cookie form.

The trickiest part of these was working with Fluff. I must be the only person in America whose mom never bought Fluff when she was a kid -- I wasn't really big on marshmallows, so I guess that's why I never got a Fluffernutter in my lunchbox. So today was actually my very first experience with Fluff, and I have to say, I can see the kid appeal -- so sticky, so sweet, so like a marshmallow but without that dusty exterior or super-firm-chewiness. The culinary appeal, though... well, I can see why it's called for in this recipe, 'cause regular marshmallows just don't give you the right gooey-from-the-campfire texture, but it's a bit of a pain to work with -- it's sticky as hell, somewhat of a challenge to measure (I finally just gave up and eyeballed it) and spread out in the pan.

But it was worth it, 'cause these things are delicious. Treat yourself to a pan in honor of National S'more Day, or any other day, really, 'cause who'd ever turn down s'mores?

Crushing crumbs Crust in the pan
Chocolate bars in the pan Fluff layer

S'more Bars
From Baking Bites
1/2 c butter, softened
1/4 c brown sugar
1/2 c sugar
1 egg
1 tsp vanilla
1 1/3 c flour
3/4 c graham cracker crumbs (you could use a food processor if you have one -- I put them in a freezer bag and crushed them with a rolling pin)
1 tsp baking powder
1/4 tsp salt
2 big Hershey bars, plain chocolate (the 4.4-ounce ones)
1 1/2 c Fluff

1. Preheat oven to 350 degrees.
2. Cream together the butter and both sugars. Beat in the egg and vanilla.
3. In another bowl, whisk together the flour, graham crumbs, baking powder and salt. Pour into the first bowl and beat on low until combined.
4. Line an 8-by-8 pan with plastic wrap and press about a third of the dough into the pan. Use the sides of the plastic wrap to lift the pressed dough out of the pan and move it into the fridge to chill (even a few minutes will help make it easier to work with).
5. Line the pan with a piece of parchment paper that comes up the opposite sides of the pan, then grease the uncovered sides of the pan. Dump in the rest of the cookie dough and press it into the pan.
6. Top with the chocolate bars side by side, then spread the Fluff over that. Pull the rest of the dough out of the fridge, peel off the plastic wrap and lay it over the top.
7. Bake 30-35 minutes, until lightly browned. Cool before cutting.

Friday, July 16, 2010

Good-karma brownies

Mmm, brownies

It's been an exceptionally lousy week, one of those times when I truly need to get to the weekend, and fast, but it's only the beginning of the work week, and I just need to stay home and be hugged and eat ice cream. But I can't do anything about that, really, just soldier on until the weekend. Something I can do, though, is try to make something good out of a crappy week, pay some good karma forward. So when I saw that some people I know online had just been scammed out of hundreds of dollars, I asked for their addresses and resolved to send them something to cheer them up a bit.

But what would I send? Well, why not baked goodies? Everyone likes goodies. And why not brownies? Almost everyone likes brownies.

I've been a bit unsatisfied with my usual brownie recipe, though. I like it fine, but a lot of other people find it a bit ho-hum, maybe 'cause it's not the kind of brownie they're used to. So I went looking for something that's more of a crowd-pleaser, more like ones from a boxed mix, perhaps, 'cause everyone likes that kind, except mine would be homemade and way better.

Before I go any further, let me just say that I think the usual categories of brownies are useless. "Cakey" brownies aren't light like cake, "fudgy" brownies aren't hard enough to be fudge-like, and "chewy" brownies, well, usually the only chewy part is on the very edges.

So I'm not going to bother with those categories. What I will say is that these create a softer brownie, the kind where when you bite into it, it just sorta melts into super-chocolatey awesomeness, whereas my old recipe was more of a dense brownie, something you could bite into and chew on. Also, these earned an immediate reaction of "you have got to make more of these, lots of these, only these from now on" from those who were iffy on my old recipe (which I'll probably still pull out sometimes, 'cause darnit, I liked them). Perfect, I'd say, for ensuring good karma once you give these away (if you can part with them, that is).

Good-Karma Brownies
Recipe from Smitten Kitchen
10 tbsp unsalted butter
1 1/4 c sugar
3/4 c plus 2 tbsp cocoa
1/4 tsp salt
1/2 tsp vanilla extract
2 eggs
1/2 c flour
2/3 c mix-ins, optional (chocolate chips or walnuts would be good)

1. Line an 8-by-8-inch pan with foil or parchment paper (otherwise, it'll be a total pain getting these out of the pan). Preheat oven to 325 degrees.
2. Melt the butter in a good-sized bowl in the microwave.
3. Stir in the sugar, cocoa powder and salt. Add the vanilla. Mix in the eggs, one at a time. Then, stir in the flour until combined.
4. Fold in your mix-ins, if using (I used chocolate chips, 'cause that's what I had in the house).
5. Bake for 25-30 minutes, or until a toothpick inserted in the center comes out slightly moist. (It took more like 35 minutes for me.) Let cool on a rack.

Monday, July 12, 2010

Double-chocolate cookies

Double-chocolate cookies

I was headed over to a friend's house, and I thought I'd bring some sort of treat. Something I have to be able to transport easily ... something everyone will like, including the kids ... hey, everybody likes chocolate, or most everybody, and everyone likes cookies, kids and adults alike. It was then that I remembered this recipe.

Cookie dough you can eat right out of the bowl without fear

I tried this one a few months back as originally written, as a chocolate-with-steel-cut-oats cookie, and I remembered it being somewhat chewy, a little sandy and a bit hard, what with the little oat bits and all. But these came out more crispy without the oats, more like a chocolate wafer cookie, almost (mmm, I bet these would make awesome ice cream sandwiches). Cut back on the baking time to keep them a bit more chewy -- since there aren't any eggs involved, there's no reason not to underbake for texture's sake.

Flattened on the pan and ready for the oven

Double-Chocolate Cookies
Adapted from Epicurious
3/4 c flour
1/4 c cocoa powder
1/2 tsp baking soda
1/4 tsp salt
1/2 c (1 stick) unsalted butter, room temperature
1/2 c sugar
1/2 tsp vanilla extract
1/4 cup semisweet chocolate chips

1. Preheat the oven to 350 degrees.
2. Whisk together the flour, cocoa, baking soda and salt in a bowl and set aside.
3. In a larger bowl, beat the butter with an electric mixer until fluffy. Add the sugar and vanilla and beat thoroughly. Add in the dry ingredients and beat until mixed -- it'll look like lots of chocolatey fluffy bits that pack together into a dough when you stir it.
4. Stir in the chocolate chips.
5. Pick up a generous tablespoon or so at a time and roll it between your hands to create a ball. Place each ball on your cookie sheet and flatten it with your hand so it's about 2 inches wide. Place the cookies about 2 inches apart (they will spread quite a bit).
6. Bake around 7-8 minutes, until the tops are a bit cracked, for chewier cookies; bake 13-14 minutes for more crispy ones.

Monday, July 5, 2010

Chocolate pudding

Puddin', aw yeah

When you make certain recipes, you know you're going to end up with a bunch of half-eggs, whether it be a pile of whites or, in this case, a pile of yolks left over from making angel food cake. Whites are easy enough to use up, but what about yolks? The most common way to use yolks is in a custard, like a pastry cream or a pudding.

Mmm, pudding. Who doesn't like pudding? Especially chocolate pudding. But the problem is that so many people eat bad pudding and accept it as alright. Pudding out of a Jell-O box? Well, that's tolerable, though the cooked kind always ends up with lumps and a horrible skin, no matter what you do. But pudding in those pre-packaged pudding cups? Seriously? That stuff tastes more like chemicals than pudding. And that's just not right, not when pudding should be a creamy, luxurious, delicious experience.

So, pudding. Real pudding, and y'know, it wasn't even that hard.

Chocolate Pudding
Recipe from the Joy of Baking website.
3/4 c sugar
3 tbsp cornstarch
1/3 c cocoa powder
1/8 tsp salt
2 1/2 c milk (I used 1% 'cause it's what I had -- I bet whole would be even better)
1/2 c heavy cream
4 egg yolks
4 ounces (2/3 c) semisweet chocolate, finely chopped (I used chocolate chips)
1 1/2 tsp vanilla extract
1 tbsp unsalted butter, room temperature, cut into pieces

1. In a heatproof (glass or stainless steel) bowl, whisk together the sugar, cornstarch, cocoa and salt. Whisk in 1/2 c of the milk. Mix in the egg yolks, one at a time.
2. Rinse out a medium saucepan with water. Pour in the other 2 c of milk and the cream. Bring this just to a boil, then pull the pan off of the heat.
3. Slowly pour a bit at a time of the hot milk mixture into the chocolate mixture. Don't rush this -- pour a little, stir, pour a little more, stir again. If you rush, you'll end up with scrambled eggs.
4. Once all of the milk is mixed into the chocolate, pour the contents of the bowl back into the saucepan and place over medium-low heat. Stir or whisk until it thickens up to the consistency of mayonnaise. Don't walk away or stop stirring -- cornstarch works quickly, so it'll be watery and you'll be thinking "geez, how long's this gonna take?" and then all of a sudden, it'll go from water to thickened in a matter of seconds.
5. Remove from the heat and stir in the chopped chocolate (or chocolate chips), vanilla and butter until everything is melted and smooth.
6. Pour into a bowl or individual serving dishes and cover with plastic wrap, pressing the plastic directly onto the top of the pudding to prevent a skin from forming. Refrigerate until chilled.