Monday, December 30, 2013

Figgy pudding

Figgy Pudding

Now bring us some figgy pudding,
now bring us some figgy pudding,
now bring us some figgy pudding ...


There. I brought some. You can stop singing now. :)

For years, we've all been singing these lines at Christmastime, but has anyone ever actually had a figgy pudding? The answer is usually no. It's an obscure dish, an old British dessert, not a pudding at all, even, but a steamed cake (the British use the word "pudding" to mean "dessert," hence the confusion).

So when I saw this recipe in "The Beekman 1802 Heirloom Dessert Cookbook," I had to try it. I even bought a proper pudding mold to cook it in (I know, I don't usually buy uni-taskers, but I wanted to do it up properly, and besides, if the recipe was good, maybe I'd make it for years to come).

The verdict? Figgy pudding is quite good, definitely deserving of a place on our holiday table. It's sort of like a fruitcake, but without the booze and the fake fruits -- instead, it's filled with chopped figs. If you like figs, you'll probably like this a lot. I'm sure I'll be bringing the figgy pudding again in the future.

Figgy Pudding
From "The Beekman 1802 Heirloom Dessert Cookbook"

Softened butter for the pan
1 1/2 c water
3/4 pound dried figs, stems removed, cut into small bits
3 tbsp orange liqueur
1 1/2 c flour
1 tbsp cocoa
2 1/4 tsp baking powder
1 tsp cinnamon
1 tsp ginger
1/2 tsp nutmeg
1/2 tsp salt
3 eggs
2/3 c sugar
1/3 c brown sugar
8 tbsp butter, melted
1 1/2 c plain bread crumbs

1. Place a roasting pan mostly full of water in a 350 degree oven. Generously butter your pudding mold (or a tube pan, if you don't have a pudding mold).
2. In a small saucepan, bring the water and figs to a boil. Reduce to a simmer, cover and cook for 20 minutes. Remove from the heat and stir in the orange liqueur (don't drain the pan).
3. In a bowl, whisk together the flour, cocoa, baking powder, cinnamon, ginger, nutmeg and salt. Set aside.
4. In a larger bowl, beat together the eggs and sugars. Beat in the butter and bread crumbs. Stir in the figs and their liquid, then the dry ingredients.
5. Scrape into the pudding mold and put on the lid. (If using a tube pan, cover the top with foil and place a pot lid on top, so it's well sealed.)
6. Place the pan into the roasting pan of water in the oven and bake for about 2 hours, until the pudding is firm and starts to pull away from the sides of the pan.
7. Cool the pan on a rack for 5 minutes, then run a spatula around the inside and invert onto a serving platter. Serve with whipped cream, ice cream or crème anglaise.

Wednesday, December 18, 2013

Buckeye cookies

Buckeye Cookies

I did a similar cookie to these last year, Rolo-stuffed cookies. But knowing how popular the combination of chocolate and peanut butter is, I couldn't resist trying these.

I made a few modifications to the instructions for these, but they came out great. The only thing I wasn't thrilled with was that I didn't think the cookie part was quite chocolatey enough; next time, I'll use the cookie from the Rolo-stuffed ones and see if I like that better. But I imagine even as-is, these ought to go over well with the Reeses-lovers in your life.

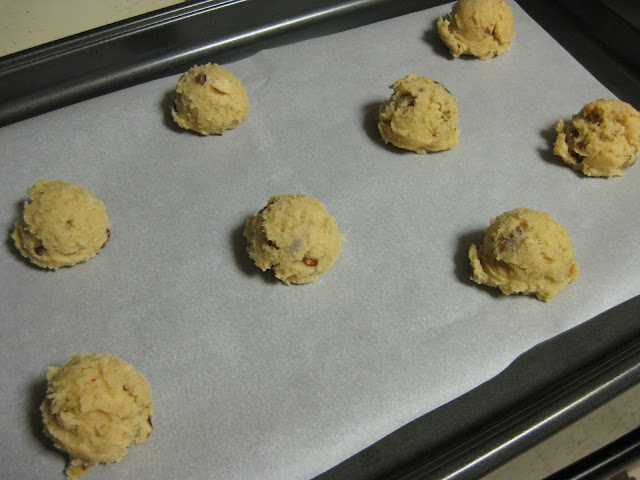
Baked cookies

Buckeye Cookies
Adapted from Baking and Mistaking

3/4 c confectioners' sugar
3/4 c peanut butter

1/2 c butter, softened
1/2 c sugar
1/2 c brown sugar
1/4 c peanut butter
1 tsp vanilla
1 egg
1 1/2 c flour
1/2 c cocoa
1/2 tsp baking soda

1. Mix together the confectioners' sugar and peanut butter. Form into marble-sized balls, place on a cookie sheet lined with waxed paper and freeze until firm (they'll be easier to work with this way).
2. Beat the butter, sugars and peanut butter together. Beat in the vanilla and egg. Beat in the flour, cocoa and baking soda just until blended.
3. Take the centers out of the freezer. Grab a tablespoon or so of dough, roll it into a ball and flatten it. Tuck a peanut butter center in the middle and wrap the dough around it, re-rolling it between your hands until you can't see any of the peanut butter. Flatten it a bit between your palms. Repeat with the rest of the dough and centers.
4. Bake at 375 degrees for 8 minutes or so, until the cookies look dry and just begin to crack. Cool.

Tuesday, December 17, 2013

Peppermint pinwheels

Peppermint Pinwheels

Christmas cookies aren't just your ordinary cookies. They're the special ones, the complicated ones, the show-stoppers that you only have the energy to make once a year. When I saw these pretty, minty cookies, I knew they fit the bill perfectly.

Making them was a bit of a chore -- I had to make a few changes to the original recipe's directions to get them to come out alright. What I ended up with was a very pretty, shortbread-like cookie with a hint of peppermint and crunchy, candy-coated edges, a really nice cookie for dunking in a cup of hot cocoa. I don't think I'd make them a lot, but I might make them again sometime, maybe in a few years.

Peppermint Pinwheels
Adapted from The Shine Project

2 1/2 c flour
1/2 tsp salt
1/2 tsp baking powder
1 c butter, softened
1 c sugar
1 egg
3 tbsp milk
1/2 tsp vanilla
1 tsp peppermint extract
Red gel food coloring
Lots of white nonpareil sprinkles

1. Whisk together the flour, salt and baking powder. Set aside.
2. Beat together the butter and sugar. Beat in the egg, milk, vanilla and peppermint extract. Gradually beat in the dry ingredients until combined.
3. Take half of the dough out of the bowl and set aside. To the other half, add red gel color, kneading it in with your hands until you get a nice, bright red dough. (Wash your hands -- they'll be really red at this point, probably.)
4. Roll out the white dough on a sheet of waxed paper into a large rectangle that's about a quarter-inch thick. Repeat this step with the red dough.
5. Flip the white dough over on top of the red dough and pull off the waxed paper. Roll them both together, starting from one of the wider ends of the rectangle and removing the waxed paper as you go.
6. Go find an empty wrapping-paper tube and cut a slit up the side. Cut the length to the length of your roll of cookie dough.
7. Wrap your dough log in plastic wrap, then place it inside the wrapping-paper tube (pry open the slit you cut to help with this). Place the whole thing in the fridge to chill for at least an hour.
8. Pull out your dough and pull it out of one side of the tube, pulling off the plastic as you go, and cut it into half-inch-wide slices.
9. Dump out the sprinkles into a wide dish. Roll the edges of each slice of dough in a little bit of water, then roll in the sprinkles. Place on a cookie sheet about an inch apart.
10. Bake at 375 degrees for about 10-15 minutes, until the cookies are set and dry-looking and the bottoms are lightly golden. Cool on a rack.

Monday, December 16, 2013

Cardamom crescents

Cardamom Crescents

Welcome to Cookiegeddon 2013, in which I spend an entire weekend in the kitchen making cookies, most of which I've never made before.

This year, I made five kinds, two of which I'd actually made before: Linzer cookies and Egg nog-pecan cookies (which weren't entirely new but were new to this year, since the first time I'd ever made them was only a couple of weeks ago). I'll do my best to post about the other three before Christmas, starting with this post: Cardamom crescents.

I'd actually come across this recipe a few years ago, but it never quite seemed like the right time to make it: I try to balance out my cookie offerings between the different flavor profiles, fruity and chocolatey and spicy and such, and it seemed like I always had another spiced option that I wanted to try more. But this year, I finally got around to these, and I'm glad I hung onto that recipe all of this time.

They're a lot like my Russian teacakes, except that they're spiced with cardamom and formed into crescent shapes. The shaping of them was really the hardest part here: Sure, they look extra-festive and fancy, but making a moon shape for each one, while carefully ensuring that there were no absolutely cracks in a rather crack-prone dough ('cause I knew any cracks would lead to pieces breaking off when I tried to roll them in sugar later), was a painstaking process to be sure. The work paid off, though, in a decently large number of really fancy-looking, exotically spiced cookies, just the thing to go with a cup of tea at Christmastime. I'll probably end up making these again in the future, 'cause the taste was worth the work -- though if I'm feeling lazy, I might just make them into balls instead of moons.

Cardamom Crescents
From Epicurious

2 1/2 c flour
3/4 tsp cardamom
1/2 tsp cinnamon
1/2 tsp salt
1/2 c confectioners' sugar
1 c chopped pecans
1 c butter, softened
1 tbsp vanilla
Extra confectioners' sugar for rolling

1. Whisk together the flour, cardamom, cinnamon and salt. Set aside.
2. In a food processor, pulse the confectioner's sugar and pecans together until the mixture is the texture of coarse meal.
3. Beat the butter and vanilla together. Beat in the nut mixture, then the dry ingredients. Knead the dough together a bit if you need to.
4. Take a tablespoon at a time, roll it between your palms a little to make it a bit log-shaped, then pinch and taper the ends, bending it a bit in the middle, to form a crescent moon shape. Carefully press together any cracks that form -- otherwise, these will be weak spots in your cookie that will tend to break off later on.
5. Place an inch apart on a baking sheet, then bake at 350 degrees for about 12-15 minutes, until the bottoms are golden.
6. Immediately roll in confectioners' sugar, then place on a rack to cool. Once cooled, re-roll in the sugar.

Thursday, December 12, 2013

Out of the Kitchen: The Holy Grail of dim sum

Dim sum and chow fun at Rain

My quest is over. I have finally found the Holy Grail of dim sum in the Capital Region.

For years, I've been looking for a place around here with good dim sum — ALL of it. That means perfectly cooked har gow, and tasty sesame balls, and baked pork buns, which are usually where places around here fall short: Only one place I've tried has baked buns consistently available, but the rest of their dim sum sucks.

So the other day, when my husband decided that we should go check out Rain, a new Cantonese place in Albany, I was up for it, cautiously hopeful that maybe this would be the good place, the place with a full slate of well-prepared Cantonese dim sum.

And the clouds parted, and the sun shone down, and I swear I heard angels singing as I bit into their beautiful, juicy, meat-filled baked pork buns. Okay, maybe I'm exaggerating — but these are the best damn baked pork buns I've had in the area, hands down.

And better, it wasn't only the pork buns that were good. The har gow was perhaps a teeny bit thick-skinned but nicely chewy and filled with succulent shrimp pieces. The sesame balls were warm and crispy-chewy and filled with what I think was lotus seed paste, very yummy. The dan tats were flaky on the outside, eggy on the inside, just right. The cheung fun were great as well, meat-filled and perfectly cooked. And the sui mai were some of the best I've had.

We got an order of beef chow fun, too, just to see how they did on a regular noodle dish, and we weren't disappointed. The noodles were cooked perfectly, with just the right amount of chewiness, and the beef itself was intensely flavored, marinated with something, I'm sure, but better than most beef I've had in a Chinese noodle dish. One odd quirk: They asked whether we wanted our noodles dry or with gravy, which is an option neither of us had ever seen before (and we have plenty of experience with authentic Chinese food). It turns out that "dry" isn't dry at all: It's the usual way you'd expect to get it, seasoned lightly and with plenty of wok char adding to the delicious flavor of the dish. The "gravy" is a brown sauce, which sounded... sort of gross on a noodle dish, really, but I guess somebody must like it that way, since they offer it.

Anyway, I know where I'm going for dim sum from now on. Rain has lots of options, and they're all top-notch. I've found my Holy Grail of Cantonese food, for sure.

Wednesday, December 11, 2013

Egg nog-pecan cookies

Egg Nog-Pecan Cookies

This year, I participated in The Great Food Blogger Cookie Swap. It was really cool -- you sign up and pay a small fee (only a few bucks), and then the swap operators (swaperators?) match you with three people. You make a big batch of a cookie recipe you haven't blogged before, then mail a dozen cookies to each of your three people. Meanwhile, three people out there have your name, so you'll be getting three dozen cookies in the mail! Also, the swap has cool sponsors who will send you free stuff as a thank-you for participating -- for instance, OXO sent me a nice set of silicone spatulas. And the whole thing raises money for Cookies for Kids' Cancer, so it's not only a fun swap but helps out a good cause, too.

I've never actually bought egg nog before, 'cause while it smells delicious, the idea of drinking eggs always grosses me out. But baking with it sounded like a fun idea, so I decided to make these egg nog cookies for the swap. They came out delicious! They have a nice texture and taste sort of like a bear claw or a Danish, eggy and nutty and yummy. :)

In return, I received two delicious packages: one from Ellen at In My Red Kitchen of yummy, shortbread-like Dutch cookies, half of them dipped in chocolate (which my husband promptly made off with, once he got a taste), and one from Susan at A Less Processed Life of homemade Thin Mints. Then, a week past the deadline, I got a third box, with postage dated a week and a half ago. Thanks, USPS? Anyway, the Nutella/white chip cookies from Nicole at The Marvelous Misadventures of a Foodie were still tasty.

This was so much fun! The best part was that not only did I get to try new cookies and maybe pick up some new recipes to use in the future, but the actual baking and sending happens in November, meaning that it doesn't add to the pile of December cookie projects. I'll definitely be doing this again next year.

Pouring in the egg nog Scooping up the cookies

Egg Nog-Pecan Cookies
Adapted from ShopGirlMaria

12 tbsp butter, softened
1 1/4 c sugar
1/2 c egg nog
1 tsp vanilla
2 eggs
3 c flour
1/2 tsp cinnamon
1 tsp baking powder
1/2 tsp salt
1 c chopped pecans

1 1/2 c confectioners' sugar
3 tbsp egg nog

1. Cream together the butter and sugar. Beat in the egg nog, vanilla and eggs.
2. In another bowl, whisk together the flour, cinnamon, baking powder and salt, then dump this into the first bowl and beat until combined.
3. Stir in the pecans.
4. Scoop cookies and place them 2 inches apart on your cookie sheet. Bake at 350 degrees for 10-12 minutes, until the edges and bottoms are lightly browned.
5. Cool on a cooling rack.
6. Whisk together the confectioners' sugar and egg nog, then drizzle over the cookies and let sit until hardened.

Thursday, November 14, 2013

Single-serve cookie butter baked oatmeal

Cookie butter oatmeal

I'm always looking for new ideas for breakfast. My requirements are simple: Whatever I make must not be a ton of work, must be tasty and must not make more than I can eat (or must store well), since I usually eat breakfast alone (my husband's usually already gone by the time I get up).

When I came across this recipe, it seemed to be all of those things, and it also uses things I already have in the house, which is a definite plus. On top of that, it uses Biscoff spread/speculoos/cookie butter, which I tend to have in the house but can never figure out how to use -- it's made of ground-up cookies, which means that putting it on bread or in a baked good seems really weird to me, 'cause either it's bread-on-bread, or if I'm going to make a dessert with it, I might as well just make speculoos cookies rather than use a ground-up dessert to make another dessert.

This, though, doesn't seem so odd, cookies mixed with oats. And the result is quite tasty and fairly filling, not to mention easy to throw together. It's entered my regular breakfast rotation, and maybe it should be in yours, too.

Single-Serve Cookie Butter Baked Oatmeal
Adapted from Healthy Food For Living

2 heaping tbsp Biscoff spread/speculoos/cookie butter
1 egg white
1/3 c milk
1/4 tsp vanilla
1/3 c oats
1/4 tsp baking powder
Pinch of salt

1. Put the cookie butter and egg white in a bowl and whisk them together with a fork until combined. (This step requires patience, but I assure you, it will come together, just keep going.)
2. Whisk in the milk, then the vanilla.
3. Dump the oats, baking powder and salt on top and whisk them in.
4. Pour the mixture into a small, greased baking dish or oven-safe bowl.
5. Bake at 350 degrees for about 25 minutes, until puffed and set.

Tuesday, October 15, 2013

Corn muffins

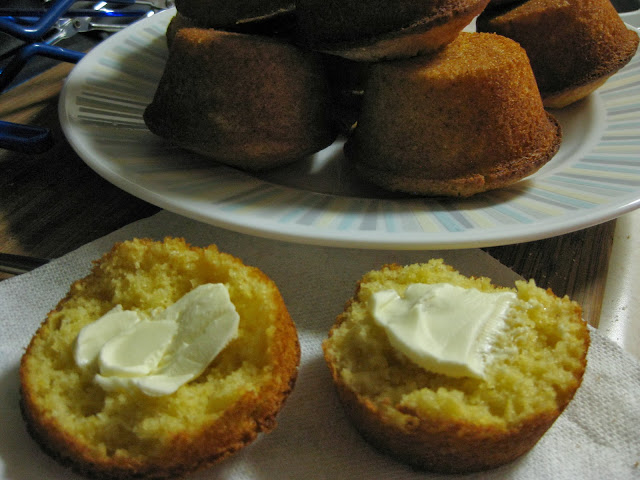
Corn muffins

Going on vacation left me with a craving for lots of things I ate while there. The thing I wanted the most, of course, was good clam chowder — even in Massachusetts, it was surprisingly hard to find. But another thing I found myself craving was corn muffins — the innkeeper at the B&B where we stayed made them on our last couple of mornings there, and I realized, once I got home, that I don't actually eat them that often and hadn't quite gotten enough. But hey, the one good thing about knowing how to bake is that if you want something like that, you can just make some.

I didn't have a corn muffin recipe, though I do know that if you're feeling lazy, the cornbread mix from Trader Joe's is pretty good in muffin form. But I was looking for something a bit sweeter, more of a breakfast food, and I think I found it with this recipe. The muffins were tasty enough that I scarfed down two of them warm from the oven, and they freeze well, too: Just wrap one in a damp paper towel and microwave until warm.

Corn Muffins
From a Food Network recipe

1 c cornmeal
1 c flour
1 tbsp baking powder
1/2 c sugar
1 tsp salt
1 c milk
2 eggs
1/2 stick butter, melted
1/4 c honey

1. Whisk together the cornmeal, flour, baking powder, sugar and salt.
2. In another bowl, beat together the milk, eggs, butter and honey.
3. Mix the wet and dry ingredients together, stirring just until combined.
4. Evenly divide the batter between 12 greased muffin cups, then bake at 400 degrees for about 15 minutes, until golden.

Thursday, October 10, 2013

Grape jelly

Jelly for my sandwich

A few years ago, I found out that a farm not too terribly far from here grows Concord grapes. I hadn’t really even thought of that as a possibility, that you could grow non-wine grapes around here, but apparently, the Concord grape actually comes from Concord, Mass., so it’s a hardy Northeastern grape. It’s also the type of grape used to make juice and pretty much everything that’s grape-flavored — the flavor of them is so strong that it’s almost unreal, almost fake-tasting.

Of course, when presented with the possibility of making something with these things, fresh off the vine, I couldn’t resist. My calendar, however, could resist, and so it’s taken me until now, two years later, to actually go get some grapes and try making some homemade grape jelly. Here’s how it went:

Step 1: Drive about an hour each way to the farm, then get grapes. We drove out into the field and parked near the vines, then walked the rows, clippers in hand. But where were the grapes? Oh, there’s a bunch, on the other side... but on the other side, we couldn’t reach it from there.

After some consternation, we figured out these tricky vines: They were hiding their bounty, forming a canopy so that you had to actually climb inside the plants to find the bunches of grapes. We clipped and bagged, clipped and bagged and YIPE, ANTS! Yep, the ants like grapes as much as we do. I swear, I probably dropped as many grapes on the ground as I did into my bag, startled by going in for a handful of fruit and coming back with a handful of creepy-crawly bugs.

An hour later, we finally had enough grapes: I knew I needed at least five pounds, and there was no way we were gonna drive back and do this again, so we made sure to get plenty. We ended up with closer to 10 pounds, which is great, ‘cause that means I can make two batches of jelly.

Step 2: Rinse and de-stem all of the grapes. ALL of the grapes. SO MANY GRAPES. Oh, and did I mention that I decided to do this on the day before we went away on a big trip? Yeah, dumb idea, but I wasn’t sure how long grape season would be, so I was antsy to get some before I missed the season yet again. So I stood there over the sink for practically forever, picking out all of the bad-looking grapes and piling the rest in my largest bowl, filling it just about full.

Step 3: Dump a bunch of the grapes into a big saucepan/skillet with a little bit of water and cook them a bit, mashing them up with a potato masher until they’re all soft and mushed up.

Step 4: Strain the grapes... somehow. The standard methodology said to dump the mixture into a double-layer of damp cheesecloth; I placed the cheesecloth inside a sieve. I also thought I’d pull out my new food mill and place that on top — surely, anything that helps get more of the pulp/skins/seeds out is a good thing, right?

In the end, I wasn’t so sure about that. I may have gotten more juice out of the grapes I put through the food mill, but the resulting mix really, really didn’t want to go through the cheesecloth. I moved it around with a spoon, I transfered the goop to a new piece of cheesecloth (a messy proposition for sure), I picked up the cheesecloth by the corners and squeezed it (even messier)... it was incredibly frustrating. I gave up on the food mill, and eventually, I managed to get all, or at least most, of the juice to pass through the cheesecloth. At this point, it was really late, and I was really tired, and there was still half a bowl of grapes on the counter mocking me. And then, I realized that there’s no reason why you can’t freeze grapes, if you’re just going to juice them later. I should have thought of that hours before. The grapes went into a freezer bag; the juice went into a couple of canning jars with plastic wrap on top and into the fridge, where they sat while I went away on vacation.

Step 5: Return to your grape juice and panic, ‘cause there’s something sludgy in the bottom of the jars. Oh no, more pulp, seriously? I consulted Google, and the answer was an interesting surprise: That wasn’t pulp, it was tartrate, an acidic compound found naturally in grapes that crystallizes when you let the juice sit for a while. It’s also the stuff they make cream of tartar from, apparently. And you actually want to let your juice sit so the crystals form and then strain them out (oh no, more straining??), or else you’ll have cloudy, acidic jelly.

Thankfully, this wasn’t as difficult as the last round of straining. I tried running it through a coffee filter at first, which didn’t work at all (the crystals just clogged up the filter), but I discovered that the sieve by itself was enough to catch the crystals, if I just stopped to rinse it off now and then. Mission accomplished.

Step 6: This is actually the easy part, by comparison. Pour 5 cups of juice into a big saucepan/skillet, whisk in a box of pectin and bring the juice to a boil. Dump in 6 cups of sugar, mix thoroughly and continue to stir as you bring it back to a hard boil, the kind you can’t stir down. Boil hard for 1 minute, skim off the foam, then fill your canning jars (leave a quarter-inch of headspace) and process them.

The result? Delicious homemade jelly — and this stuff is a little softer than the store-bought stuff, just soft enough that you can actually spread it easily onto your peanut butter-covered bread.

Cooking the jelly Finished jars of jelly

Grape Jelly
From the Ball Complete Book of Home Preserving

5 c grape juice
1 package powdered fruit pectin
6 c sugar

1. In a large saucepan, pour in the juice and whisk in the pectin until dissolved. Bring to a boil over high heat, stirring frequently.
2. Add the sugar all at once, stir it in and bring the mix to a full, rolling boil, the kind you can't stir down. Boil hard for 1 minute.
3. Pull the pan from the heat and skim off the foam on top.
4. Fill your canning jars, leaving a quarter-inch of headspace. Process for 10 minutes, then remove the canner lid and let the jars sit for 5 minutes before removing them to a stable, undisturbed place to cool.

Monday, March 25, 2013

Out of the Kitchen: Healthy Living or "Wealthy Living"?

[This is where the picture would have gone, if "No Photography" hadn't been posted by the doors of Healthy Living (seriously, what's the big secret that can't be photographed?).]

I went up to the new Healthy Living store today, thinking that maybe this would be a new, better place for me to do my grocery shopping. Would this be the grocery Mecca that local bloggers are making it out to be? Or would it be, like some Yelpers have written, more like "Wealthy Living," a waste of time and a paycheck? I went in with an open mind and an empty notebook page; I didn't need to pick up many things, but I figured I'd take notes on some items I often buy, just to see how the prices were.

The first thing I noticed was that Healthy Living has definitely learned some things about how to set up a store. I've been to their Burlington, Vt., home base, and it's really, really horrible to navigate -- it's a maze of cramped, crooked aisles running this way and that, a place where you can very easily get lost, literally, "where is the door again? and how the heck do I get back to that thing I saw a minute ago?" lost. It's just terrible. But the new store isn't that at all -- it's got reasonably spacious aisles that are laid out in rows, like a normal store. The layout presented no problems at all. Kudos for figuring that out.

I wandered through the store, and as I shopped, I noticed that their selection of less-common groceries is actually impressive: You won't find a lot of the brands and items you usually buy, but if you follow a restrictive diet plan -- you're a vegan, say, or have celiac disease -- you'll love this place. It's the kind of place where they have tofu on the hot bar and seitan in the deli sandwiches. (I'd imagine that the majority of average grocery shoppers don't even know what seitan is.)

They also have a good-sized bulk-ingredients section, which is nice: If I need, say, a half-cup of whole wheat pastry flour, I know where I can get it and not have to buy a huge package of it.

And they have an emphasis on farm-raised, local foods that's nice, though it's clearly a bit of a work in progress in spots, since they're still learning about local food sources. For instance, they sell pies from Champlain Orchards in Vermont, but there's no need to bring in Vermont pies when we've got a really good pie-baking orchard of our own only a few towns away from their store, at Smith Orchards in Charlton (and they do sell to stores -- you can find their pies at the Meat House).

But how about the prices? Well, that was an eye-opener. The store's owners have said in the local media that their prices are reasonable... but are they?

I rounded up some prices of things I buy frequently while at Healthy Living, then went over to the nearby Hannaford and checked their prices on the same or comparable items. I also went down to Trader Joe's later in the day, which is where I've been doing a lot of my food shopping since they opened (if for no other reason than TJ's has a wide variety of non-corn-syruped, non-chemical-laden bread products).

So here's the breakdown ("n/a" indicates that the store doesn't carry that product):
Healthy Living Hannaford Trader Joe's
Bananas $1.19/pound (fair trade) $0.79/pound (organic), $0.49/pound (conventional) $0.29 each (about $1 per pound) (organic)
Scallions $1.49/bunch $1.19/bunch $1.29/bunch
Applegate lunchmeat: Roast beef, 7 ounces $6.89 n/a $3.99
Applegate lunchmeat: Smoked turkey, 7 ounces $6.49 n/a $3.99
Applegate lunchmeat: Ham, 7 ounces $6.39 n/a $3.99
Boneless, skinless chicken breast $14.99/pound (organic) $5.49/pound (Nature's Place) $6.99/pound (organic)
Eggs, farm-raised, 1 dozen $3.69 $2.79 $2.99
Milk, Battenkill Creamery skim, one gallon $4.59 $3.99 n/a
Van's frozen waffles, 1 box $3.99 $2.99 n/a
Frozen blueberries, organic $4.99/8-ounce package ($0.62/ounce) (Cascadian Farms) n/a $3.99/12-ounce package ($0.33/ounce) (TJ's brand)
Ben & Jerry's ice cream $4.99/pint $3.79/pint n/a
Amy's Organic creamy tomato soup, 1 can $3.29 $2.99 n/a

Let's see what we've got here... I'll assume one pound of anything that's per-pound, and I'll leave out the blueberries, just to keep the math sane and fair (since the packages are different sizes)...

Total if I had bought all of these things at Healthy Living: $57.99
Total if I had bought all of these things at Hannaford and Trader Joe's: $35.99

That's a more than 61 percent markup! For the exact same products!

So what have we learned today? We've learned that Healthy Living's claim to have reasonable prices is a crock. Their prices are MUCH higher than those at other stores.

Perhaps one could justify a small markup, since they're a smaller company and have overhead costs and all of that. But more than 60 percent is hardly a reasonable markup -- if I can buy the same product elsewhere, sometimes just up the road, for 60 cents or a dollar or even multiple dollars less than you're charging, you're charging way too much.

This isn't to say that Healthy Living is completely useless: Like I said, their vegan/gluten-free selection is vast, so if you have a restricted diet and can't eat a lot of the stuff that most people typically buy for groceries, this might be the place for you. But know that if you're buying regular stuff there, or even organic stuff, chances are very good that you're spending way more money on groceries than you could be. If you've got that much money to waste in the name of one-stop shopping, go for it, but most of us don't. As for me, I walked out with an empty shopping bag.

Wednesday, March 20, 2013

Champagne cupcakes

Champagne cupcake

Since we started planning my friend's bridal shower, I'd been Googling around, stockpiling ideas, and one thing I came across was a recipe for a pink champagne cake. Pink wouldn't fit with our theme, but champagne, that might work nicely. So when I ended up being enlisted to make the cake, I revisited that idea, and after a bit of research and a bit of trial and error, I pulled together this recipe for champagne cupcakes. I'd say that they came out pretty good, if you like champagne -- I tasted the cake and frosting and the champagne I'd used, and the flavor did come across nicely. One small warning: While there's really not that much champagne in the frosting, once it's added, it's not cooked, so you might want to keep these away from the kids. (For them and for those who don't like champagne, I made some chocolate cupcakes for the occasion as well.)

The best thing about making these, I think, is that I'd been lacking a good recipe for vanilla buttercream, and now, I've found one -- I tasted this frosting before adding the champagne, and even then, without any vanilla extract, it tasted really good. (And yes, Swiss meringue buttercream is totally worth the extra effort, 'cause the taste and texture are so much better, so much smoother and lighter and fluffier, than that shortcut recipe a lot of people use.)

Champagne Cupcakes with Champagne Swiss Meringue Buttercream
Adapted from two different Sweetapolita recipes

Cake:
3/4 c butter, softened
2 c sugar
3 c flour
1 1/2 tsp baking powder
3/4 tsp baking soda
3/4 tsp salt
6 egg whites, room temperature
1 tsp vanilla extract
2 c champagne, room temperature, stirred until flat

Frosting:
5 egg whites
1 1/4 c sugar
Pinch of salt
1 1/2 c butter, softened, cut into pieces
1 to 4 tbsp champagne

1. Cream together the butter and sugar, then beat in the egg whites and vanilla.
2. Whisk together the flour, baking powder, baking soda and salt. Add this to the mixer, alternating with the champagne, starting and ending with the dry ingredients. Beat just until combined.
3. Fill paper-lined or greased cupcake pan cups two-thirds full. Bake at 350 degrees for 20-30 minutes, until a toothpick comes out clean. De-pan and cool on a rack.
4. In the top of a double-boiler or a bowl that can sit on top of a saucepan filled with an inch or so of simmering water, beat together the egg whites, sugar and salt with a whisk. Continue to whisk gently and monitor the temperature of the mixture with a thermometer, cooking it until it reaches 150 degrees.
5. Pour the mixture into a mixer bowl (or use a hand mixer) and beat with the whisk attachment until it's thickened and glossy and forms a soft peak when you lift up the whisk.
6. Beat in the butter, one piece at a time, until it's all in there and combined. (It will probably start to look scary somewhere along the line, like it's curdling -- that's totally normal, just keep beating it and it will come together.)
7. Beat in the champagne, one tablespoon at a time, tasting after each addition, until the flavor is to your liking. Then, beat a bit more, until light and fluffy.
8. Frost cupcakes and serve.

Monday, March 18, 2013

Gougères

Gougères

It's not often that I get to make food for a party -- after all, my husband and I aren't really the party-throwing type, not to mention that our apartment is in a perpetual state of disorder bad enough that we just can't ever have people over. But this past weekend, I got to help throw a bridal shower for a dear friend, and we settled on a wine-and-cocktails emphasis. What goes well with wine? Cheese, so I'm told (I don't drink wine, since I have yet to meet a wine I actually like). Cheese and crackers would be boring... but gougères, now those looked classy, fancy enough for a party and plenty cheesey, too.

Of course, I forgot that choux pastry, better known as the stuff you usually use to make eclairs and cream puffs, is a pain to make, 'cause it requires forcing eggs into an incredibly sticky dough that doesn't want to take them. Also, fun fact: if you put it in a food processor, the dough is so thick and sticky that it actually climbs up under the blade, up in there where it's a total bitch to clean out later. But hey, it came together, anyway, and the results were pretty darned tasty. In fact, the bride threatened to kidnap me and make me her personal cheesy-poofs chef. :) I guess that means they were worth it.

Gougères
Adapted from Smitten Kitchen

1 c milk
4 tbsp (1/2 stick) butter
1/4 tsp salt
Dash cayenne pepper
1 c flour
3 eggs
1/2 c grated Parmesan cheese, plus a little bit extra
1 1/2 c grated Gruyere cheese

1. Bring the milk, butter, salt and cayenne barely to a boil in a saucepan. Take the pan off the heat and stir in the flour until thoroughly combined -- it should come together into a dense ball.
2. Mix in the eggs until thoroughly combined, by any means you can think of. If you're lucky, you can force them together with a spoon. Or try a food processor, or perhaps a heavy-duty electric mixer. Beware: This stuff is seriously sticky -- it will stick to your fingers, the spoon, really anything it comes anywhere near.
3. Stir in the cheeses, then use a couple of small spoons to scoop, shape and drop table-spoon sized balls onto a parchment-lined cookie sheet an inch or two apart. Sprinkle the little bit of extra Parmesan on the tops.
4. Bake at 375 degrees for about a half-hour, until browned and crisp. Serve warm or room-temperature.

Saturday, February 16, 2013

Fat go (Prosperity cakes)

Fat go

This year, I decided to try my hand at making something Chinese for my in-laws' Chinese New Year gathering (despite the fact that I'm white and haven't tried making Chinese food in my life, other than occasionally playing sous-chef for my husband). After all, chocolate cookies aren't exactly traditional Chinese food.

But what is traditional Chinese food, when it comes to desserts? The main dishes would all be covered, after all, not to mention that it's hard to transport regular food 3 hours by car and have it hold up well. The thing is, Chinese cuisine doesn't really do much for desserts -- maybe Mandarin oranges, or almond cookies, but that's about it most of the time. But upon consulting Google, I did turn up a couple of traditional Chinese foods that my mother-in-law was familiar with, and I ended up settling on the more appetizing-sounding of the two: Fat go (pronounced "faht go"), which are steamed cakes made with rice flour.

Off to the Asian supermarket I went, and once I had the needed supplies, I put together this simple recipe, put the cups of batter in the steamer and crossed my fingers.

Ingredients Dissolving brown candy Steaming away

The result was... disappointing. For one, they're supposed to pop up over the top of the cupcake papers and split open -- the splits are said to symbolize Buddha's smile, meaning that he is smiling upon your efforts, and the more sections the cake split into, the luckier you are. But my first attempts didn't split at all, just rose straight up. And on top of that, I wasn't sure if they tasted alright, either. Having never eaten these before, I wasn't sure if the flavor and texture were right: The flavor was sweet, like brown sugar (unsurprisingly), but the texture was oddly grainy and crumbly, like eating soft sand, if that makes sense. But then again, that might just be what rice flour does when you steam it into a raised cake.

My husband taste-tested them for me, and he thought they were fine, though he admitted that he hadn't eaten them since he was a young child, so he was straining to remember what they're supposed to taste like. So the flavor was alright, though not my cup of tea. As for the shape, a friend on Twitter had recently mentioned that ramekins, which I'd used to support the batter-filled papers, are ceramic and therefore a good insulator, not a great conductor of heat. Thinking of this, I tried making the cakes again, this time putting the papers inside of tinfoil cups I formed using an empty ramekin. For added insurance, I also bought new baking powder and cranked up the stove burner as high as it would go.

Success! All of my cakes split this time, some into as many as five sections. A few even got so carried away that they bumped into the bottom of the steamer basket above them -- oops.

In the end, my in-laws seemed to like these alright -- they seem to have come out fairly well, as a pretty decent reproduction of fat gos. But y'know, even if they were correctly made, nobody seemed all that thrilled about them, and I have to say, they're not really something that I found that appetizing -- I think it was that odd, crumbly texture more than anything. So I'd say that this is a good recipe, but regardless, I may not make it again.

Fat Go (Prosperity Cakes)
From Random Cuisine

3/4 c water
1 1/2 block Chinese brown candy
1 c rice flour
1 tsp baking powder
1 tsp water

1. Set up your steamer over a pot of hot water. Form tinfoil cups using a ramekin as a mold, then fill each with a cupcake paper. (Red would be the best color to use, since it's a lucky color in Chinese culture, but I was using blue papers since I was just testing the recipe when I took the photos and didn't want to run out of red papers for later on.)
2. Measure out the rice flour into a good-sized bowl and the baking powder into a ramekin.
3. Put the water and brown candy in a small pan and cook until the candy is all dissolved.
4. Pour the melted candy into the rice flour and whisk until no lumps remain. At this point, turn up the heat under your steamer setup to high.
5. Pour the water into the baking powder, stir to combine (it will fizz, don't be alarmed), then pour into the batter and whisk together.
6. Fill the cupcake papers almost full, then place them into your steamer and put on the lid. (This recipe will only make about five cakes at a time. But if you double or triple the recipe, the baking powder might lose effectiveness as it sits in the batter, so I'd recommend just making a batch at a time.)
7. Steam for 15-20 minutes -- do not open the steamer while they are cooking.
8. Remove from steamer and let cool.

Saturday, January 26, 2013

Out of the Kitchen: Maestro's at the Van Dam

[Sorry, no photos... cozy, intimate restaurant lighting does not make for good picture-taking.]

Sometimes, when you're having a lousy day, the best way to make yourself feel better is by treating yourself to a good meal. So it was that after my husband came home one night recently from a rough day at work, we decided to go to Maestro's at the Van Dam in Saratoga Springs for dinner.

The place certainly gave the impression of a special-occasion restaurant as we were seated in the dining room, surrounded by dark wood wainscoting, intimately dim lighting and artwork on the walls. That impression was sustained when our server immediately brought us some flatbread crackers and white bean dip to nibble on while we perused the menu. The crackers were tasty, as was the dip, which included onions and balsamic vinegar to accent the flavor of the chunky mashed beans.

We placed our orders and finished up the bean dip, and our server soon returned with slices of two varieties of bread, white and oatmeal molasses, plus a large pat of unsalted butter topped with Hawaiian red sea salt. The bread was warm, and both varieties were delicious: the white was nicely yeasty, while the oatmeal had a faint aroma of molasses, rather like that of Boston brown bread, though its flavor wasn't nearly as strong. Our server told us that the breads were made in-house.

For appetizers, I got the crab cake, while my husband got the stuffed cannelloni. The crab cake was described on the menu as "The best you will ever eat!" -- and I have to say, based solely on the cake itself, they might be right. It was really, really good, stuffed with crab and almost no filler, nice and thick and crispy on the outside. But it was plated with a spicy sauce that was overwhelming -- the flavor went well with the crab cake, but there was just way too much of it. My husband's cannelloni, on the other hand, suffered a similar but worse fate: the meat stuffed inside was barely noticable except by texture, and the whole thing was drowning in bechamel sauce.

Our entrees panned out much the same way. I ordered the braised short ribs, and while the beef itself was pretty good (with an interesting flavor note in the demi-glace from the birch beer it was braised with), the accompanying garlic mashed potatoes weren't garlicky at all and were a bit watery. My husband, meanwhile, ordered roasted butternut squash and chicken risotto, which tasted like CHICKEN -- not just chicken, but aggressively chickeny and nothing but chicken, not a hint of the flavors of squash or the spinach and ricotta that were buried in there somewhere (the spinach was visible but flavorless).

After hearing so many great things about this place, we were a bit thrown by the amount of misses compared to hits, and so we decided to see if they'd redeem themselves a bit with dessert. We ordered the clementine torte, which turned out to be a somewhat bitter cake studded with almonds (which also tend to be bitter). The cake itself almost tasted like the pith of the clementine instead of the juice, which is weird considering that clementines are usually a sweeter citrus. And the clementine-vanilla sauce was even worse -- it tasted like a bit of clementine juice mixed with a heavy dose of straight vanilla extract, very bitter and almost astringent. This dish desperately needed some sugar somewhere, perhaps caramelized in the bitter, watery sauce.

But the end of the meal wasn't all bad. After we were finished, our server brought us complimentary dark chocolate bark studded with raisins and almonds, which was very tasty and left us with a much better taste in our mouths.

Still, while the meal started and ended well, we couldn't help but wonder on the way home what had happened. Why was this supposedly-great restaurant so inconsistent? Why were there so many letdowns in our dinner? We expected great, we wanted good, but what we got was hit-or-miss, with the misses dominating the night. And for that kind of money, that's just not right.

Sunday, January 6, 2013

Granola

Granola

Sometimes, baking projects are premeditated, planned-out, scheduled affairs. But sometimes, it's liberating to not have a plan, to just make something for yourself (not with a plan to give it to someone else) because it sort of sounds good -- "let's buy some stuff and throw it together and see how it comes out," that sort of thing.

So I bought some stuff to make homemade granola, since I'd come across some recipes for it lately and it just sounded good, not to mention potentially a lot cheaper than it is to buy it at the store. And it turns out that it could've been even cheaper, 'cause most of the ingredients were things I already had in my pantry or things sitting around left over from when I made fruitcake last month. It's that kind of recipe, too, the kind where you can just sort of throw in whatever sounds good.

I'm glad I bought the extra ingredients I didn't need, though, 'cause I have a feeling I might need to make a second batch of this before the week's over -- my husband came out in the kitchen and grabbed some, and as he munched, this happened:

"Is it good?"
(crunch, crunch) "Mm-hmm."
"You can have some more if you want."
(grabbing another handful and chewing) "Mm-hmm."
"... Should I make more this week?"
"Mm-hmm!"

I guess we have a winner. :)

Granola
Adapted from Amateur Gourmet

2 c rolled oats (not quick oats)
1 tsp cinnamon
Scant 1/2 tsp salt
3 tbsp plus 1 tsp oil
1/4 c honey
1/4 c brown sugar
1 tsp vanilla extract
1/3 c sliced almonds (or any kind of nut)
1/3 c chopped pecans (again, use what you have)
1/3 c chopped dates (or any other dried fruit, or leave it out entirely)

1. Set the oven to 325 degrees and line a cookie sheet with parchment. (When your hand's all sticky in a couple of minutes, you'll be glad you did this first.)
2. In a big bowl, mix together the oats, cinnamon and salt.
3. In a smaller bowl, whisk together the oil, honey, brown sugar and vanilla.
4. Pour this mixture over the oats and mix with your hand (if you use one hand, you can keep the other one clean, perhaps using it to hold a spatula to scrape down your oat-covered sticky hand when you're done). Combine thoroughly, squeezing the mixture between your fingers to make sure it's all well-coated.
5. Scoop the mixture up and spread it on the cookie sheet, leaving it at least partly clumped together.
6. Bake about 10 minutes, then fold in the nuts.
7. Bake another 10-15 minutes or so, until a nice, toasty golden color (it will still be soft -- don't worry, it'll harden as it cools). Remove from the oven and let cool on the pan.
8. Once cooled, mix in the fruit, if using, and break it all up a bit if it's too clumped together.