Friday, December 30, 2011

Triple-chocolate cupcakes

Triple-chocolate cupcake

The holidays are over, mostly... but it's never a bad time for chocolate, right? Especially sinfully rich, dark, fudgy goodness. And especially when all of that is packaged in a deceptively cute cupcake.

This one takes a bit of work, but it's totally worth it if you're a serious chocolate lover. Also, one big, blinking caution light: This recipe yields 12 cupcakes. Twelve. Just 12. So you'll probably want to double it.

Triple-Chocolate Cupcakes
From "Cooks Illustrated

Ganache:
2 ounces bittersweet chocolate
1/4 c heavy cream
1 tbsp confectioners' sugar

Cake:
3 ounces bittersweet chocolate
1/3 c cocoa
3/4 c hot coffee
3/4 c bread flour
3/4 c sugar
1/2 tsp salt
1/2 tsp baking soda
6 tbsp oil
2 eggs
2 tsp white vinegar
1 tsp vanilla

Swiss meringue buttercream:
1/3 c sugar
2 egg whites
Pinch of salt
12 tbsp butter, cut into pieces
6 ounces bittersweet chocolate, melted and cooled
1/2 tsp vanilla

1. Make the ganache: Place the chocolate, cream and confectioners' sugar in a bowl and microwave until melted together, stirring frequently. Chill about 30 minutes, just until firm.
2. Place chocolate and cocoa in a large bowl and pour in the hot coffee, whisking until melted and smooth. Chill until cooled.
3. Whisk in the oil, eggs, vinegar and vanilla.
4. In another bowl, whisk together the flour, sugar, salt and baking soda. Whisk into the wet ingredients.
5. Divide batter evenly among paper-lined muffin cups. Onto each, drop one rounded teaspoon of ganache.
6. Bake at 350 degrees for 17 to 19 minutes, until set and just firm to the touch. Cool in the pan about 10 minutes, then remove and cool on a rack.
7. Combine the sugar, egg whites and salt in a bowl and place it atop a pan of simmering water. Whisk gently and constantly until the mixture is slightly thickened and reaches 150 degrees.
8. Pour into a larger bowl (if you're using a small one) and beat with a mixer until the consistency of shaving cream.
9. Beat in the butter one piece at a time. At some point, it will start to look curdled. Do not panic! Just keep beating it and adding the butter; it will come together eventually.
10. Beat in the melted chocolate and the vanilla. Beat on medium-high until light and fluffy. Frost cupcakes.

Tuesday, December 20, 2011

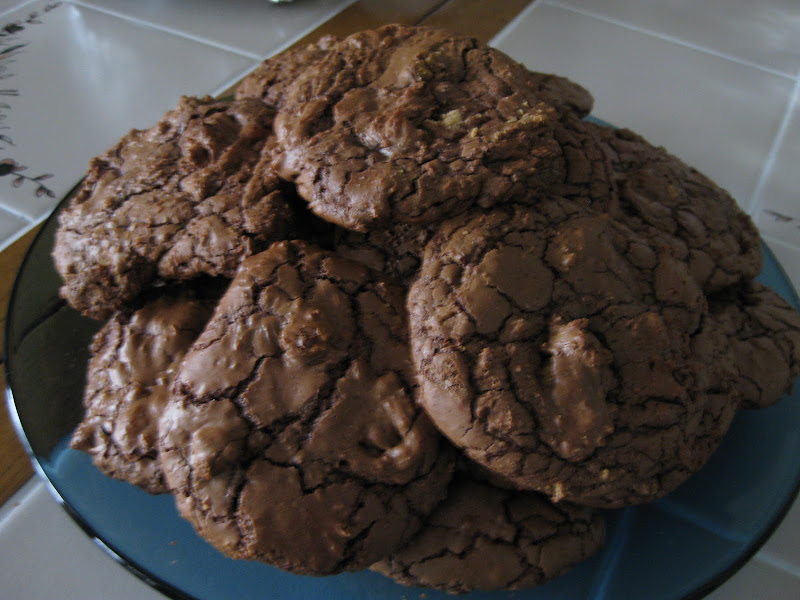
Mexican hot chocolate cookies

Mexican hot chocolate cookies

I just had to get fancy, didn't I?

The annual cookie contest was coming up at work, and I was mulling over my options. Snickerdoodles? Or maybe this new recipe I had for espresso fudge cookies? Neither looked terribly difficult, just make dough and put it on the pan and bake it.

But no. I couldn't take the easy way out, now, could I? I had to find a recipe that was way fancier, way more difficult, too, 'cause tasting good apparently wasn't enough for me. I couldn't just bring in a delicious cookie. I had to wow them.

And this is how I found myself in the kitchen at 1:30 a.m., swearing profusely, every surface and utensil (and of course my fingers, on both hands, somehow) sticky with dulce de leche, the pastry tips clogged, the counter covered in almond bits. Bleh. I spent hours on these damn cookies, and I'm sure that at least two curse words were said for every damn cookie that resulted.

And to add insult to injury, I didn't even win the damn contest. The winner was someone who made cookies into ice cream sandwiches. I thought this was a cookie contest, not an ice cream (with cookies added to the outsides) contest, but oh, silly me. (My boyfriend, upon hearing of this, suggested that next year, I should make a layer cake with tiny cookies as garnish. Fair point, I think.)

But anyway. *ahem* These cookies did come out really good, after all of that work. I might even make them again, now that I've learned a few things about them, though not at 1 a.m. this time. They're a very complexly flavored cookie, cinnamon-chocolate with a hint of black pepper and cayenne, a little sweetness and a bit of crunch. They're sort of addictive, really. And they look impressive on a cookie tray (assuming you can display them in a way that they won't stick together).

Mexican Hot Chocolate Cookies
Adapted from a Food Network recipe, with help from Cooking for Engineers

1 c flour
1/2 c plus 1 tbsp unsweetened Mexican cocoa powder (or substitute by adding 3/4 tsp cinnamon to unsweetened cocoa powder)
1/4 tsp baking soda
1/4 tsp salt
1/2 c plus 1 tbsp light brown sugar
1/2 c plus 1 tbsp sugar
3 tbsp butter, softened
3 tbsp margarine (yes, margarine, do not substitute)
1/2 tbsp cinnamon
Generous pinch black pepper
Generous pinch cayenne pepper
1 tsp vanilla extract
1 egg white
1 can sweetened condensed milk
Chopped almonds

1. Whisk together the flour, Mexican cocoa powder, baking soda and salt. Set aside.
2. Mix together the sugars in a large bowl, making sure that there aren't any lumps. Beat together with the butter and margarine. Beat in the cinnamon, peppers and vanilla, then the egg white. Beat in the flour mixture until incorporated.
3. Press together into a neat log about an inch and a half in diameter, then wrap in plastic wrap and chill.
4. Slice about a quarter-inch thick, place rounds on a cookie sheet an inch apart and bake at 350 degrees for 12 minutes. Remove from pans and cool on a rack.
5. Make dulce de leche: Some people will tell you to just boil the entire can in a pot of water, and that sounds great if you've got four hours. Me, I took the shortcut method: Pour the contents of the can into a huge bowl, the biggest one that you can use in your microwave -- it will look like overkill, but this stuff will swell up a ton, trust me. Then, cook on medium (NOT high, MEDIUM) for 2 minutes at a time, whisking in between, until thickened and caramel-y. If it gets too thick, you can whisk in a bit of water to loosen it up.
6. Spoon the dulce de leche into a pastry bag with a somewhat small round tip, or spoon it into a zip-top bag and snip the corner off. Drizzle the dulce de leche onto the cookies.
7. Sprinkle with chopped almonds, pressing them into the dulce de leche a bit so they stick.

Sunday, December 18, 2011

Espresso fudge cookies

Espresso fudge cookies

I went to my first From Scratch Club food swap last week, and since it's December, it was a cookie-themed swap. As I'd hoped, I went home with lots of cookies and a few ideas for my holiday baking, and when I got home and taste-tested all of my swap booty, these were the clear winners.

I added them to my cookie list for this year, and I'm really glad I did -- they're amazing, sinfully rich and fudgy and delicious, with the espresso serving to deepen the chocolate flavor even more. These cookies would be on Santa's naughty list for sure, 'cause they're simply decadent. :)

Espresso Fudge Cookies
Adapted from a recipe from Love & Olive Oil via @talkanatalka

3 ounces unsweetened chocolate, chopped
2 c semisweet chocolate chips
8 tbsp butter, cut into pieces
3 eggs
1 c plus 2 tbsp sugar
2 tsp instant espresso powder
3/4 c flour
Heaping 1/4 tsp baking powder
1/4 tsp salt

1. In a microwavable bowl, melt the unsweetened chocolate, 1 cup of semisweet chocolate and butter (do not overcook -- microwave it for a minute or 30 seconds or so, stir and repeat until just melted).
2. In a separate bowl, whisk together the flour, baking powder and salt.
3. In another, large bowl, beat the eggs, sugar and espresso powder on high until very thick and pale. Beat in the chocolate mixture, then beat in the flour mixture until just combined. Stir in the remaining chocolate chips.
4. Drop heaping tablespoons about 2 inches apart on a cookie sheet.
5. Bake at 350 degrees for 10 minutes, until puffed and cracked on top. Cool on the pan for 1 minute, then remove to a cooling rack.

Saturday, December 17, 2011

Russian teacakes

Cashew teacakes

I remember eating these as a kid, when my mom would buy packaged ones at the grocery store. But years later, we stopped being able to find them at the store anymore, and when I got into baking, I decided to make some myself.

The problem was, I couldn't remember what they were called, and every recipe I found that sounded similar had a different name -- Russian teacakes? Mexican wedding cookies? Something like these, it seemed, was what I was looking for, but I distinctly remembered the cashews. I also remembered calling them Russian teacakes, though, which is what I continue to call them to this day, even though the recipes I turned up for those weren't quite the same. So I adapted a Russian teacake recipe to produce this one, which is pretty much like what I remembered eating as a kid.

Of course, now, just to add further confusion, I've been coming across "cashew nougats" at the grocery store, and they look similar to, if not the same as, the ones from my childhood. So maybe they've brought them back. Or maybe this is just another layer of confusion. Whatever -- I've got my own recipe now. I don't need that packaged stuff.

Russian Teacakes

1 c butter
1 tsp vanilla
6 tbsp confectioners' sugar, plus a lot more for rolling
2 c flour
1 c chopped cashews

1. Melt the butter and mix in the vanilla. Add in the confectioners' sugar and flour and mix until blended. Mix in the nuts. Chill.
2. Carefully break off bits of the dough (it will probably be crumbly) and form into 1-inch balls, placing them on a cookie sheet (these won't spread, so spacing doesn't matter much).
3. Bake at 350 degrees for 12 minutes, until they are a bit dry-looking and just slightly browned on the bottoms.
4. Immediately roll in confectioners' sugar. Let cool, then roll in sugar a second time.

Friday, December 16, 2011

White chocolate-clementine cookies

White chocolate-clementine cookies

Sometimes, you buy ingredients for a recipe. And sometimes, you find a recipe to rationalize buying the ingredients. :) That was what happened here: There was a sale on boxes of clementines at the store, and I wanted to take advantage, but did I really need to buy a box of clementines, honestly? Well, no... unless... unless I used them for one of my Christmas cookies! Yeah, that's it!

So I Googled around a bit, and I found this recipe, which was even better because it also has white chocolate, and I had a few bags of white chips lying around. They came out... well, not bad, but the baking directions weren't terribly accurate, I don't think. But with a little fussing, they came out alright, fairly tasty, though with so many great cookie recipes out there, I don't know whether I'd make this one again. Maybe I would if I wanted to justify buying clementines again, though. :)

White Chocolate-Clementine Cookies
Adapted from a recipe at Hot Polka Dot

1 c butter, softened
1 c sugar
2 tbsp clementine zest
2 tbsp clementine juice
2 eggs
1/2 tsp baking soda
1/2 tsp baking powder
1 tsp salt
2 1/2 c flour
2 c white chocolate chips

1. Beat together the butter and sugar until fluffy. Beat in the clementine juice, zest and eggs.
2. In another bowl, whisk together the baking soda, baking powder, salt and flour. Beat this mixture into the wet ingredients.
3. Stir in the chocolate chips.
4. Drop rounded tablespoons of dough an inch or so apart on a cookie sheet.
5. Bake at 350 degrees for about 15 minutes, until they are browned around the edges and don't look wet in the centers. Cool on a rack.

Thursday, December 15, 2011

Maple-walnut fudge

Maple-walnut fudge

You know I can never do things the shortcut way. And I had a whole bunch of maple syrup in the house from a trip to Vermont a while back -- real maple syrup, not the fake Aunt Jemima stuff. So I couldn't just use one of those fudge recipes with chocolate chips in it, or marshmallows, oh no. I had to make candy from scratch, boil sugar and create fudge.

This came out pretty tasty, but I think I overbeat it a little, 'cause I was paranoid about not beating it enough -- it was a little on the firm side, a little leaning toward maple candy instead of creamy maple fudge. I'd try making it again, though, and just stop beating it a little sooner.

Maple-Walnut Fudge
Adapted from a recipe on Food.com

1 1/2 c maple syrup
Scant 1 3/4 c sugar
1 tbsp corn syrup
2/3 c heavy cream
1/4 tsp salt
1/4 c butter, cut into pieces
1 tsp vanilla
1 c chopped walnuts

1. Line an 8-by-8 pan with foil, then liberally grease/butter/spray the foil.
2. Place the maple syrup, sugar, corn syrup, cream and salt in a decent-sized saucepan. Stir or whisk together, then put the spoon/whisk away -- you won't need it again.
3. Get the butter and vanilla ready in a small dish or cup. Get the walnuts all measured out and ready, too. Once you start this, you don't want to be fumbling for ingredients. Get the mixer out, too, and a really big mixing bowl, so you don't have to stop and get them out later.
4. Put your saucepan on medium to medium-high heat and place a candy thermometer in the pan. Bring the mixture to a boil and drop the heat so it's just high enough to stay at a boil. Cook until the thermometer reads 238 degrees (or soft-ball stage -- an extra degree or two won't kill you, though any more than that might).
5. Turn off the heat, let the pan sit a second, then pour the contents into the bowl. Add the butter and the vanilla, then start to beat the mixture. Beat until thickened and lighter in color and no longer glossy.
6. Stir in the nuts and spread in the prepared pan. Let sit until cooled.

Tuesday, December 13, 2011

Snickerdoodles

Snickerdoodles

It's cookie time!

I love December, 'cause it gives me an excuse to make lots and lots of different cookies, at least some of which must always be kinds I've never tried before. I started off with these snickerdoodles as a warmup, a prelude to the full-on Cookie Weekend that I just wrapped up (whew!). And I'm kicking myself now, because I should've been making these for years, and instead, I only made them for the first time this holiday cookie season. They're really, really good, and they make the house smell awesome -- so awesome, in fact, that my boyfriend was roused out of bed by the smell, at 1 a.m., powerless to resist eating one, even though he was nearly asleep. :)

I'll be blogging the rest of what I made on Cookie Weekend as I get the time. For now, enjoy this one, and do make it -- it's delicious, it's not hard and you probably have everything in the house already, except maybe the cream of tartar.

Snickerdoodles
From "Baking Illustrated"
2 1/4 c flour
2 tsp cream of tartar
1 tsp baking soda
1/2 tsp salt
12 tbsp butter, softened
1/4 c shortening
1 1/2 c sugar
2 eggs
3 tbsp sugar
1 tbsp cinnamon

1. Whisk together the flour, cream of tartar, baking soda and salt and set aside.
2. In a large bowl, beat together the butter, shortening and 1 1/2 cups of sugar until combined. Beat in the eggs, then the dry ingredients until combined.
3. Mix together the 3 tablespoons of sugar and cinnamon in a wide bowl.
4. Roll the dough into balls, a heaping tablespoon at a time. Roll the balls in the cinnamon sugar and space about 2 inches apart on a baking sheet.
5. Bake about 10 minutes at 400 degrees, until the edges are beginning to set and the centers are soft and puffy. Let cool on pan 2 to 3 minutes, then move to a rack to cool.

Sunday, December 4, 2011

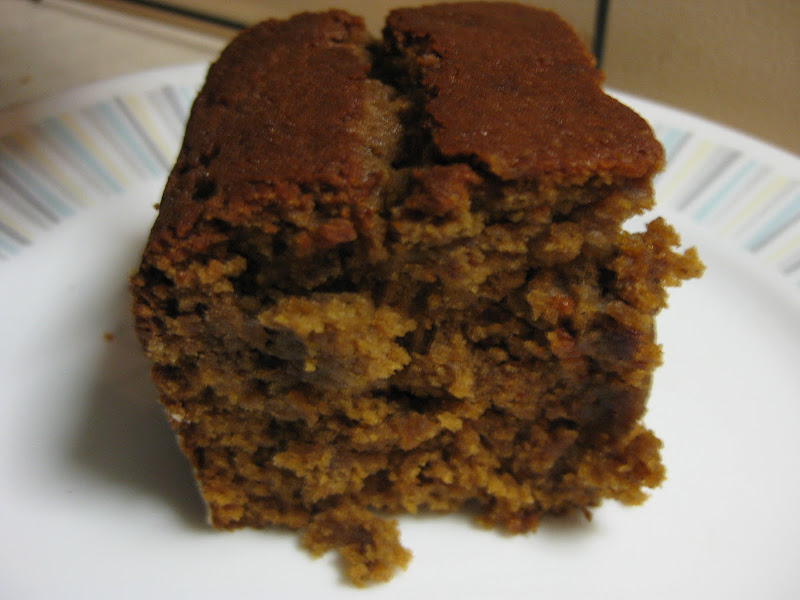
Gingerbread cake

Gingerbread cake

'Tis the season for deliciousness -- the sweet peppermint of candy canes, the melty sweetness of chocolate and of course, spice-laden baked goods, like that most classic of holiday cookies, gingerbread. But why should the drool-inducing combination of spices and molasses and sugar be saved for just cookies? After all, gingerbread started as, well, bread, a quick bread, more cake than cookie.

This stuff was really good and highly addictive. I totally recommend it, especially if you really crave gingerbread but don't feel like doing the work of making cookie dough, rolling it out, cutting it and so forth -- this cake comes together in just minutes.

Gingerbread Cake
From "Baking Illustrated"

2 1/4 c flour
1/2 tsp baking soda
1/2 tsp salt
2 tsp ground ginger
1 tsp cinnamon
1/2 tsp cloves
1/2 tsp nutmeg
1/2 tsp allspice
1 tsp cocoa
8 tbsp butter, melted and cooled
3/4 c molasses
3/4 c sugar
1/2 c buttermilk
1/2 c milk
1 egg

1. Grease and flour a 9-by-9 or 11-by-7 pan.
2. Whisk together all of the dry ingredients and set aside.
3. Beat together all of the wet ingredients in a large bowl. Beat in the dry ingredients until the batter is smooth and thick.
4. Scrape the batter into the pan and bake at 350 degrees for about 40 minutes, until the top springs back when lightly touched and the edges pull away from the pan sides. (I used the toothpick test, which seemed to work alright, too.)
5. Cool in pan on a wire rack for at least 10 minutes. Serve warm or at room temperature.

Tuesday, November 29, 2011

Dinner rolls

Dinner rolls

Every year, I like to contribute something different for Thanksgiving dinner -- I'm trying to slowly feel out what recipes I'll want to use when I have my own Thanksgiving dinner someday, when it's my turn to cook the whole meal. Last year, I made the pumpkin pie. The year before, I made an awesome green bean casserole (from scratch, which makes all the difference in the world -- no canned soup here!). And this year, well, I was running out of options, 'cause certain things are sacred in my mom's Thanksgiving dinner.

Well, strike that -- almost EVERYTHING is sacred. And to some extent, I don't blame them, 'cause Thanksgiving is partly about tradition, about time-honored recipes you pull out every year. So the turkey was settled (though I actually did get my hands on that one year, discovering that brining wasn't really worth the effort), and so was the stuffing, the carrots, potatoes, cranberry sauce (always from a can, though I've been itching to try making that some year), even the pumpkin pies (though I contributed an apple pie, largely because my boyfriend likes it way better than pumpkin).

What wasn't already carved-in-stone tradition, not to be tinkered with? The dinner rolls. Every year, they're the typical store-bought brown-and-serve variety. They're not BAD, per se. They're alright. But they're not particularly good, either, so I figured, why not try making my own?

I attacked these with some trepidation, 'cause it seems like bread doughs never want to rise for me quite as quickly as they should, and then I get impatient with them. On top of that, the recipe for these swore that you could freeze them and then bake them from frozen with no ill effects. And y'know, it was right. I popped these in the oven at Mom's, and a little while later, we had fully cooked, golden brown rolls, slightly flaky around the edges and a bit yeasty in the middle, maybe not the greatest bread product known to man, but perfectly good rolls, good enough to earn compliments from everyone at the table. I might even make these again for Christmas dinner, though I can be a bit of a magpie-ish baker, so my attention might move on to trying something else by then (and hey, cookie season's nearly upon us! And there's gingerbread, and cakes, and candies, and, and...).

Dinner Rolls
From "The Best Make-Ahead Recipe"

4 1/4 c flour
2 tbsp sugar
1 envelope rapid-rise yeast
1 1/2 tsp salt
1 1/4 c whole milk, warmed to 110 degrees
12 tbsp butter, melted, plus a little extra for brushing on before baking
2 egg yolks
1 egg

1. Whisk together 4 cups of the flour with the sugar, yeast and salt.
2. In another bowl, whisk together the milk and butter, then the egg. Combine with the dry ingredients and mix until a dough comes together.
3. Knead until smooth and elastic, adding the remaining 1/4 cup of flour if it's too sticky. (The mixing and kneading can be done in a stand mixer, if you've got one, but I don't, so I did it all by hand.)
4. Form a smooth, round ball, place in a large, oiled bowl, cover with plastic wrap and let rise until doubled, about an hour.
5. Divide the dough into 24 even pieces, form into smooth, tight balls and place on a parchment-lined baking sheet. Cover loosely with plastic wrap and let rise until double, about an hour.
6. At this point, you can pop the tray into the freezer, freeze the rolls until firm and transfer them into a zip-top bag for storage.
7. To bake, arrange the rolls on a greased or parchment-lined baking sheet and brush with melted butter. Bake at 375 degrees until golden, 15 to 25 minutes. Cool for 10 minutes before serving.

Friday, November 25, 2011

Applesauce

Applesauce

It's the day after Thanksgiving, and everyone's thoughts have now turned to leftovers. Well, that and holiday shopping, of course. But food is my focus, most of the time, and now that it's late November, we've got lots of leftover turkey and stuffing and whatnot to deal with... not to mention the remnants of the fall harvest.

Did anyone else buy waaaaay too many apples this fall? *raises hand* Yes, definitely. But fret not, 'cause those leftovers can be turned into something yummy, too, no matter how bad they're starting to look -- not rotten, mind you, but the bruised ones are just fine here, the ugly ones, the ones that look like they really need to be used up right now, today, before it's too late, before they go bad.

Applesauce is the perfect fix for this situation. It's delicious, it's really simple to make, and you can can it, which means that you can taste September even in January or May.

Applesauce
Loosely adapted from "The Ball Complete Book of Home Preserving"

Apples, peeled and cut up, enough to fill a large saucepan (this will depend on the size of your apples, obviously)
Water, just a splash
2 tbsp lemon juice
1 1/2 c sugar (but feel free to use a lot less if you're using sweeter apples -- I only used 2/3 c or so in mine)

1. Splash a little bit of water into the pan containing the cut-up apples. Bring to a boil over high heat, then turn down the heat and boil gently for 5 to 20 minutes, until the apples are tender.
2. Mash up the apples with a potato masher until of the right consistency (if you like it chunky, leave chunks; if you like it super-smooth, hit it with a stick blender or put it through a food mill).
3. Add the lemon juice and sugar and bring to a boil to dissolve the sugar.
4. Pour into sterilized canning jars, leaving a half-inch of headspace. Add lids and rings, screwed on fingertip-tight.
5. Process jars in a large, covered pot of boiling water for 20 minutes. Remove the pot's lid and wait 5 minutes, then remove the jars of applesauce and place them somewhere out of the way to cool, making sure not to tilt them.

Tuesday, November 22, 2011

Cornbread

Cornbread

Sometimes, it's the simple things where I find myself lacking.

Sure, I can whip up some pretty good cookies, or even a cake or two, but had I ever made something as simple as cornbread? No, no I had not. Not unless you could those little blue and white boxes, of course.

But there was chicken and chorizo stew in the slow cooker (a dish that makes me think I should talk my boyfriend into blogging, too, 'cause that stuff is awesome), and cornbread sounded like a nice accompaniment, so I pulled out my trusty "Baking Illustrated," 'cause that's always my fallback for baking something I've never made. The result? Well, it was alright. It wasn't quite sweet enough for my taste, though. (Maybe I'll throw more sugar in next time. Or maybe I'll try a different recipe.) But it was plenty corn-y and had a nice texture. I also learned a new use for cornbread, besides just eating it straight (thank you, Interwebs!) -- it's pretty tasty for breakfast if you fry it in a little bit of butter (or bacon fat, if you happen to be cooking bacon) and pour some syrup over it. I never would've thought of that.

Cornbread
From "Baking Illustrated"

2 tbsp butter, melted
1 c yellow cornmeal
1 c flour
2 tsp baking powder
1/2 tsp baking soda
4 tsp sugar
1/2 tsp salt
2 eggs
2/3 c buttermilk
2/3 c milk

1. Whisk together the cornmeal, flour, baking powder, baking soda, sugar and salt in a large bowl. Push the mixture up the sides of the bowl to form a well in the center.
2. Crack in the eggs and mix lightly, then add the buttermilk and milk. Stir until almost combined, then mix in the butter and stir until just combined.
3. Pour into a greased 9-by-9 or 8-by-8 pan.
4. Bake at 425 degrees for about 20-25 minutes, until the top is golden brown and lightly cracked and the sides have pulled away from the pan.
5. Cool on a rack for 5-10 minutes, the cut and serve warm.

Thursday, November 17, 2011

Pumpkin chip cookies

Pumpkin chip cookies

Have you ever tried cinnamon chips? I hadn't, but I came across a few recipes for pumpkin cookies that included them, so I decided to get some. What I discovered, though, is that apparently, at my grocery store, they're a seasonal item -- they didn't have them when I looked a few weeks ago, but then later on, they did. And they were worth the wait -- they add just the right spicy-deliciousness to these classic pumpkin cookies. I'm definitely going to buy a bunch more bags to stock up before the holidays are over, not to mention plenty of pumpkin. Some people may say that pumpkin cookies are a fall thing, but I'd eat these all year, they're that good. In fact, I think they might be my new favorite cookie.

Pumpkin Chip Cookies
Adapted from Libby's

2 1/2 c flour
1 tsp baking soda
1 tsp baking powder
1 tsp cinnamon
1/2 tsp nutmeg
1/2 tsp salt
1 1/2 c sugar
1/2 c butter, softened
1 c pumpkin
1 egg
1 tsp vanilla
10 ounces cinnamon chips (one bag)

1. Whisk together the flour, baking soda, baking powder, cinnamon, nutmeg and salt in a bowl.
2. In another, larger bowl, beat together the butter and sugar until fluffy. Beat in the pumpkin, egg and vanilla. Then, beat in the dry ingredients.
3. Stir in the cinnamon chips.
4. Drop tablespoon-sized dollops onto a parchment-lined (or greased) cookie sheet.
5. Bake at at 350 degrees for 15 minutes, until the edges are firm.
6. Let cool on pans for 2 minutes, then remove to a cooling rack.

Thursday, October 6, 2011

Pumpkin streusel Bundt cake

Pumpkin streusel Bundt cake

I've gained a bit of a reputation at work for my baking skills, since I can't possibly eat all of what I bake and therefore often bring plates of goodies to work. Usually, my coworkers treat what I bring in as a nice surprise and leave it at that. But last week, they went a step further; I was sitting at my desk, and all of a sudden, I overheard "I thought she was supposed to bring us cake. There isn't any, though, so I guess not."

I have to admit, one of the words that makes my ears perk up is "cake." "Hmm?" I said, looking up across the desks. "Oh, nothing," said the coworker who had been speaking. I pressed further, and eventually, what I got was a general sense of "we'd like you to bring in a cake." "Why?" I asked. "What kind, and what for, and when?" After all, I'm always game for making a cake. But they just sorta said "oh, never mind." They didn't have any particular reason or occasion in mind; they'd just decided that cake sounded good and I hadn't brought any in for a while.

Well, ask and ye shall receive. Mind you, it took me a week or so, 'cause I had to make a pie first -- I'd promised an apple pie to my boyfriend, since it's apple season and we have a house full of them. But once the pie was safely stowed in the fridge (and oh, who am I kidding, indulged in, too), I turned my attention to cake. It had to be something October-y, 'cause I like to cook seasonally when I can. And it had to be a casual sort of cake, 'cause there was no occasion for this, nothing that would justify a fancy layer cake. What I came up with was this: pumpkin is autumn-y, and Bundt cake, well, they're just naturally pretty, without being overly fancy.

But enough of my chatter, 'cause you need to make this, today if possible, or if not today, then as soon as you can possibly find the time and some people to help you eat it. It's moist, it's delicious, it's got the most sweet-spicy filling inside, and you'll have all you can do not to eat four pieces in one afternoon.

Completed cake

Pumpkin Streusel Bundt Cake
Adapted from a recipe from Libby's, via AllRecipes

1/2 c brown sugar
1 tsp cinnamon
1/4 tsp allspice
2 tsp butter (teaspoons, this is not a typo)

3 c flour
1 tbsp cinnamon
2 tsp baking soda
1 tsp salt
1 c butter, softened
2 c sugar
4 eggs
1 c pumpkin puree
8 oz sour cream
2 tsp vanilla

1 1/2 c confectioners' sugar
2-3 tbsp milk

1. Butter and flour your Bundt pan. Set aside.
2. Mix together the brown sugar, cinnamon and allspice. Cut in the butter until crumbly. Set aside.
3. Whisk together the flour, cinnamon, baking soda and salt. Set that aside, too.
4. Beat together the butter and sugar until light and fluffy. Beat in the eggs, one at a time, until combined. Beat in the pumpkin, then the sour cream, then the vanilla. Beat in the flour mixture.
5. Spoon half of the batter into the pan, spreading it out evenly to the sides. Top with the brown sugar mixture, being careful to keep it in the center of the batter and not get it toward the edges. Top with the remaining batter, smoothing it out so it touches the edges of the pan.
6. Bake at 350 degrees for 55 to 60 minutes, until a toothpick comes out clean.
7. Cool in pan on a rack for 30 minutes. Then, de-pan onto the rack and finish cooling.
8. Mix together the confectioners' sugar with as much of the milk as you need to make a glaze. Drizzle over the cake and let harden.

Trail mix cookies

Trail mix cookies

I went on a trip last month to a cabin in the woods, and I needed something to bring, something that's easy to grab and munch. Cookies would be popular, of course, but I wanted something more. I wanted cookies that would actually be healthy, cookies that I could eat for breakfast and not feel horribly bad about it. So I picked up a healthy-recipe cookbook we have lying around, and I found this recipe. Trail mix, for a weekend in the woods? That seemed appropriate. And these have nuts and seeds and fruit in them, plus a little whole grain, so they're remarkably healthy. But I won't compromise on flavor in the name of good health, and I'm happy to say that no compromise was required here -- these are delicious, chewy and crunchy and salty and sweet and addictive, for sure.

Trail Mix Cookies
From "The America's Test Kitchen Healthy Family Cookbook"

1 c rolled oats
1/2 c whole wheat flour
1/4 c regular all-purpose flour
1/2 tsp salt
1/4 tsp cinnamon
1/4 tsp baking soda
5 tbsp butter, melted and cooled
1 egg
2 tsp vanilla
1 c brown sugar (either light or dark works here)
1/2 c dried cherries, raisins or other similar dried fruit (I used currants)
1/2 c unsalted pumpkin or sunflower seeds
1/4 c pecans, walnuts or almonds
1/4 c chocolate chips

1. Whisk together the oats, flours, salt, cinnamon and baking soda.
2. In another, larger bowl, whisk together the butter, egg and vanilla. Stir in the sugar until smooth. Stir in the oat mixture until just combined, then stir in the fruit, seeds, nuts and chips.
3. Roll dough into tablespoon-sized balls and place about 2 inches apart on a parchment-lined baking sheet. (You'll want to use wet hands for this, so the dough doesn't stick to your hands.)
4. Bake at 350 degrees until the edges are set and starting to brown but the centers are still soft, puffy and underdone, 12 to 16 minutes.
5. Let cool on the pan for 10 minutes, then remove to a rack to finish cooling.

Thursday, September 22, 2011

Brown-butter Rice Krispies treats

Brown-butter Rice Krispies treats

You want a crowd-pleaser? THIS is a crowd-pleaser. And it's so easy!

Alright, I know, I hear you saying "sheesh, they're just Rice Krispies treats, no big deal, any moron could make them." But these are different. They don't LOOK different, but that's the thing -- one teeny, tiny change is all you need to go from "hm, Rice Krispies treats" to "zomgwherehaveyouBEENallmylife!"

The secret? Brown the butter. Not burn, mind you, just brown, until it smells a little bit nutty. What you get are Rice Krispies treats with a super-delicious, caramel-y, vanilla-y flavor. And there's salt in them, which heightens the flavor that much more. They're amazing. And they only take, what, maybe two minutes longer than the original version? And that's good, 'cause you'll have to make more once you start sharing them with people. They disappear fast.

Brown-Butter Rice Krispies Treats
From Smitten Kitchen

1/4 c butter
4 c mini marshmallows
1/4 tsp sea salt
6 c Rice Krispies

1. Butter a pan, almost any pan, since you're not baking these -- an 8-by-8, or a 9-by-9, or a 9-by-13, maybe even a loaf pan or two if that's your thing.
2. Melt the butter in a large pan over medium-low heat, then, keep cooking it, stir from time to time and watch carefully. It will foam up a bit, then turn clear, then start to go just a little brown and smell a bit nutty. As soon as it does this, take the pan off the heat, 'cause the line between browned and burned isn't very wide.
3. Stir in the marshmallows until they're melted.
4. Stir in the cereal and the salt. Dump it all out into your greased pan and press down into the corners so it's even (you may want to try a piece of greased parchment or waxed paper for this, so you don't get too sticky).
5. Let cool, cut and wait for the raves to begin. :)

Friday, September 16, 2011

Peanut butter cookies

Peanut butter cookies

Sometimes, you need cookies in a hurry, without having to run to the store, and you need to make something that will please a crowd.

And sometimes, you need cookies 'cause they'll make even the worst day a teeny bit better.

Those two needs came together after Hurricane Irene, while town employees were laboring around the clock to keep everyone safe and answer everyone's questions, and then on top of that, a nearby dam threatened to break, and they issued an evacuation order and opened an emergency shelter for anyone living near said dam.

Thankfully, the storm didn't affect us directly. Our power stayed on, and we don't live near a stream, so we didn't get flooding except for an innundated road on the afternoon of the storm. But it affected a lot of other people, and in times like that, I couldn't do much, but I can bake, and so bake I did. I made these cookies and took them over to Town Hall to give to the overworked people there, and they were hugely grateful. It's always nice to be able to do a good deed. :)

Peanut Butter Cookies
From The Complete Magnolia Bakery Cookbook

1 1/4 c flour
3/4 tsp baking soda
1/2 tsp baking powder
1/4 tsp salt
1/2 c butter, softened
1 c peanut butter (the recipe calls for chunky, but I only had creamy and they still came out good)
3/4 c sugar plus a bit more for sprinkling
1/2 c light brown sugar
1 egg
1 tbsp milk
1 tsp vanilla
1 c peanut butter chips (optional -- I didn't have these, either)

1. Whisk together the flour, baking soda, baking powder and salt.
2. In another bowl, beat the butter and peanut butter together. Add the sugars and beat until smooth. Add the egg, then the milk and vanilla, then the flour mixture. Stir in the peanut butter chips, if using.
3. Drop by rounded teaspoonfuls onto cookie sheets, leaving several inches between them. Using a fork, lightly indent with a crisscross pattern. Lightly sprinkle with sugar.
4. Bake at 350 degrees for 10 to 12 minutes. Cool on pan for 1 minute, then remove to a rack.

Friday, August 19, 2011

Homemade Oreos

Homemade Oreos

One day, I brought something a bit frou-frou in to share with my coworkers — macarons, I think it was. People ate them, but they weren't enthusiastic, and one coworker remarked, "see, the problem is, these are too fancy for us. Just bring in a bag of Oreos or something, we'll be happy."

You know you've got the baking bug when someone says something like that and your reaction is "hey, I wonder if I could make Oreos!"

Many months later, after this idea got shoved to the bottom of the to-bake pile, there was another work night and another coworker who got me talking about Oreos. And I was reminded that I never did try that recipe, never did answer that question.

Well, here's the answer: Yes. Yes, I can make Oreos, and so can you. And these are actually better than Oreos, in a few ways. First, they're thicker and a trifle softer, and on top of that, the recipe makes a lot of filling, so you can double-stuff, even triple-stuff these, if you want. And second, have you seen the ingredients list for those ones Nabisco's selling us? High-fructose corn syrup. And what's "soy lecithin," anyway? I can pronounce everything in the ones I made. And they tasted just as good.

Portioning out the dough Baked cookies

Homemade Oreos
From Smitten Kitchen

1 1/4 c flour
1/2 c cocoa powder
1 tsp baking soda
1/4 tsp baking powder
1/4 tsp salt
1 c sugar
1/2 c plus 2 tbsp butter, softened
1 egg
1/2 c butter, softened
2 c confectioners' sugar
2 tsp vanilla

1. Whisk together the flour, cocoa, baking soda, baking powder, salt and sugar.
2. If you have a food processor, mix on low speed with the butter and the egg. If you don't, like me, you can just mush it all together in a big bowl with your hands. The object is to combine everything until it's a dough, either way.
3. Roll a rounded teaspoon of dough into a ball. Place it on a parchment-lined cookie sheet, flatten with your hand a bit, then poke the center with your fingertip. Repeat until you've filled two cookie sheets.
4. Bake at 375 degrees for 9 minutes, rotating the sheets top to bottom halfway through. Place the pans on racks to cool. Repeat to use up all of the dough.
5. Beat together the butter, confectioners' sugar and vanilla. Sandwich between two cooled cookies.

Rice Krispies s'more bars

Rice Krispies s'more bars

Would you believe that until this point, I'd never made Rice Krispies treats?

Sure, I'd made them with my mom once, ages ago, when I was little. But never since. And I have no idea why, especially after seeing exactly how quickly and easily these came together.

Of course, I couldn't just make the standard recipe, oh no. I wanted s'more bars, something that seemed appropriate for these waning days of summer. And after looking up about a billion recipes for s'more adaptations, I came to a realization: Not only are Rice Krispies treats easy, but you can throw all sorts of stuff at 'em. They're infinitely adaptable. Want to make some with your favorite candy? Sure, throw it in. Dried fruit? Why not? Fruity Pebbles instead? What the hell, go for it. It's really hard to screw these up.

Rice Krispies S'more Bars
Adapted from the original Kellogg's recipe

1/4 c butter
Pinch of salt
4 c mini-marshmallows
6 c Rice Krispies (honestly, I used store-brand ones, and I didn't taste any difference)
1 c Golden Grahams (you could try graham crackers, but I was worried that their texture wouldn't be good in these)
1/2 c chocolate chips

1. Mix the cereals and the chocolate chips together in a really big bowl.
2. Grease a 9-by-13 baking pan.
3. Melt the butter with the salt in a saucepan. Add the marshmallows and stir until melted.
4. Pour over the cereal mixture and stir, stir, stir, until all combined.
5. Dump into the baking pan. Press it down flat using a piece of waxed paper.
6. Let cool. Cut. Eat.

Date-nut bread

Date-nut bread

Sometimes, you bake something because you really have the itch to make a particular thing. And sometimes, you bake something because it will use up something you have in the house. This is one of the latter.

I've got to be just about the only person I know who'd buy fresh dates as an impulse purchase. But I'd never had fresh dates before, only the pre-packaged, chopped-and-dried-and-sugared king. And there they were at the grocery store, on sale and everything. And they're fruit, so they're healthy, so I should buy them... so I did.

And then they sat on the counter, snug in their package, for a couple of weeks. And I realized that other than "hey, let's get one out and try it and maybe eat a couple," I had no plan for these rather pricey little fruits.

But then, I remembered flipping past a date bread recipe in my copy of "Baking Illustrated." And I just happened to have some buttermilk going bad in the fridge, too. Perfect.

This recipe produced a moist, delicious loaf, studded with nuts and soft little morsels of date. Yum. Sure, it's not flashy or decadent like, say, cupcakes, or brownies, but it's tasty all the same (and would be even better with a nice cup of tea, I'd think).

Date-Nut Bread
From "Baking Illustrated"

2 c fresh whole dates
1 c boiling water
1 tsp baking soda
2 c flour
1/2 tsp salt
1 tsp baking powder
1 c chopped walnuts or pecans
2/3 c buttermilk
3/4 c dark brown sugar
6 tbsp butter, melted and cooled
1 egg

1. Pit the dates — sorta squish them and pull them apart with your fingers, then take out the pit (it looks kinda like a piece of walnut). Then, chop up the dates.
2. Place the dates in a bowl with the hot water and baking soda. Stir and let sit.
3. Whisk together the flour, salt and baking powder in another bowl. Stir in the nuts.
4. Stir the buttermilk and sugar together in a large bowl. Add the butter and egg and stir. Stir in the date mixture, then the dry ingredients, just until combined.
5. Scrape into a greased and floured 9-by-5 loaf pan.
6. Bake at 350 degrees until the loaf is dark brown and a toothpick inserted in the center comes out clean, 55 to 60 minutes. Cool in the pan 10 minutes, then depan onto a rack and cool.

Monday, August 1, 2011

Blueberry crumb bars

Blueberry crumb bars

It's blueberry season!

Blueberry season is exciting, 'cause blueberries are delicious in so many things, and 'cause my boyfriend and I found a blueberry farm not too far away where we can go picking. This year, we spent hours out in their fields, sampling the different varieties and picking buckets of berries. It's times like that when I sort of marvel at nature, at the fact that while money doesn't grow on trees, food totally can -- we stood there in the field, reaching into the bushes and coming away with fistfuls of food, and I felt very lucky to have a place like that nearby, especially since it was a perfect day for picking, with the bushes not picked over at all.

It probably helped that we decided to go way over on the other side of the fields, away from the crowds and toward the variety of berries we like best, the Little Giants. Picking those felt like an insider secret, and now, I'm sharing that secret with you -- they might be little, but they sure do pack a giant flavor, so sweet and delicious, so if your local berry farm has Little Giants, get those, definitely.

But I found a new favorite this year, too. I didn't want to pick just Little Giants, 'cause after all, I was intending to make jam (perhaps I'll blog about that later, once I've had a chance to open a jar and see how it came out), so I figured some bigger berries would probably be well suited for that. I came across a section of Sierra blueberries, and I have to say, if you're looking for bigger berries, those are pretty darned good, too, nice and sweet and plump.

For this recipe, I ended up using a mix of both varieties, 'cause I wanted to use the bigger ones for a soft, baked berry layer, but there were some little berries in the fridge that I needed to use up. As for how the bars tasted, I wouldn't actually know -- I took them to work, and a whole pan of them vanished before I got a taste! The rave reviews of my coworkers, and the fact that they actually ate that many, would seem to indicate that this recipe's a real crowd-pleaser, and I'll certainly make this again sometime (and save one out for myself this time!).

Blueberry Crumb Bars
From Smitten Kitchen

1 c sugar
1 tsp baking powder
3 c flour
1 c cold butter
1 egg
1/4 tsp salt
Zest and juice of a lemon (or just juice, if you only have a pre-zested lemon like I did... or 2 1/2 tbsp of the bottled stuff)
4 c blueberries
1/2 c sugar
4 tsp cornstarch

1. Whisk together the sugar, baking powder, flour, salt and lemon zest (if using) in a good-sized bowl.
2. Cut in the butter and egg with a pastry blender (or forks or your fingers, if you don't have one) until uniformly crumbly.
3. Press half of the crumb mixture into the bottom of a greased 9-by-13 pan.
4. In another bowl, mix together the sugar, cornstarch and lemon juice. Gently stir in the blueberries. Pour into the pan and spread out evenly.
5. Crumble the remaining dough over the berries.
6. Bake at 375 degrees for about 45 minutes, until the top is slightly brown. Cool completely in pan before cutting.

Friday, July 8, 2011

Strawberry cupcakes

Strawberry cupcake

I made blueberry cupcakes last year, so this year, with plenty of fresh strawberries in the house, I thought, why not strawberry? Everyone loves cupcakes, not to mention that they're easy to make impressive-looking -- I got plenty of compliments on these beauties, not to mention the yummy taste.

Let me just say, though, that for those who aren't big on frosting, you may not like these, 'cause with these, the frosting really makes them. The cake is faintly strawberry, just a bare hint, but the frosting is bright and berrylicious. Also, one caveat: This recipe is written to only yield a dozen. I doubled it when I made it, 'cause honestly, who makes only a dozen cupcakes?

Strawberry Cupcakes
From Sprinkles Cupcakes via Martha Stewart

Around 2/3 c strawberries
1 1/2 c flour
1 tsp baking powder
1/4 tsp coarse salt
1/4 c whole milk
1 tsp vanilla
1/2 c butter, softened
1 c sugar
1 egg and 2 egg whites

About 1/2 c strawberries
1 c butter, softened slightly
Pinch of salt
3 1/2 c confectioners' sugar
1/2 tsp vanilla

1. Preheat the oven to 350 degrees and line your cupcake pan with cupcake papers.
2. Puree the 2/3 cup of strawberries; you'll need 1/3 cup of puree.
3. In a bowl, whisk together the flour, baking powder and salt.
4. In another bowl, mix together the strawberry, milk and vanilla.
5. In a large bowl, beat the butter until light and fluffy, then beat in the sugar. Beat in the egg and egg whites just until blended.
6. Beat in half of the flour mixture, then the strawberry mixture, then the rest of the flour mixture, just until combined.
7. Pour evenly into the cupcake tin. Bake for about 22 minutes, until a toothpick comes out clean.
8. Cool cupcakes in the pan on a wire rack.
9. Puree the 1/2 cup of strawberries.
10. Beat together the butter and salt, then add the vanilla and 3 tablespoons of strawberry puree. Then, beat in the confectioners' sugar.
11. Frost cupcakes and serve.

Strawberry jam

Strawberries

When you've got a bunch of these, in season and fresh from the berry patch, how can you not want to preserve them any way you can? The season's so short, after all, the time for perfectly ripe, sweet, delicious berries so fleeting, and the berries themselves are so perishable and disappear so quickly once you start eating them. Sure, one can freeze them (and I certainly did freeze some), but I was looking to try something new, and so, I made my first jam -- nine pints of it, in fact (well, more like nine and a half, but I didn't have any half-pint jars, so that bit went to waste).

This came out pretty good, though I think I'd dial back the sugar a bit, 'cause the fresh berries really didn't need quite so much help. Still, the result was certainly jam in consistency and compared well to store-bought jam in flavor -- though mine smelled and tasted more like fresh berries and less like corn syrup and preservatives.

Jars of jam Mmm, jam

Strawberry Jam
From the Ball Complete Book of Home Preserving

2-3 quarts strawberries
7 c sugar
4 tbsp lemon juice
1.75 ounces powdered fruit pectin

1. In a large pot (or a canner if you've got one), place your empty canning jars. Fill the jars and the pot with water. Cover and bring to a simmer.
2. In another, smaller pot, place the lids for the jars (not the screw bands, just the lids) and water to cover. Bring to a simmer.
3. Measure the sugar into a bowl and set aside.
4. Wash and hull the berries, then crush them with a potato masher a bit at a time, until you have 5 cups of crushed berries. Place them in a large pan.
5. Add the lemon juice, then whisk in the pectin until dissolved.
6. Bring to a full rolling boil, stirring frequently. Add in the sugar all at once and return to a boil while stirring. Boil hard for 1 minute.
7. Remove from the heat and skim off the foam on top.
8. Remove one jar at a time from the canner or pot, dump out the water inside into the pot, place on the counter next to your pan and fill using a canning funnel, leaving a quarter-inch of space at the top and avoiding leaving any air bubbles in the jar (slide a nonmetal utensil in to release them if they form). Wipe the rim of the jar with a damp cloth if necessary. Then, using a magnetic or nonmetalic utensil, remove a lid from their water bath and center it on the jar. Place a screw band on the jar and screw it down until fingertip-tight -- do NOT overtighten. Repeat with more jars until you can't fill another full jar. (Do NOT can less than a full jar -- it won't be safe to eat.)
9. Once all of the jars are filled, lower them into the canner or pot, making sure that they are covered by at least an inch of hot water. Cover the pot and bring to a boil. Boil for 10 minutes. Turn the heat off, wait 5 minutes, then remove the jars, keeping them upright. Place them on a towel in a draft-free place and let cool undisturbed for 24 hours.
10. Remove the screw bands and test the seals. If you press down on a center of a lid and it moves, it didn't process properly and must be either refrigerated for immediate use or reprocessed.

Monday, June 20, 2011

Lemon-white chocolate butter cookies

Cookies

Yay, I finally used "Bakewise" for something!

I've had this book for ages, 'cause I felt that it was an essential for my bookshelf, a reference, almost, like a dictionary is for writers. But what I've found is that a lot of the recipes are just too fussy-looking for me, and the role I thought this book would fill is being filled instead by Cook's Illustrated and their books. And so, this book has been gathering dust all this time, sometimes thumbed but never used... until the other night, when I was looking for a good cookie recipe for warm weather, something fruity and sweet and on the lighter side, nothing too heavy or sticky, and something not too plain, either, not too ordinary. I came across this recipe, and the results were delicious. Well, alright, most of the results were delicious -- I'll admit, I burned the heck out of the first pan, so those went in the trash. But the rest were quite good. :)

Lemon-White Chocolate Butter Cookies
From "Bakewise"

1 c butter, softened and cut up
3/4 c sugar
1 tsp salt
1 tsp light corn syrup
1/2 tsp lemon extract
1 tbsp lemon zest
2 egg yolks
2 c flour
1 c white chocolate chips

1. Cream together the butter, sugar, salt, corn syrup, lemon extract and zest. Beat in the yolks one at a time. Beat in the flour.
2. Stir in the white chocolate chips.
3. Form into logs about 2 inches in diameter, wrap in plastic wrap and chill thoroughly (at least 2 hours in the fridge, though I cheated and sped up the process in the freezer).
4. Slice into 3/8-inch slices and place about an inch apart on a cookie sheet.
5. Bake at 375 degrees for 10 to 15 minutes, until the edges just begin to brown.
6. Cool on pan 2 minutes, then remove to a cooling rack.

Strawberry pie

Strawberry pie

Here's a recipe for you: Combine one affinity for pie, one love of strawberries and one boyfriend and mix well. Add in one birthday. The result: Me trying out this recipe from a sample issue of "Cook's Country" that he got in the mail a while back. The later result: One seriously delicious pie, says the aforementioned boyfriend (I'm trying to cut down, so I left it up to him to do the tasting). Apparently, I'll be making this one again. :)

Cooking up the filling Gelatin always looks yucky

Strawberry Pie
From Cook's Country

One recipe for a single-crust pie (I used my old standby from here)
2 pounds frozen strawberries (though fresh would probably be fine, if you've picked up a ton of them while they're in season)
2 tbsp lemon juice
2 tbsp water
1 tbsp unflavored gelatin
1 c sugar
Pinch salt
1 pound fresh strawberries, hulled and sliced thinly

4 ounces cream cheese
3 tbsp sugar
1/2 tsp vanilla
1 c heavy cream

1. Roll out the pie crust and fit it to your pie pan. Chill until firm.
2. Line crust with foil, covering the edges well, then fill with pie weights or dried beans. Bake at 375 about 25 to 30 minutes, until the dough looks dry and is light in color. Remove the foil and weights and bake until deep golden brown, about 12 minutes. Remove to wire rack to cool.
3. Cook the frozen berries in a saucepan until jam-like and reduced down to 2 cups (measure this out to be sure), about 25 minutes.
4. Combine the lemon juice, water and gelatin in a small bowl. Let stand until the gelatin softens and thickens.
5. Stir the gelatin mixture, sugar and salt into the strawberries and cook about 2 minutes. Remove from heat and cool to room temperature.
6. Fold fresh berries into filling, then spread evenly in pie shell. Chill until set, at least 4 hours.
7. Beat together the cream cheese, sugar and vanilla until smooth, then add the cream and whip until stiff peaks form. Top slices of pie.

Mmm, pie

Banana bread

Banana bread

Apparently, I bake in spurts. Sorry for the wait (though rest assured, there are a couple more entries in store soon). Also, apologies for not having a photo of the inside of this banana bread -- I took this to work to share, and it just looks funny to bring something to work with a piece missing. It's way easier to remove, say, one cookie, than one slice of bread, or one piece of a layer cake, without it being noticable. But suffice it to say that this looked pretty much like any other banana bread in the middle.

This tasted alright, but I have to say, it didn't quite live up to Cook's Illustrated's standards, 'cause it took forever before the middle was fully done, and by the time the toothpick finally came out clean, the outside was a tad overdone, so the loaf ended up a bit overbrowned and a touch on the dry side. It still tasted alright, but I'm not sure if I'd make this recipe again -- I'll probably try some others, looking for a recipe that comes out moist but still done in the center. Still, it wasn't bad, and maybe it'll come out a bit better if you try it yourself. It's worth a shot.

Banana Bread
From "Baking Illustrated"

2 c flour
1 1/4 c chopped walnuts
3/4 c sugar
3/4 tsp baking soda
1/2 tsp salt
3 overripe bananas, mashed
1/4 c plain yogurt
2 eggs
6 tbsp butter, melted and cooled
1 tsp vanilla

1. Grease and flour a 9-by-5-inch loaf pan. Move an oven rack to the lower-middle position and preheat to 350 degrees.
2. Whisk together the flour, sugar, baking soda, salt and walnuts.
Mix together the mashed bananas, yogurt, eggs, butter and vanilla. Fold in the flour mixture until just combined.
3. Pour into prepared pan and bake until loaf is golden brown and a toothpick inserted in the center comes out clean, about 55 minutes.
4. Cool in pan 5 minutes, then depan onto a rack.

Wednesday, May 18, 2011

Heath bar blondies

Gooey toffee deliciousness

It can be hard to muster the enthusiasm for baking when you're on a diet. Much as I love to bake, it's so much more fun when you can scarf down a bunch of what you're making. But everything in moderation, so when I decided to use up some mini Heath bars I had in the pantry, and take on one of my recipe nemeses, blondies, in the process, I did eat one. Just one, though. I was good. Willpower, win.

I always have a horrible time with blondies, 'cause I can never decide when they're done. I think I'm always looking for them to be cakey, but y'know, they just aren't, it just isn't the nature of the beast. If you ever manage to get the insides of a pan of blondie totally cakey and dense, the outside will be toast. And so, we compromise, with chewy-gooey insides and edges dry and chewy like the edges of a pan of brownies, which, after all, are what blondies are modeled after, so it makes sense.

These were a sure crowd-pleaser -- almost two dozen of these disappeared at my office over the course of a day, which is a good sign. Also, they made the house smell awesome, all caramel-vanilla-toffee-ish. And they were really easy to throw together. And yes, they were pretty yummy, too. :)

Heath Bar Blondies
From The Delicious Life

1 c flour
1/2 tsp baking powder
1/8 tsp baking soda
1/2 tsp salt
1 stick butter
1 c brown sugar
1 egg
1/4 tsp vanilla
1 c crushed Heath bars

1. Whisk together the flour, baking powder, baking soda and salt.
2. In another, larger bowl, melt the butter, Stir in the brown sugar, then the egg, then the vanilla. Then stir in the flour mixture, and then the crushed Heath bars.
3. Pour into a greased 8-by-8 or 9-by-9 pan.
4. Bake at 350 for 20-25 minutes. Cool in pan.

Saturday, April 23, 2011

Marshmallows

Homemade lavender marshmallows

I love making things that make people say, "you MADE those? I didn't know you could MAKE those!" There are so many things that we just buy, thinking that nobody really makes them, it must be impossible. But people do, and it isn't, and marshmallows made at home are way softer and fluffier and yummier than those rubbery things they sell in a bag.

And yet, I must say, I had a fear of candy-making. Still do, a bit, I must admit. But I was involved in a swap project (sorta like Secret Santa, except not at Christmas), and the person I was sending to had lavender marshmallows on their list, but I wasn't going to be able to fit them in under the spending limit. So I figured I'd take a stab at it myself, once I bought a candy thermometer, of course (which I didn't count toward that spending limit, as I kept it and will use it again).

These came out pretty good (well, it's Alton Brown, of course it would), though I honestly don't like the taste of lavender. But the texture was lovely, and I can see some all-vanilla ones in my future. The trickiest things about making these, I think, were that you must have an electric mixer of some kind, if you don't want your arm to fall off from whisking (and yay, I got to use the whisk attachment on my mixer, which I hadn't tried out yet), and you must not scrape the bowl. Don't do it. I know there's still going to be some left stuck to the bowl once you pour it into the pan, but just let it go, or you're gonna end up covered in marshmallow (and it still won't end up in the pan).

Marshmallows
From Alton Brown

3 envelopes of unflavored gelatin (Knox is the most common brand, if you've never bought this stuff before)
1 c cold water
1 1/2 c sugar
1 c light corn syrup
1/4 tsp salt
1 tsp extract -- vanilla or another flavor (I used half vanilla, half lavender for mine)
1/4 c confectioners' sugar
1/4 c cornstarch
Nonstick spray

1. Place 1/2 cup of cold water in a large bowl, pour the gelatin over it and let stand.
2. Combine the rest of the water and the sugar, corn syrup and salt in a saucepan. Cook, covered, over medium-high heat for 3-4 minutes, then uncover and clip on the candy thermometer (make sure the bulb doesn't touch the bottom of the pan). Cook until the mixture reaches 240 degrees, then remove from the heat.
3. Turn on your mixer with the whisk attachment (or use a stand mixer if you've got on) and slowly pour the sugar mixture down the side of the bowl into the gelatin. Turn the mixer up to high and whip, whip, whip, until it's thick and lukewarm -- basically, until it's marshmallow, until it looks like Fluff.
4. Add in the extract(s), and if you want to use food coloring, drip that in, too. Beat in.
5. Combine the confectioners' sugar and cornstarch in a small bowl.
6. Spray a 9-by-13 pan with cooking spray. Dust the pan with some of the sugar/cornstarch mix, pouring the excess back into the bowl.
7. Pour the marshmallow into the pan. A greased spatula may help with this. (Or it may not -- it didn't really help me much.)
8. Once the marshmallow has settled into the pan, dust with the sugar/cornstarch mix.
9. Let sit at least 4 hours (overnight is better).
10. Dump the marshmallow out and cut into pieces using an oiled knife. Roll the sides in the sugar/cornstarch mix.

Easter bunny cake pops

Bunny pops!

Alright, I admit it. I cheated on these. But I can explain. See, while I haven't used a boxed mix for anything in, well, more than a year, at least, sometimes, they have their place. I usually make everything from scratch, but boxed cakes still taste alright, and besides, I make it a policy to listen to the experts -- if the experts say to use a mix, or to use something pre-packaged, 'cause the results from homemade aren't any better and can actually be worse, well, I listen to those experts. So I made these with a cake mix, a strawberry one, so I'd have cute, spring-y pink bunny innards. I used a can of frosting, too (oh, the horror!), plain white vanilla. Sure, I could've made both from scratch, but the prevailing Internet sentiment was that the results would be way more work and produce less consistent results.

That is not to say that these were easy, though. Not at all. In fact, these took almost three afternoons of work. And decorating is not my strong suit, not at all. Still, I got a lot of compliments on them, and my boyfriend ate two when I'd only asked him to take a taste, so I guess they were worth the work. (Kudos to my boyfriend, btw, for helping me as I went along -- "I'm out of sticks, what do I do?" "How am I gonna dry these so they stay level?" "YOU wanna make some ears? My hands are cramping, and so's my back.")

My boyfriend even played photographer, leading to my debut in a photo on my own blog.  Yes, I know my piping sucks, and in fact, I'm doing it wrong-handed, but my hand always cramps too much when I do it the proper way. A basket of bunnies, all ready to go

Cake Pops
Inspired by Bakerella, the cake pop queen

1 boxed cake mix of your choice, plus whatever you need to make it (usually a few eggs and some oil)
1 can of frosting
2 bags of candy coating (to make sure you have enough)
Decorations, if using (for the bunnies, I used a bottle of pink cookie icing and a black edible-ink marker -- you could use candies or other edible things, too, just look at Bakerella's site for inspiration)
A foam block, or something else you can use to hold the pops while they dry.

1. Make the cake as directed in a 9-by-13 pan, then cool completely.
2. Dump the cake out into the biggest bowl you have and crumble it up. Dump in the frosting and mix it all together (a spoon is fine, but your hands are probably better for this task).
3. Form the mixture into balls and place them on a waxed-paper-lined cookie sheet.
4. Chill (in the fridge if you have time, in the freezer if you don't).
5. Assemble your decorations, if you need to. This is when I piped the bunny ears onto waxed paper.
6. Melt some of the candy coating, dip the sticks in it and shove them into the balls (only about halfway in, mind you). Put the pops back in the fridge/freezer for a bit.
7. Dip the pops into the candy coating, then tap gently to remove excess. (This is the point at which I shoved the ears into the tops of the pops, just after coating them.) Shove the pops into the foam block and let dry.
8. Decorate. I dropped little dollops of icing for the noses, then used a toothpick to make the mouths and put pink on the ears. Then, I drew on the eyes with an edible-ink marker. (And I just now, days later, realized that I forgot to draw on whiskers. Oh well. The marker wasn't working all that great on the candy coating, anyway -- that idea probably wouldn't have panned out. *shrug*)

Thursday, March 31, 2011

Chocolate toffee cracker bark

Chocolate toffee cracker bark

Yay, I made something candy-based and I didn't screw it up!

I always worry when I try to make something that involves cooking sugar in a saucepan. I'm sure I'll burn it, and in the process, I end up leaving it gritty, which isn't good, either. But this time, I got it right. I can heartily recommend this recipe for people who are paranoid about candy-making, 'cause despite my worrying that the toffee wouldn't turn out or would burn, and also despite my worrying that it was too liquid when it came out of the oven and surely, the chocolate wouldn't layer properly, it turned out just fine, delicious, in fact, and it didn't even take that long.

Best of all, it was fairly well-received by the coworkers. That's a win-win-win, right there.

Chocolate Toffee Cracker Bark
From Smitten Kitchen

4 to 6 sheets of matzoh, or around 40 Saltines
1 c butter
1 c brown sugar
Pinch of sea salt
1/2 tsp vanilla
1 1/2 c chocolate chips
Sea salt for sprinkling (omit if using Saltines)

1. Line a cookie sheet with foil, then place a sheet of parchment on top of that. Arrange the matzoh or crackers in a single layer covering the entire bottom of the pan.
2. Melt the butter and brown sugar together in a saucepan on medium heat. Once it comes to a boil, cook for 3 minutes, stirring well.
3. Pour the sugar mixture over the crackers, spreading it quickly to cover the crackers evenly before it hardens.
4. Bake at 350 degrees for 10-15 minutes, turning the heat town if the corners start to burn.
5. Take the pan out of the oven and sprinkle the chocolate chips over the top (the toffee will be a bit liquidy still, but it's alright, don't panic). Let the pan sit for 5 minutes, so the chips can melt and the toffee can harden.
6. Spread out the now-melted chips evenly over the crackers, then sprinkle with sea salt.
7. Chill or let sit to harden the chocolate, then break into pieces.

White batter bread

White batter bread

I've been on the lookout lately for a white sandwich bread that doesn't take all day to make. So when I came across this recipe, which promised a bread that only rises once, in the pan, and doesn't even need to be kneaded, I was in.

I was really careful with the yeast, making sure to proof it properly, and after the flat Irish soda bread, I even made sure to let the bread rise plenty, enough that it wouldn't need to have oven spring to be passably tall.

And yet. And yet. Well, it went into the oven the height of the pan... and it came out short. Mind you, it still tastes pretty decent. But it's half-height, and seeing as I followed the directions perfectly, I don't know why. Maybe I'll try this again sometime with a full packet of yeast -- the recipe said to use less, so I did, but y'know, what've I got to lose? Just the ingredients for another loaf, really.

White Batter Bread
Recipe from Smitten Kitchen

1 c warm milk
1 1/8 tsp yeast
1 tbsp sugar
1 tsp salt
2 tbsp butter, melted
2 c flour

1. Proof the yeast in the warm milk with a sprinkling of the sugar.
2. Whisk together the rest of the sugar, salt and butter. Once the yeast is proofed, whisk it into the butter mixture.
3. Stir in the flour, half at a time, until a smooth batter is formed.
4. Pour into a greased 9-by-5 loaf pan. Cover with plastic wrap and let rise for an hour.
5. Preheat oven to 400 degrees. Place pan inside, drop the heat to 375 degrees and bake for 30 minutes.

Wednesday, March 16, 2011

Irish brown soda bread

Irish brown soda bread

While I'm getting in touch with my heritage, I figured I'd move on to another country my people are from: Ireland. This is appropriate, seeing as it's the time of year when St. Patrick's Day rolls around -- I've got a craving for corned beef, so I figured, why not make traditional soda bread for corned beef sandwiches?

That's traditional soda bread, mind you. You may think that soda bread is sweet stuff with raisins in it, but the truth is that while that kind is delicious, it's not traditional. Soda bread, really, is just bread made with baking soda, as opposed to yeast -- it reacts with an acidic ingredient, usually buttermilk, and that reaction makes the bread rise.

I have to say, this recipe's delicious. And it's healthy, too, which is always a plus. And it's easy. The only issue I had was that I overbaked it a bit, again, 'cause I got distracted while it was in the oven. And it didn't rise so much -- but seeing as it's a wheat bread, and hard flours inhibit rising, that makes sense. I might alter the flour ratio a bit next time, just a bit, just to see if I can get a better rise.

Irish Brown Soda Bread
From "Cooking Light"

2 1/2 c wheat flour
1/2 c all-purpose flour
1/2 c steel-cut oats
2 tbsp brown sugar
1 tbsp wheat germ
1 tsp baking soda
1 tsp baking powder
1/2 tsp salt
1 egg, lightly beaten
2 c buttermilk

1. Whisk all of the dry ingredients together in a large bowl.
2. Whisk the egg and buttermilk together in a small bowl, then pour it into the other bowl. Mix until just combined.
3. Spoon into a greased 9-by-5 loaf pan.
4. Bake at 325 degrees for about an hour, until a toothpick inserted in the center comes out clean.
5. De-pan and cool on a rack.

Pączki

Pączki

It's always sad when a family loses their culinary heritage because somebody didn't think to write their recipes down. This happens with a lot of families, including mine -- while my dad remembers his Polish mother making a lot of things, he was a boy, so it never really occurred to him that he should be writing these recipes down. About the only recipe we have from his Polish heritage is pierogi, and that recipe actually came from someone my mom met who was Polish and willing to share her recipe.

Every once in a while, I get the urge to try to rediscover the recipes from my heritage. And so, when I learned that Mardi Gras is actually Pączki Day to the Polish, a day for eating what's basically a Polish doughnut, well, I was up for the challenge.

By the time I was done making these, though, they were pretty much dead to me.

First, I had to buy the ingredients. I found a seemingly authentic recipe, and it called for rum, so a trip to the liquor store was in order. (I couldn't find Polish run, but I figured that once it was baked into something, there's probably no difference anyway.) Then, I found an Eastern European grocery store around here, so I could get cherry jam and powidła (plum butter), which are traditional fillings. (Rose hip jelly would also be traditional, but it only came in huge jars, so that was out.)

And then came the actual baking. I mixed the ingredients together, and I set them aside to rise. And I waited.

And I waited.

And I started consulting friends online, who assured me that eggy, sweet doughs sometimes take longer to rise.

And I waited some more.

And many hours later, I realized that this stuff probably wasn't going to rise. I had followed the recipe to the letter, as I always do when I've never made something before. But the recipe had told me to "soften yeast in warm water," which didn't sound right to me. Perhaps I ought to go with my own experience instead of trusting the recipe so much.

So I started over, this time proofing the yeast properly with a bit of sugar. And oh, what a difference it made. That'll teach me to trust a recipe instead of my own instincts.

One caveat for anyone who tries to make these: This dough is weird. Really weird. Like, you'll think you screwed up, 'cause it starts out in the bowl as a really stick, stringy mess. And then, when you roll it out, well, it's still very sticky and very weird-feeling, very light and delicate and sticky and, well, almost like the Blob, oddly enough -- it oozed out of the bowl.

Overall, I'm glad I tried to make these. They did come out edible, though the last rise didn't rise so well, so they were a bit flat. They tasted decent, though. People seemed to like them. Would I make them again? Eh... I don't know. But I'm glad I tried them.

Pączki (pronounced "pownch-kee," by the way)
From Food.com

12 egg yolks
1 tsp salt
2 envelopes yeast
1/4 c warm water
1/3 c butter, softened
1/2 c sugar
4 1/2 c flour
1/3 c rum
1 c whipping cream, warmed
Jam/preserves/fruit butter
Oil for frying

1. Beat egg yolks and salt together in a small bowl until thick.
2. In another small bowl, combine the yeast and warm water, then sprinkle a few pinches of the sugar over the top. Let sit until foamy.
3. Cream together the butter and sugar in a large bowl until fluffy.
4. Beat in ingredients, in this order: the yeast mixture; a quarter of the flour; the rum; half of the cream; more flour; the rest of the cream; half of the flour that's left; the eggs. Mix in the rest of the flour (you'll probably need a big spoon for this -- I tried using the mixer, and the dough climbed the beaters).
5. Cover the bowl with plastic wrap and let rise in a warm place until doubled.
6. Punch down, cover and let double again.
7. Punch down, dump onto a floured surface and roll to about an inch thick. Cut out 3-inch rounds.
8. Cover and let rise about 20 minutes.
9. Fry in 350-degree oil until golden on both sides, then drain.
10. Dust with powdered sugar while warm, if using. Or let cool, then mix up glaze (see below) and dunk them in to coat, draining on a wire rack until hardened.
11. Cut a slit in the side of each and pipe in the filling.

Doughnut Glaze
1/3 c butter, melted
2 c confectioners' sugar
1 1/2 tsp vanilla
2-4 tbsp hot water

Whisk all ingredients together until combined, adding water if needed to reach the right consistency.

White sandwich bread

White sandwich bread

Bread should be a common food. Bread should be cheap to make and delicious to eat, and most of all, bread should be worth the effort. Too many yeast-raised recipes aren't worth the time and energy, not to mention the intimidation factor, 'cause way too many people are scared to work with yeasted doughs in the first place, afraid that they'll screw them up.

As for yeasted doughs, a little knowledge goes a long way. But that doesn't mean that you have to pick the most difficult recipe to get a good result.

Take this one, for instance. "Baking Illustrated" promised a good, basic white sandwich bread in just a couple of hours. Did it deliver? Well, I'll admit that I may have overbaked it a bit, and I'll admit that perhaps the long-risen kind has a better texture and somewhat more yeasty flavor. Still, this recipe's pretty good, and the savings in time and energy definitely make it worth making again. This might just be the recipe that converts me to becoming a weekly bread-baker.

White Sandwich Bread
From "Baking Illustrated"

3 3/4 c flour, plus more for the counter
2 tsp salt
1 c warm whole milk
1/3 warm water
2 tbsp butter, melted
3 tbsp honey
1 envelope instant (rapid-rise) yeast

1. Turn your oven on to 200 degrees. Let it pre-heat, then, after it's at 200 for a few minutes, turn it off.
2. Meanwhile, whisk 3 1/2 cups of the flour and the salt together in a large bowl.
3. In another bowl, mix together the milk, water, butter and honey. Take the temperature of your mixture if you're not sure what "warm" is -- it should be 110 degrees. Once you've checked the temperature, mix in the yeast.
4. Mix the wet stuff into the dry stuff. If you've got a stand mixer with a dough hook, use it. Me, I used a big wooden spoon and lots of elbow grease. If the dough seems really sticky after you've got it all mixed, add in up to a 1/4 cup of flour.
5. Turn out onto a floured surface and knead until smooth. Form into a ball.
6. Place in a big, lightly oiled bowl. Flip it over, so all of the outside gets a little bit of oil on it. Cover the bowl with plastic wrap, pop it into the warm oven and let it double in size -- this will take 40-50 minutes or so.
7. Take out the dough, turn it out onto your counter and flatten it into a rectangle that's 9 inches wide (the length of your 9-by-5 bread pan). Roll the dough up into a log, starting at one of the 9-inch sides, then pinch the seam closed. Turn it over so it's seam-side down and place it in your greased loaf pan, pressing down so it touches all of the sides and corners of the pan.
8. Cover with plastic wrap and let rise until almost doubled, 20-30 minutes.
9. Heat the oven to 350 degrees and place a small pan of hot water inside (not underneath where your loaf will be).
10. Bake your loaf about 40-50 minutes, until a thermometer reads 195 degrees in the center of the loaf. De-pan and cool on a rack.

Freezer biscuits

Freezer biscuits, baked

Before you get all excited, these are not the perfect biscuits, either. My biscuit quest continues. However, these have become my go-to recipe in the meantime, because they're make-ahead biscuits -- you make them up, you freeze them, and then, when you want biscuits, pop 'em in the oven and you have fresh-baked biscuits, right then, no mixing or measuring required.

They're cream biscuits, granted, so the flavor's a bit different than a buttermilk biscuit. But they're still pretty tasty, and also, they're all cream, no butter, which means no cutting in butter, which makes them even easier.

Freezer Biscuits
From "The Best Make-Ahead Recipe"

6 c flour, plus a little extra for the counter
2 tbsp sugar
2 tbsp baking powder
1 1/2 tsp salt
4 1/2 c heavy cream

1. Whisk all of the dry ingredients together in the biggest bowl you've got.
2. Stir in the cream with a wooden spoon until it comes together into a dough.
3. Turn the dough out onto your floured counter and knead a little, just until smooth.
4. Pat out so it's 3/4 inch thick, then cut out biscuits with a 2 1/2-inch cutter. Form the scraps into a ball and cut up to two more times.
5. Place biscuits on a clean cookie sheet (lined with parchment is nice but not absolutely necessary), wrap well with plastic wrap (foil also works alright) and freeze until hard. Transfer to freezer bags and store.
6. To bake, place on a cookie sheet and bake at 450 degrees for 20 minutes or so, until golden and puffed.

Wednesday, March 2, 2011

Chocolate peanut butter cup cookies

Chocolate peanut butter cup cookies

I'm sorry, Martha Stewart. I'm sorry I doubted you.

See, I've always thought of Martha Stewart as a crafter, a home-decor maven, someone who will show you how to make something pretty with some paint and some cardboard. I knew that she had recipes posted online, and I'd heard people talking about her cookbooks, but she hadn't really earned any cred with me. I knew she could work with wicker, but flour and shortening and such? I was dubious.

But I also have a stockpile of candy to use up. (Yay for after-holiday sales -- they're a good time to stock up on things you can bake with later. And don't forget about those miniature chocolate bars and pieces, 'cause there's no difference between those and chocolate chips except their size.) And I thought, y'know, I have yet to find a good chocolate cookie recipe that's all-purpose, something to throw chocolate chips in, or nuts, or candy, or anything that might go in a cookie. So I typed in "chocolate cookies." And Google gave me a Martha Stewart recipe. Sure, what the heck.

These are gooooood. They're the sort of cookies where when you're baking them, you just sort of have to trust that they'll be alright once they're cooled. But they're chewy and delicious and take well to mix-ins, and they don't even require you to cream butter and sugar together, which is nice. They were also very well-received when I took a plate of them to a homemade banquet with my boyfriend's family. After all, who doesn't like chocolate and peanut butter? I'll definitely hang onto this recipe.

Chocolate Peanut Butter Cup Cookies
Adapted from Martha Stewart

8 ounces (1 1/3 c) semisweet chocolate chips
4 tbsp butter
2/3 c flour
1/2 tsp baking powder
1/2 tsp salt
2 eggs
3/4 c brown sugar
1 tsp vanilla
About 12 ounces of mix-ins -- I used chopped-up miniature peanut butter cups, but you could use chocolate chips or chunks, any chopped-up candy that sounds good to you, nuts or a mix of the above

1. Place chocolate chips and butter in a small bowl and set aside.
2. Whisk together the flour, baking powder and salt in another bowl.
3. In a third, larger bowl, beat together the eggs, brown sugar and vanilla on high speed until light and fluffy.
4. Microwave the chocolate and butter, stopping and stirring every 30 seconds or so, until melted. Beat this into the egg mixture on low.
5. Beat in the flour mixture, then mix in whatever chunky ingredients you're using.
6. Drop heaping tablespoons 2 inches apart and bake in a 350-degree oven for about 12 minutes, until cookies are shiny and crackly but still soft in the centers.
7. Let cool on the cookie sheet for 10 minutes, then remove cookies to a rack to finish cooling.

Naan

Naan

Well, they can't all be winners.

It's true that you can make anything at home, anything you might order from a restaurant or bakery. But sometimes, it takes special equipment or a certain skill that you just don't have yet. And this was one of those times.

I got so excited when I saw this recipe on the Tasty Kitchen blog. Homemade naan! I love naan! And it's one of those things that I just never thought about making at home, assuming that it couldn't be done well.

I was half-right -- it couldn't be done well by me. I attribute this to a few factors. First, the recipe calls for a heavy-bottomed skillet, then doesn't make it clear whether you're supposed to grease said skillet or not. I imagine that what you should actually use here is a well-seasoned cast iron skillet. But I don't own one (a skillet I have, but it doesn't have a good level of seasoning on it yet). So I used a regular frying pan, which did not work out well at all -- the dough stuck to the pan and then didn't want to release, ultimately scorching my pan. The recipe also calls for cooking the second side over the flame of a gas stove. Sadly, all I have now is an electric stove, so none of that for me.

Ultimately, after the first few of these failed entirely (burnt on the outside, doughy on the inside), I put the rest of them on a cookie sheet in a 475-degree oven. That seemed to cook them alright, but there was still something really lacking about the flavor. I don't know whether it was the lack of ghee (clarified butter used in Indian cooking -- I didn't have any or feel like buying or making any) added at the end, or the lack of a tandoori oven, or what. Or maybe my standards are just too high. I noticed that on the page where I read about the recipe, the rave was "this is so much better than the kind you buy at the grocery store!" Honestly, I've never bought grocery-store naan -- I've always just ordered it at Indian restaurants. Maybe this is better than the packaged kind, but it's not as good as what you get at a restaurant.

So I figured I'd put this recipe here with ample caveats. I mean, a lot of reviewers on that site thought this recipe was awesome. And maybe, if you have a cast-iron skillet and a gas stove, or if your standards are lower than mine, you'll love this, too. Me, I'll probably wait a while before attempting naan again, and if I do, I'll probably look for another recipe. Or maybe I'll just resign it to the short list of things that are best ordered out.

Naan
From Tasty Kitchen

2 c flour
3/4 tsp baking powder
1/2 tsp baking soda
1/2 tsp sugar
1/4 tsp salt
1/2 c warm milk
1/2 c plain yogurt
1/2 tbsp oil, as needed (I never did figure this part out, seeing as it's not mentioned in the recipe...?)

1. Whisk all of the dry ingredients together in a good-sized bowl.
2. Mix together the milk and yogurt in another bowl. Then, make a well in the center of the dry ingredients and pour the wet stuff in, mixing together.
3. Cover the bowl with a damp cloth and let sit for at least 2 hours.
4. Knead the dough for a few minutes, then divide it into 8 parts.
5. Flatten the pieces out.
6. Heat a thick-bottomed skillet. Brush one side of your naan with water, then place it wet side down onto your hot skillet and cover for 30 seconds, until you see bubbles in it (good luck... I never did).
7. Flip with tongs and cook on the other side, or use tongs to hold the other side over the flame of a gas burner until it has charred spots.

Tuesday, February 15, 2011

Chocolate-hazelnut macarons

Chocolate-hazelnut macaron

For Valentine's Day this year, I decided to try the latest, hippest thing in baked goods, at least according to the Internet -- macarons. That's macarOns, one O, as in a meringue-and-nut-based sandwich cookie, as opposed to macarOOns, which are the coconut ones most people are familiar with.

Wouldn't you know, they ended up being way more of a pain than I suspected, and my quick afternoon baking project became "sorry I'm not ready to go out to dinner yet, honey, but I'm piping, and then these have to sit, and then I have to bake them... but here's a nice card and some chocolate-dipped strawberries to occupy you in the meantime, okay?"

As it turns out, as I was fussing over the meringue, Google-ing "macaron meringue texture" to try to figure out how this stuff was supposed to look, I realized that almost every recipe out there uses an easier meringue, the kind I'm familiar with and have made a bunch of times. Apparently, I picked the hardest macaron recipe on the Internet. Leave it to me to get sucked in by "ooh, chocolate, hazelnuts, Nutella!" and not notice the details until I was halfway into the recipe. Also, I hate piping. It looks good, but I always seem to forget how much it makes my hand hurt. Ah, well.

I have to say, these did come out pretty tasty, though they didn't spread like I thought they would, so they ended up being a bit small and fat. Next time, I think I might look for a simpler recipe, then just substitute like ingredients to get what I want. Or maybe I'd just try a different kind altogether, maybe some traditional almond ones.

Macaron

Chocolate-Hazelnut Macarons
From Baking Bites
2 1/4 c ground hazelnuts
2 c confectioners’ sugar
1/2 c cocoa
4 egg whites, room temperature
1 c sugar
1/4 c water
Nutella (the original recipe calls for a cup, but I totally didn't need that much)

1. Set 2 of the egg whites aside in a large bowl.
2. In another large bowl, whisk together the hazelnuts, confectioners' sugar and cocoa. Add the other 2 egg whites and mix until you have a stiff dough (I ended up using my hands for this task, 'cause a spoon wasn't cutting it).
3. Put the sugar and water in a small saucepan and turn on the burner to bring the mixture to a rolling boil.
4. Meanwhile, beat the 2 remaining egg whites until frothy. Once the sugar comes to a boil, keep beating the egg whites until soft peaks are formed.
5. With the mixer running on medium, slowly drizzle the hot sugar mixture into the bowl. Beat until about the texture of shaving cream.
6. Spoon about a third of the meringue into the bowl with the chocolate-nut mixture and beat them together. Then, fold in the remaining meringue a bit at a time. (Note: This totally didn't work for me -- the dough was just too stiff and thick to get the meringue to combine delicately. I ended up beating the whole mess together. They still came out tasting alright in the end. *shrugs*)
7. Line two baking sheets with parchment paper. Do NOT skip this, or you'll never get them off the pan.
8. Spoon the batter into a piping bag fitted with a 1 cm round tip, then pipe 1-inch circles about an inch apart on your baking sheets. If you get peaks on the tops of them (I did, 'cause my piping technique is far from perfect), just wet your finger with a bit of water and push those peaks down flat.
9. Turn on the oven to 350 degrees. Then, walk away for about 20 minutes -- the cookies need to sit so they'll develop a skin on top, so they're the right shape once they bake (smooth tops with little "feet" on the bottoms).
10. Bake the cookies for 11-12 minutes, until the tops are set. (One site I looked at recommended checking for doneness by grabbing the top of one and wiggling it from side to side -- if it shifts just slightly against the bottom of the cookie, it's done.)
11. Let cool on pan for 2 minutes, then remove to cooling racks. Once cooled, sandwich with Nutella.