Friday, December 30, 2011
Triple-chocolate cupcakes
The holidays are over, mostly... but it's never a bad time for chocolate, right? Especially sinfully rich, dark, fudgy goodness. And especially when all of that is packaged in a deceptively cute cupcake.
This one takes a bit of work, but it's totally worth it if you're a serious chocolate lover. Also, one big, blinking caution light: This recipe yields 12 cupcakes. Twelve. Just 12. So you'll probably want to double it.
Triple-Chocolate Cupcakes
From "Cooks Illustrated
Ganache:
2 ounces bittersweet chocolate
1/4 c heavy cream
1 tbsp confectioners' sugar
Cake:
3 ounces bittersweet chocolate
1/3 c cocoa
3/4 c hot coffee
3/4 c bread flour
3/4 c sugar
1/2 tsp salt
1/2 tsp baking soda
6 tbsp oil
2 eggs
2 tsp white vinegar
1 tsp vanilla
Swiss meringue buttercream:
1/3 c sugar
2 egg whites
Pinch of salt
12 tbsp butter, cut into pieces
6 ounces bittersweet chocolate, melted and cooled
1/2 tsp vanilla
1. Make the ganache: Place the chocolate, cream and confectioners' sugar in a bowl and microwave until melted together, stirring frequently. Chill about 30 minutes, just until firm.
2. Place chocolate and cocoa in a large bowl and pour in the hot coffee, whisking until melted and smooth. Chill until cooled.
3. Whisk in the oil, eggs, vinegar and vanilla.
4. In another bowl, whisk together the flour, sugar, salt and baking soda. Whisk into the wet ingredients.
5. Divide batter evenly among paper-lined muffin cups. Onto each, drop one rounded teaspoon of ganache.
6. Bake at 350 degrees for 17 to 19 minutes, until set and just firm to the touch. Cool in the pan about 10 minutes, then remove and cool on a rack.
7. Combine the sugar, egg whites and salt in a bowl and place it atop a pan of simmering water. Whisk gently and constantly until the mixture is slightly thickened and reaches 150 degrees.
8. Pour into a larger bowl (if you're using a small one) and beat with a mixer until the consistency of shaving cream.
9. Beat in the butter one piece at a time. At some point, it will start to look curdled. Do not panic! Just keep beating it and adding the butter; it will come together eventually.
10. Beat in the melted chocolate and the vanilla. Beat on medium-high until light and fluffy. Frost cupcakes.
Tuesday, December 20, 2011
Mexican hot chocolate cookies
I just had to get fancy, didn't I?
The annual cookie contest was coming up at work, and I was mulling over my options. Snickerdoodles? Or maybe this new recipe I had for espresso fudge cookies? Neither looked terribly difficult, just make dough and put it on the pan and bake it.
But no. I couldn't take the easy way out, now, could I? I had to find a recipe that was way fancier, way more difficult, too, 'cause tasting good apparently wasn't enough for me. I couldn't just bring in a delicious cookie. I had to wow them.
And this is how I found myself in the kitchen at 1:30 a.m., swearing profusely, every surface and utensil (and of course my fingers, on both hands, somehow) sticky with dulce de leche, the pastry tips clogged, the counter covered in almond bits. Bleh. I spent hours on these damn cookies, and I'm sure that at least two curse words were said for every damn cookie that resulted.
And to add insult to injury, I didn't even win the damn contest. The winner was someone who made cookies into ice cream sandwiches. I thought this was a cookie contest, not an ice cream (with cookies added to the outsides) contest, but oh, silly me. (My boyfriend, upon hearing of this, suggested that next year, I should make a layer cake with tiny cookies as garnish. Fair point, I think.)
But anyway. *ahem* These cookies did come out really good, after all of that work. I might even make them again, now that I've learned a few things about them, though not at 1 a.m. this time. They're a very complexly flavored cookie, cinnamon-chocolate with a hint of black pepper and cayenne, a little sweetness and a bit of crunch. They're sort of addictive, really. And they look impressive on a cookie tray (assuming you can display them in a way that they won't stick together).
Mexican Hot Chocolate Cookies
Adapted from a Food Network recipe, with help from Cooking for Engineers
1 c flour
1/2 c plus 1 tbsp unsweetened Mexican cocoa powder (or substitute by adding 3/4 tsp cinnamon to unsweetened cocoa powder)
1/4 tsp baking soda
1/4 tsp salt
1/2 c plus 1 tbsp light brown sugar
1/2 c plus 1 tbsp sugar
3 tbsp butter, softened
3 tbsp margarine (yes, margarine, do not substitute)
1/2 tbsp cinnamon
Generous pinch black pepper
Generous pinch cayenne pepper
1 tsp vanilla extract
1 egg white
1 can sweetened condensed milk
Chopped almonds
1. Whisk together the flour, Mexican cocoa powder, baking soda and salt. Set aside.
2. Mix together the sugars in a large bowl, making sure that there aren't any lumps. Beat together with the butter and margarine. Beat in the cinnamon, peppers and vanilla, then the egg white. Beat in the flour mixture until incorporated.
3. Press together into a neat log about an inch and a half in diameter, then wrap in plastic wrap and chill.
4. Slice about a quarter-inch thick, place rounds on a cookie sheet an inch apart and bake at 350 degrees for 12 minutes. Remove from pans and cool on a rack.
5. Make dulce de leche: Some people will tell you to just boil the entire can in a pot of water, and that sounds great if you've got four hours. Me, I took the shortcut method: Pour the contents of the can into a huge bowl, the biggest one that you can use in your microwave -- it will look like overkill, but this stuff will swell up a ton, trust me. Then, cook on medium (NOT high, MEDIUM) for 2 minutes at a time, whisking in between, until thickened and caramel-y. If it gets too thick, you can whisk in a bit of water to loosen it up.
6. Spoon the dulce de leche into a pastry bag with a somewhat small round tip, or spoon it into a zip-top bag and snip the corner off. Drizzle the dulce de leche onto the cookies.
7. Sprinkle with chopped almonds, pressing them into the dulce de leche a bit so they stick.
Sunday, December 18, 2011
Espresso fudge cookies
I went to my first From Scratch Club food swap last week, and since it's December, it was a cookie-themed swap. As I'd hoped, I went home with lots of cookies and a few ideas for my holiday baking, and when I got home and taste-tested all of my swap booty, these were the clear winners.
I added them to my cookie list for this year, and I'm really glad I did -- they're amazing, sinfully rich and fudgy and delicious, with the espresso serving to deepen the chocolate flavor even more. These cookies would be on Santa's naughty list for sure, 'cause they're simply decadent. :)
Espresso Fudge Cookies
Adapted from a recipe from Love & Olive Oil via @talkanatalka
3 ounces unsweetened chocolate, chopped
2 c semisweet chocolate chips
8 tbsp butter, cut into pieces
3 eggs
1 c plus 2 tbsp sugar
2 tsp instant espresso powder
3/4 c flour
Heaping 1/4 tsp baking powder
1/4 tsp salt
1. In a microwavable bowl, melt the unsweetened chocolate, 1 cup of semisweet chocolate and butter (do not overcook -- microwave it for a minute or 30 seconds or so, stir and repeat until just melted).
2. In a separate bowl, whisk together the flour, baking powder and salt.
3. In another, large bowl, beat the eggs, sugar and espresso powder on high until very thick and pale. Beat in the chocolate mixture, then beat in the flour mixture until just combined. Stir in the remaining chocolate chips.
4. Drop heaping tablespoons about 2 inches apart on a cookie sheet.
5. Bake at 350 degrees for 10 minutes, until puffed and cracked on top. Cool on the pan for 1 minute, then remove to a cooling rack.
Saturday, December 17, 2011
Russian teacakes
I remember eating these as a kid, when my mom would buy packaged ones at the grocery store. But years later, we stopped being able to find them at the store anymore, and when I got into baking, I decided to make some myself.
The problem was, I couldn't remember what they were called, and every recipe I found that sounded similar had a different name -- Russian teacakes? Mexican wedding cookies? Something like these, it seemed, was what I was looking for, but I distinctly remembered the cashews. I also remembered calling them Russian teacakes, though, which is what I continue to call them to this day, even though the recipes I turned up for those weren't quite the same. So I adapted a Russian teacake recipe to produce this one, which is pretty much like what I remembered eating as a kid.
Of course, now, just to add further confusion, I've been coming across "cashew nougats" at the grocery store, and they look similar to, if not the same as, the ones from my childhood. So maybe they've brought them back. Or maybe this is just another layer of confusion. Whatever -- I've got my own recipe now. I don't need that packaged stuff.
Russian Teacakes
1 c butter
1 tsp vanilla
6 tbsp confectioners' sugar, plus a lot more for rolling
2 c flour
1 c chopped cashews
1. Melt the butter and mix in the vanilla. Add in the confectioners' sugar and flour and mix until blended. Mix in the nuts. Chill.
2. Carefully break off bits of the dough (it will probably be crumbly) and form into 1-inch balls, placing them on a cookie sheet (these won't spread, so spacing doesn't matter much).
3. Bake at 350 degrees for 12 minutes, until they are a bit dry-looking and just slightly browned on the bottoms.
4. Immediately roll in confectioners' sugar. Let cool, then roll in sugar a second time.
Labels:
cookies
Friday, December 16, 2011
White chocolate-clementine cookies
Sometimes, you buy ingredients for a recipe. And sometimes, you find a recipe to rationalize buying the ingredients. :) That was what happened here: There was a sale on boxes of clementines at the store, and I wanted to take advantage, but did I really need to buy a box of clementines, honestly? Well, no... unless... unless I used them for one of my Christmas cookies! Yeah, that's it!
So I Googled around a bit, and I found this recipe, which was even better because it also has white chocolate, and I had a few bags of white chips lying around. They came out... well, not bad, but the baking directions weren't terribly accurate, I don't think. But with a little fussing, they came out alright, fairly tasty, though with so many great cookie recipes out there, I don't know whether I'd make this one again. Maybe I would if I wanted to justify buying clementines again, though. :)
White Chocolate-Clementine Cookies
Adapted from a recipe at Hot Polka Dot
1 c butter, softened
1 c sugar
2 tbsp clementine zest
2 tbsp clementine juice
2 eggs
1/2 tsp baking soda
1/2 tsp baking powder
1 tsp salt
2 1/2 c flour
2 c white chocolate chips
1. Beat together the butter and sugar until fluffy. Beat in the clementine juice, zest and eggs.
2. In another bowl, whisk together the baking soda, baking powder, salt and flour. Beat this mixture into the wet ingredients.
3. Stir in the chocolate chips.
4. Drop rounded tablespoons of dough an inch or so apart on a cookie sheet.
5. Bake at 350 degrees for about 15 minutes, until they are browned around the edges and don't look wet in the centers. Cool on a rack.
Thursday, December 15, 2011
Maple-walnut fudge
You know I can never do things the shortcut way. And I had a whole bunch of maple syrup in the house from a trip to Vermont a while back -- real maple syrup, not the fake Aunt Jemima stuff. So I couldn't just use one of those fudge recipes with chocolate chips in it, or marshmallows, oh no. I had to make candy from scratch, boil sugar and create fudge.
This came out pretty tasty, but I think I overbeat it a little, 'cause I was paranoid about not beating it enough -- it was a little on the firm side, a little leaning toward maple candy instead of creamy maple fudge. I'd try making it again, though, and just stop beating it a little sooner.
Maple-Walnut Fudge
Adapted from a recipe on Food.com
1 1/2 c maple syrup
Scant 1 3/4 c sugar
1 tbsp corn syrup
2/3 c heavy cream
1/4 tsp salt
1/4 c butter, cut into pieces
1 tsp vanilla
1 c chopped walnuts
1. Line an 8-by-8 pan with foil, then liberally grease/butter/spray the foil.
2. Place the maple syrup, sugar, corn syrup, cream and salt in a decent-sized saucepan. Stir or whisk together, then put the spoon/whisk away -- you won't need it again.
3. Get the butter and vanilla ready in a small dish or cup. Get the walnuts all measured out and ready, too. Once you start this, you don't want to be fumbling for ingredients. Get the mixer out, too, and a really big mixing bowl, so you don't have to stop and get them out later.
4. Put your saucepan on medium to medium-high heat and place a candy thermometer in the pan. Bring the mixture to a boil and drop the heat so it's just high enough to stay at a boil. Cook until the thermometer reads 238 degrees (or soft-ball stage -- an extra degree or two won't kill you, though any more than that might).
5. Turn off the heat, let the pan sit a second, then pour the contents into the bowl. Add the butter and the vanilla, then start to beat the mixture. Beat until thickened and lighter in color and no longer glossy.
6. Stir in the nuts and spread in the prepared pan. Let sit until cooled.
Tuesday, December 13, 2011
Snickerdoodles
It's cookie time!
I love December, 'cause it gives me an excuse to make lots and lots of different cookies, at least some of which must always be kinds I've never tried before. I started off with these snickerdoodles as a warmup, a prelude to the full-on Cookie Weekend that I just wrapped up (whew!). And I'm kicking myself now, because I should've been making these for years, and instead, I only made them for the first time this holiday cookie season. They're really, really good, and they make the house smell awesome -- so awesome, in fact, that my boyfriend was roused out of bed by the smell, at 1 a.m., powerless to resist eating one, even though he was nearly asleep. :)
I'll be blogging the rest of what I made on Cookie Weekend as I get the time. For now, enjoy this one, and do make it -- it's delicious, it's not hard and you probably have everything in the house already, except maybe the cream of tartar.
Snickerdoodles
From "Baking Illustrated"
2 1/4 c flour
2 tsp cream of tartar
1 tsp baking soda
1/2 tsp salt
12 tbsp butter, softened
1/4 c shortening
1 1/2 c sugar
2 eggs
3 tbsp sugar
1 tbsp cinnamon
1. Whisk together the flour, cream of tartar, baking soda and salt and set aside.
2. In a large bowl, beat together the butter, shortening and 1 1/2 cups of sugar until combined. Beat in the eggs, then the dry ingredients until combined.
3. Mix together the 3 tablespoons of sugar and cinnamon in a wide bowl.
4. Roll the dough into balls, a heaping tablespoon at a time. Roll the balls in the cinnamon sugar and space about 2 inches apart on a baking sheet.
5. Bake about 10 minutes at 400 degrees, until the edges are beginning to set and the centers are soft and puffy. Let cool on pan 2 to 3 minutes, then move to a rack to cool.
Sunday, December 4, 2011
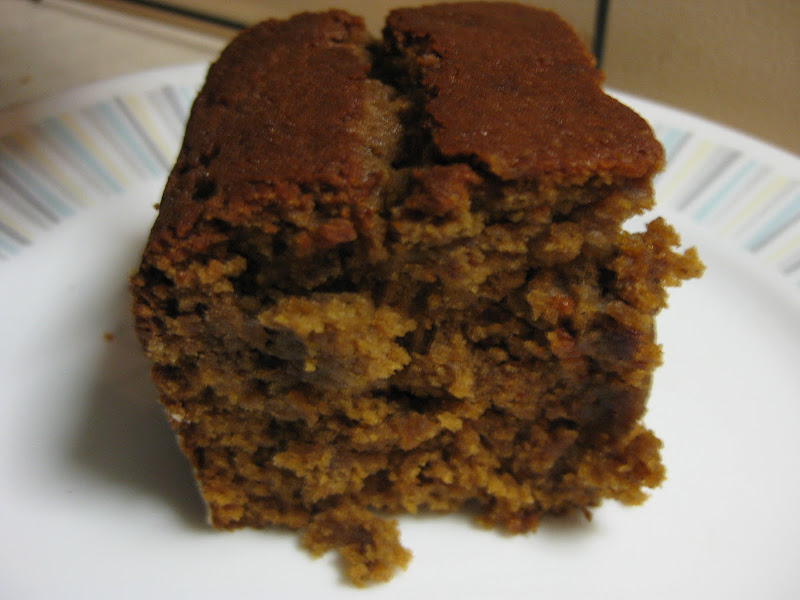
Gingerbread cake
'Tis the season for deliciousness -- the sweet peppermint of candy canes, the melty sweetness of chocolate and of course, spice-laden baked goods, like that most classic of holiday cookies, gingerbread. But why should the drool-inducing combination of spices and molasses and sugar be saved for just cookies? After all, gingerbread started as, well, bread, a quick bread, more cake than cookie.
This stuff was really good and highly addictive. I totally recommend it, especially if you really crave gingerbread but don't feel like doing the work of making cookie dough, rolling it out, cutting it and so forth -- this cake comes together in just minutes.
Gingerbread Cake
From "Baking Illustrated"
2 1/4 c flour
1/2 tsp baking soda
1/2 tsp salt
2 tsp ground ginger
1 tsp cinnamon
1/2 tsp cloves
1/2 tsp nutmeg
1/2 tsp allspice
1 tsp cocoa
8 tbsp butter, melted and cooled
3/4 c molasses
3/4 c sugar
1/2 c buttermilk
1/2 c milk
1 egg
1. Grease and flour a 9-by-9 or 11-by-7 pan.
2. Whisk together all of the dry ingredients and set aside.
3. Beat together all of the wet ingredients in a large bowl. Beat in the dry ingredients until the batter is smooth and thick.
4. Scrape the batter into the pan and bake at 350 degrees for about 40 minutes, until the top springs back when lightly touched and the edges pull away from the pan sides. (I used the toothpick test, which seemed to work alright, too.)
5. Cool in pan on a wire rack for at least 10 minutes. Serve warm or at room temperature.
Subscribe to:
Posts (Atom)