Tuesday, March 20, 2012

Out of the Kitchen: Albany Cupcake-Off

I think it's time to acknowledge that sometimes, interesting food-related stuff happens that's not directly tied to me baking something. And so, I've added a new entry tag: "Out of the Kitchen." And I can't think of a better way to start off my non-recipe entries (of which I assure you there won't be a whole lot -- this will still be primarily a baking blog) than with an event I was part of today: a blind tasting of area cupcakeries' offerings.

The competition has been pretty fierce around here between the four major cupcake bakeries. There's Coccadotts, best known as either the people who failed miserably on "Cupcake Wars" (and got a lot of flack afterwards for it) or the people who recently got a lot of publicity for making Buffalo wing cupcakes. There's Bettie's, which you can't miss, with their multiple outlets (at least three, last I knew) and two cupcake trucks and massive publicity everywhere you go. There's Sweet Temptations, now in two locations and with one truck. And there's Fluffalicious, which started out as a truck and only recently opened a shop of their own.

But while all of them have their fans and detractors, who really has the best cupcake? I was determined to find out, and after planting a bug in the ear of the Profussor, who has set up quite a few head-to-head food comparisons like this, we had our answer.

Many precautions were taken, because the cupcake business can be cutthroat around here. The orders were placed anonymously, just an order for a party or something, no mention given of our true intent. All participants were sworn to secrecy, not allowed to say anything about the event in public in case a bakery were to find out and somehow game the system, make sure that we had extra-good cupcakes just for us, when what we wanted was to find a fair answer: If you walked into one of these places off the street, right now, where would you get the best cupcake? And to remove our own biases, we tested them blind, with only a few organizers on the other end of the room knowing whose cakes went on plates labeled A, B, C and D.

At high noon, we gathered and prepared for the tasting, which included water and cold milk to wash down the cakes.

Milk and water

First up was the vanilla round: Yellow cupcakes with vanilla frosting.

Round 1, Vanilla/vanilla

Cupcake A stood out for being almost shortcake-like, with a whipped-cream-like, non-gritty frosting that had a pleasant vanilla flavor and a fairly good cake. Cupcake D's frosting wasn't so good, awfully greasy-tasting, but their cake was buttery and moist and delicious.

Meanwhile, Cupcake C's frosting tasted chemical-y and buttery in the bad way, like a stick of butter, while their cake tasted mostly like cake flour, like the chemicals used to give cake flour its texture. And Cupcake B was just wretched -- the frosting tasted like Crisco and chemicals, and the cake was about the same, artificial-tasting and just awful. Even the sprinkles were bad; for some odd reason, they tasted like black pepper. You could actually do a little better to buy a box of cheap cake mix and a jar of frosting at the grocery store than to eat this one. We also noticed that B was the smallest cupcake, but considering how bad it was, that might've been a blessing.

So much for "yay, we get to eat cupcakes!" Clearly, they were not all created equal. Onward to round two: Chocolate cakes with chocolate frosting.

Round 2, Chocolate/chocolate

Again, A stood out, this time for being the only one that tasted like chocolate: the frosting had a clear cocoa taste, while the cake also tasted like chocolate cake. D was so-so, not offensive but not chocolate-y, either. C's frosting had a hard crust on top, like it had been sitting around for a while, and its cake was even worse: it was beyond dry into full-on tough, actually hard for me to cut through with a knife, and it tasted about the same, dry and awful. But B was again the worst, tasting like chemicals and grease instead of like cake.

Round three was the specialty-flavor round, and we went with the most popular one across all four shops: Peanut butter cup.

Round 3, Peanut butter cup

A faltered a bit in this round -- it was pretty much the same as the chocolate/chocolate one in the previous round, except for a scant peanut butter filling (which I think was tasty, but I can't be sure 'cause there was so little of it). C actually redeemed itself a little bit here, 'cause while their cake was again very dry and lacking in flavor, the frosting was the best of the bunch, very peanut-y. D was slightly peanut-y in the frosting but sort of greasy and overall unimpressive. And B, well, by this point, I actually resented that I had to put this in my mouth, and when I got a taste of their frosting, I actually made a face -- again, it was all Crisco and chemicals, as was the cake.

You shouldn't actually dread eating a cupcake, but with bakery B's, I did. They were so bad, across the board, so chemical-y and artificial-tasting and lacking in any good flavor at all, that I was actually offended by them. How does bakery B get away with selling these? How do they have the nerve to charge people money for such wretchedly bad cupcakes? Don't they have any taste buds to know how much theirs suck? Do they have no shame?

After much eating and thinking, we turned in our score sheets, and then, we were told the identities of the bakeries we'd been eating from...

The cupcake carnage

Bakery A was Fluffalicious.
Bakery D, which I'd say was my second-favorite (and my favorite yellow cake), was Coccadotts.
Bakery C was Bettie's.
Bakery B was Sweet Temptations.

After the big reveal, the ratings of bakery C made sense to me, 'cause I have tried their cupcakes a couple of times and have always found them to be very dry and not very good in flavor (which is why I stopped eating theirs). I was open to them being the winner, because it was a blind test and I could've been surprised, but I wasn't -- all of the added locations and cute pink ads and double-decker buses in the world can't save a dry, lousy cupcake.

As for Sweet Temptations, I just don't understand how someone can run a shop specializing in cupcakes and make ones that are that horribly bad, then put their name on them and charge people money for them. They were just that bad. I mean, before they opened, didn't they ever eat a cupcake before, ever notice that they're not supposed to taste like grease and chemicals? How do they have the nerve to sell this crap? As for the second obvious question, why do people buy them, I'd guess it's simply because they have no basis for comparison at the time, because it's a cupcake, if not a good cupcake. For that matter, I've eaten one of their cakes before, and I don't remember it being so bad, but not good, either. I almost think it's one of those things where if you buy one of theirs and think, "gee, this isn't very good," you might second-guess yourself, "but they're cupcake bakers, this is what they do, they're professionals... maybe I'm just not appreciating the goodness of this cupcake, 'cause if they run a cupcake shop, they must make good cakes, right?"

(Further reading: The Profussor's recap with scoring breakdowns.)

Friday, March 16, 2012

Cream cheese brownies

Cream cheese brownies

This was supposed to be a crowd-pleasing St. Patrick's Day recipe.

See, I knew the scones wouldn't go over all that well, being as authentic (read: kinda bland) as they were. So when I came across this recipe, I figured the week before St. Patrick's Day would be a good time for some totally inauthentic baking, too. And who doesn't love Irish cream? Heck, who doesn't love boozy baked goods?

Except that the Baileys doesn't come across here, not that I can taste, and I can usually pick up liquor flavors very easily. All I taste is a cream cheese-swirled brownie, a pretty darn good one, I must say, so I'd totally recommend this recipe, but I didn't get any Irish out of these at all, just yummy chocolate and cheesecake flavors. Maybe it needs more Baileys -- that might be worth trying. Or you could just appreciate these for what they are, which isn't Irish but is still delicious.

Cream Cheese Brownies
Adapted from Wee Kitchen


1 c butter
4 ounces unsweetened chocolate
2 c sugar
4 eggs
1 1/2 c flour
1/2 tsp salt

16 ounces cream cheese
1/3 c sugar
1 egg
3 tbsp Baileys Irish Cream

1. Melt the butter and chocolate together (I use the microwave, stopping to stir occasionally). Stir to combine and set aside.
2. Beat the sugar and eggs together until fluffy.
3. Whisk together the flour and salt, then beat a bit at a time into the sugar mixture. Fold in the chocolate mixture.
4. Beat together the cream cheese and sugar, then beat in the egg and Irish cream.
5. In a greased 9-by-13 pan, pour half of the brownie batter, then all of the cream cheese, spreading it out over the whole pan, then the rest of the brownie batter. Swirl together with a knife.
6. Bake at 350 degrees for 40 minutes. Let cool before cutting.

Thursday, March 15, 2012

Irish scones

Irish scones

With St. Patrick's Day approaching, I thought it was time to try something from an Irish cookbook I picked up some time ago. The book promises authentic Irish recipes, collected from cooks across Ireland. And for the most part, it delivered -- these taste how authentic scones have always been described -- not sweet, not salty like biscuits, actually rather bland in flavor, a peasant concoction that's best as a carrier for jam.

I might make these again, and they definitely get points for authenticity, but to my American palate, they really could've used some salt (there isn't any at all in the recipe). Next time, I might make a more common, biscuit-like recipe instead, 'cause like many foods from my heritage (see also black pudding/kishka, steak and kidney pie, haggis, etc.), just because it's what my ancestors ate doesn't mean that I've inherited a taste for it.

Irish Scones
Adapted slightly from "The Country Cooking of Ireland"

6 1/4 c flour
1/2 c sugar
2 tsp baking soda
1 c butter, cut into pieces, cold
3/4 c currants or raisins
1 3/4 c milk
1 egg

1. Mix the flour, sugar and baking soda together in a large bowl. Cut in the butter until the mixture resembles coarse meal. Stir in the currants or raisins, then add the milk and stir just until the dough comes together. (This totally didn't work for me -- I ended up dumping it all out onto a floured counter and kneading it together, 'cause it just couldn't be mixed in a bowl.) Form into a rough ball.
2. Divide into 2 pieces and form each into a ball. Arrange on parchment-lined cookie sheets at least an inch apart.
3. Beat together the egg and a teaspoon of water and brush the tops of the dough balls.
4. Bake at 400 degrees for 30 to 35 minutes, until golden brown. Remove to a rack to cool.

Friday, February 24, 2012

Banana-butterscotch muffins

Banana-butterscotch muffin

Sometimes, when you've stopped looking for something is when you find it.

I'd been looking for a good banana recipe for some time now, banana bread or banana muffins, there's not a huge difference. But I'd sort of given up on that, put it on the back burner and focused on other things. And then, my fiancé decided to clean out the freezer the other day, and I noticed how many bananas had piled up in there, quite a few of them no longer good, I'm sure, but some of them I knew I'd only put in there a few weeks ago.

Meanwhile, I'd already noticed that the giant pile of bags of baking chips had been sitting there in the pantry, mocking me, and I'd pulled out a bag of peanut butter chips and opened them, nibbling on a few here and there. So when I saw the pile of bananas needing to be used up, I thought, why not look around for a peanut butter-banana something, a muffin or cookie or somesuch?

Of course, once I'd settled on this recipe, I realized that while I have one bag of peanut butter chips, I have four bags of butterscotch chips, and they're all set to expire in October, meaning that I have to use them up between now and then. (In case you're curious, the reason why I have four bags of butterscotch chips to use up is that I was stockpiling them when they were on sale for a baking project that was supposed to happen in January... but it got postponed until next spring, far past when the chips need to be used. So much for planning ahead.)

But it all worked out for the best, 'cause really, butterscotch is only a few steps away from caramel or brown sugar, flavor-wise, and those are the sorts of flavors that pair nicely with banana. These came out even yummier than I'd hoped for, and they filled this house with a sweet, almost pancake-y aroma. Plus, not only is the pairing of banana and butterscotch a good one, but the muffin recipe itself is a keeper, very moist and light and delicious. :)

Banana-Butterscotch Muffins
Adapted from Fun & Fearless in Beantown

1 1/2 c flour
2/3 c sugar
1 1/2 tsp baking powder
1/4 tsp salt
1/4 tsp cinnamon
2 bananas
1/2 c butter
1/4 c buttermilk
1 tsp vanilla
1 egg
3/4 c butterscotch chips (or peanut butter, or chocolate, or nuts, whatever)

1. Whisk together the flour, sugar, baking powder, salt and cinnamon. Set aside.
2. In another, good-sized bowl, microwave the bananas and the butter until the butter melts, then mash together until it's as smooth as you can get it. Stir in the buttermilk and vanilla, then the egg, then the dry ingredients. Mix in the butterscotch chips.
3. Divide evenly among 12 greased muffin cups. Bake at 350 degrees for 20 to 25 minutes, until they are golden and a toothpick inserted in the centers comes out clean. Cool for a few minutes in the pan, then remove onto a cooling rack.

Tuesday, February 14, 2012

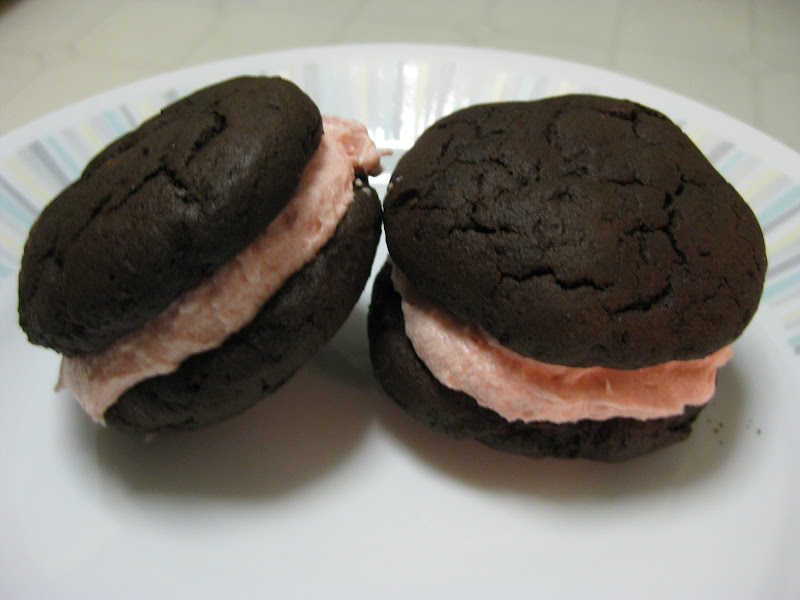
Chocolate-strawberry whoopie pies

Chocolate-strawberry whoopie pies

It's Valentine's Day eve, and I now own a wedding dress! The wedding planning is humming along quite nicely -- but I haven't neglected the kitchen, fret not. In fact, I couldn't let Valentine's Day pass without one more chocolate recipe, so when I saw a recipe for a raspberry-filled whoopie pie, well, that seemed perfect, especially since I'd been meaning to try my hand at whoopie pies for quite some time (they're the latest baking trend, y'know). What better time for making whoopie (pies) than Valentine's Day? ;)

Of course, I couldn't leave the recipe alone, not when I have lots of fresh-picked-in-season strawberries stashed in the freezer that need to be used up. Plus, the cake part of the 'pies looked a little flat in photo that went with the original recipe -- why not sub in another cake recipe that looked much more promising?

The only major problem I ended up having with these was that as often happens, I ended up with way too much buttercream (and the original recipe's yield actually indicated that I wouldn't have enough). Next time, I might half that recipe.

These came out really delicious, though, like a cakey version of a chocolate-covered strawberry. I'm sure your Valentine would really appreciate them. I know mine will -- he loves anything strawberry. :)

Chocolate-Strawberry Whoopie Pies
Adapted from this recipe, with a version of this filling, both from Baking Bites

2 c flour
1 c cocoa
Scant 1/2 tsp salt
1/2 c butter, softened
1 c sugar
1 egg yolk
1 tsp vanilla
1 tsp baking soda
1/2 c hot water
1/2 c buttermilk

1 c butter, softened
1/4 c strawberry puree (blend berries until no chunks remain, then pass through a sieve)
1 tbsp milk
1 tsp vanilla
3 c confectioners’ sugar

1. Whisk together the flour, cocoa and salt and set aside.
2. Beat together the butter and sugar, then beat in the egg yolk and vanilla.
3. Combine the baking soda and hot water.
4. Into the butter mixture, stir in a third of the hot water, a third of the buttermilk and a third of the flour mixture, stirring after each addition. Repeat until everything is mixed in.
5. Form into 1-inch balls and place on a parchment-lined cookie sheet. Press down on each to flatten.
6. Bake at 400 degrees for about 6 minutes, until the tops are cracked and the cakes look set. Remove to racks to cool.
7. Beat the butter, then beat in the milk, vanilla and strawberry puree. Beat in the confectioners' sugar until combined, then beat on high until fluffy. Sandwich between the cooled cakes.

Saturday, February 11, 2012

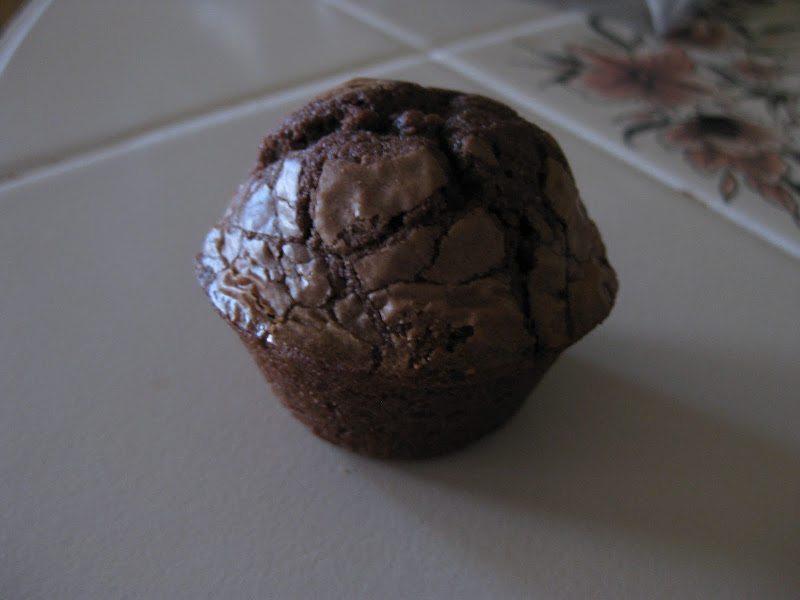
Nutella brownie bites

Nutella brownie bites

It's so hard to find the time to bake and blog when you're caught up in a whirlwind of wedding planning. But that doesn't mean I don't still love to do it, and so, when I came across this recipe on Pinterest for three-ingredient Nutella brownie bites (so quick, so simple!), I had to try it. After all, I've had a craving for chocolate and brownies for weeks, because Valentine's Day is approaching, so this was perfect... and a perfect excuse to buy a jar of Nutella, of course. :)

My verdict on these is that while they were indeed quick and easy, I'm not sure if they were worth the amount of Nutella used in them. If you want a nutty-tasting brownie, go for it, but some of the fudginess of the Nutella gets lost in this recipe, so they're more nutty than chocolatey. They're not bad by any stretch, and they're sure worth the tiny amount of effort that goes into them, but I think I'd rather make a more chocolatey brownie and save the Nutella for eating straight from the jar, myself.

Nutella Brownie Bites
Adapted from a Savory Sweet Life recipe

1 c Nutella
2 eggs
10 tbsp flour

1. Mix together the Nutella and the eggs until well combined. Stir in the flour until blended.
2. Spoon into a greased mini-muffin tin.
3. Bake at 350 degrees for about 10-12 minutes, until a toothpick comes out with crumbs clinging to it. De-pan, cool and serve.

Friday, January 27, 2012

Gingersnaps

Gingersnaps

It's hard to find the time to blog when you're planning a wedding. Truth be told, I haven't been baking much lately, either. But when I found this recipe in a recent issue of "Cooks Illustrated," I had to make it, especially when I found out that my fiancé had never had gingersnaps. Really? Never? No, never. He never had the experience of sitting in front of the TV after school, dunking gingersnaps into a glass of milk until they go all soft, but timing it so that you don't leave them in that one extra second that makes the dunked part fall off into the milk.

We had to fix that, of course. :) And these came out just as good as, if not better than, the ones in a box that I grew up eating. I will warn you, though, that this recipe makes a ton of cookies, so you might want to think about who's going to get a gift of gingery goodness before you make them. :)

Gingersnaps
From "Cooks Illustrated"

2 1/2 c flour
2 tsp baking soda
1/2 tsp salt
12 tbsp butter
2 tbsp ground ginger
1 tsp cinnamon
1/4 tsp cloves
1/4 tsp pepper
Pinch of cayenne pepper
1 1/4 c dark brown sugar
1/4 c molasses
2 tbsp grated fresh ginger
1 egg and 1 egg yolk
1/2 c sugar

1. Whisk together the flour, baking soda and salt. Set aside.
2. Heat the butter in a skillet or saucepan until melted, then continue to cook on medium-low heat until foaming subsides and butter is just beginning to brown.
3. Pour butter into a large bowl and whisk in the ground ginger, cinnamon, cloves, pepper and cayenne pepper. Cool slightly, then add the brown sugar, molasses and fresh ginger. Then, whisk in the egg and yolk.
4. Add the flour mixture and stir just until combined.
5. Cover bowl with plastic wrap and chill until firm.
6. Roll into 1-inch balls, then roll in sugar to coat. Place on a parchment-lined baking sheet, about 20 per sheet.
7. Bake at 300 degrees on the top rack of the oven for 15 minutes. Then, move to the lower rack, place the next sheet of dough balls on the top rack and bake 10 to 12 minutes, until the cookies on the lower rack just begin to darken around the edges. Remove the lower sheet and move the top sheet to the bottom for about 15 to 17 minutes, until done. Repeat with remaining pans of dough balls.
8. Cool completely on a rack before serving. (Cookies are best enjoyed with a cup of milk or hot tea.)

Tuesday, January 3, 2012

Vanilla cupcakes

Vanilla cupcake

Cupcake, where have you been all my life?

I've been looking for ages for a cake like this. You'd think that a basic vanilla cake would be easy, but no, it's the simple things that are the hardest -- every recipe I've ever tried either came out heavy and flavorless or tasted like chemicals. (Any recipe that uses cake flour is a non-starter for me, 'cause it just tastes bad.) Every attempt gave me another moment of weakness, another time when I thought that maybe I should just stick with boxed mixes -- somehow, they get it right, flavor-wise at least.

Fast-forward to this June, and I found myself in New York City on my birthday, in need of some cake, 'cause hey, what's a birthday without cake? I decided to try the much-talked-about Magnolia Bakery, and I got a vanilla cupcake with chocolate frosting. And it was awesome. Well, great, it's easy enough to like someone else's cake, but what about mine? Well, lucky me, Magnolia has a cookbook (multiple ones, in fact). And lucky me, my then-boyfriend's sister (we're engaged now, eeeee! :) ) got me one of those cookbooks as a belated birthday present. :)

And yet somehow, amid all of the cookie-baking, I didn't find a good opportunity for cupcake-baking until right before Christmas, when I was supposed to be bringing a desert to a Christmas party, and I'd decided to bring chocolate cupcakes, 'cause my honey's nephew had asked for them and I'd promised. The more I thought about it, the more I saw this as an opportunity to try out the Magnolia recipe and please the non-chocolate-lovers (there are always a few) at the same time.

The results were promising. In my opinion, the frosting was too sweet, overpowering the cake. But the cake itself, eaten alone, was delicious Yay, vanilla cake win! I'll definitely make this cake again, but next time, I'll probably use the chocolate Swiss meringue buttercream from the chocolate cupcakes. I always like yellow cake with chocolate frosting better, anyway. :)

Vanilla Cupcakes
From "The Complete Magnolia Bakery Cookbook"

1 1/2 c self-rising flour (I doubled this recipe, rather than buy a special flour)
1 1/4 c regular all-purpose flour
1 c butter, softened
2 c sugar
4 eggs
1 c milk
1 tsp vanilla

1 c butter, softened
6-8 c confectioners' sugar
1/2 c milk
2 tsp vanilla

1. Whisk together the flours and set aside.
2. Pour the milk and vanilla together in a large cup.
3. Cream together the butter and sugar until fluffy. Beat in the eggs, one at a time. Then, beat in the dry ingredients and the milk mixture, alternating between them, until just combined.
4. Spoon into 24 cupcake papers. Bake for 20-25 minutes, until a toothpick inserted in the centers comes out clean. Cool 15 minutes in the pans, then remove and cool on a rack.
5. Beat together the butter, 4 cups of the confectioners' sugar and the milk and vanilla. Gradually beat in the remaining sugar. Frost cupcakes.

Friday, December 30, 2011

Triple-chocolate cupcakes

Triple-chocolate cupcake

The holidays are over, mostly... but it's never a bad time for chocolate, right? Especially sinfully rich, dark, fudgy goodness. And especially when all of that is packaged in a deceptively cute cupcake.

This one takes a bit of work, but it's totally worth it if you're a serious chocolate lover. Also, one big, blinking caution light: This recipe yields 12 cupcakes. Twelve. Just 12. So you'll probably want to double it.

Triple-Chocolate Cupcakes
From "Cooks Illustrated

Ganache:
2 ounces bittersweet chocolate
1/4 c heavy cream
1 tbsp confectioners' sugar

Cake:
3 ounces bittersweet chocolate
1/3 c cocoa
3/4 c hot coffee
3/4 c bread flour
3/4 c sugar
1/2 tsp salt
1/2 tsp baking soda
6 tbsp oil
2 eggs
2 tsp white vinegar
1 tsp vanilla

Swiss meringue buttercream:
1/3 c sugar
2 egg whites
Pinch of salt
12 tbsp butter, cut into pieces
6 ounces bittersweet chocolate, melted and cooled
1/2 tsp vanilla

1. Make the ganache: Place the chocolate, cream and confectioners' sugar in a bowl and microwave until melted together, stirring frequently. Chill about 30 minutes, just until firm.
2. Place chocolate and cocoa in a large bowl and pour in the hot coffee, whisking until melted and smooth. Chill until cooled.
3. Whisk in the oil, eggs, vinegar and vanilla.
4. In another bowl, whisk together the flour, sugar, salt and baking soda. Whisk into the wet ingredients.
5. Divide batter evenly among paper-lined muffin cups. Onto each, drop one rounded teaspoon of ganache.
6. Bake at 350 degrees for 17 to 19 minutes, until set and just firm to the touch. Cool in the pan about 10 minutes, then remove and cool on a rack.
7. Combine the sugar, egg whites and salt in a bowl and place it atop a pan of simmering water. Whisk gently and constantly until the mixture is slightly thickened and reaches 150 degrees.
8. Pour into a larger bowl (if you're using a small one) and beat with a mixer until the consistency of shaving cream.
9. Beat in the butter one piece at a time. At some point, it will start to look curdled. Do not panic! Just keep beating it and adding the butter; it will come together eventually.
10. Beat in the melted chocolate and the vanilla. Beat on medium-high until light and fluffy. Frost cupcakes.

Tuesday, December 20, 2011

Mexican hot chocolate cookies

Mexican hot chocolate cookies

I just had to get fancy, didn't I?

The annual cookie contest was coming up at work, and I was mulling over my options. Snickerdoodles? Or maybe this new recipe I had for espresso fudge cookies? Neither looked terribly difficult, just make dough and put it on the pan and bake it.

But no. I couldn't take the easy way out, now, could I? I had to find a recipe that was way fancier, way more difficult, too, 'cause tasting good apparently wasn't enough for me. I couldn't just bring in a delicious cookie. I had to wow them.

And this is how I found myself in the kitchen at 1:30 a.m., swearing profusely, every surface and utensil (and of course my fingers, on both hands, somehow) sticky with dulce de leche, the pastry tips clogged, the counter covered in almond bits. Bleh. I spent hours on these damn cookies, and I'm sure that at least two curse words were said for every damn cookie that resulted.

And to add insult to injury, I didn't even win the damn contest. The winner was someone who made cookies into ice cream sandwiches. I thought this was a cookie contest, not an ice cream (with cookies added to the outsides) contest, but oh, silly me. (My boyfriend, upon hearing of this, suggested that next year, I should make a layer cake with tiny cookies as garnish. Fair point, I think.)

But anyway. *ahem* These cookies did come out really good, after all of that work. I might even make them again, now that I've learned a few things about them, though not at 1 a.m. this time. They're a very complexly flavored cookie, cinnamon-chocolate with a hint of black pepper and cayenne, a little sweetness and a bit of crunch. They're sort of addictive, really. And they look impressive on a cookie tray (assuming you can display them in a way that they won't stick together).

Mexican Hot Chocolate Cookies
Adapted from a Food Network recipe, with help from Cooking for Engineers

1 c flour
1/2 c plus 1 tbsp unsweetened Mexican cocoa powder (or substitute by adding 3/4 tsp cinnamon to unsweetened cocoa powder)
1/4 tsp baking soda
1/4 tsp salt
1/2 c plus 1 tbsp light brown sugar
1/2 c plus 1 tbsp sugar
3 tbsp butter, softened
3 tbsp margarine (yes, margarine, do not substitute)
1/2 tbsp cinnamon
Generous pinch black pepper
Generous pinch cayenne pepper
1 tsp vanilla extract
1 egg white
1 can sweetened condensed milk
Chopped almonds

1. Whisk together the flour, Mexican cocoa powder, baking soda and salt. Set aside.
2. Mix together the sugars in a large bowl, making sure that there aren't any lumps. Beat together with the butter and margarine. Beat in the cinnamon, peppers and vanilla, then the egg white. Beat in the flour mixture until incorporated.
3. Press together into a neat log about an inch and a half in diameter, then wrap in plastic wrap and chill.
4. Slice about a quarter-inch thick, place rounds on a cookie sheet an inch apart and bake at 350 degrees for 12 minutes. Remove from pans and cool on a rack.
5. Make dulce de leche: Some people will tell you to just boil the entire can in a pot of water, and that sounds great if you've got four hours. Me, I took the shortcut method: Pour the contents of the can into a huge bowl, the biggest one that you can use in your microwave -- it will look like overkill, but this stuff will swell up a ton, trust me. Then, cook on medium (NOT high, MEDIUM) for 2 minutes at a time, whisking in between, until thickened and caramel-y. If it gets too thick, you can whisk in a bit of water to loosen it up.
6. Spoon the dulce de leche into a pastry bag with a somewhat small round tip, or spoon it into a zip-top bag and snip the corner off. Drizzle the dulce de leche onto the cookies.
7. Sprinkle with chopped almonds, pressing them into the dulce de leche a bit so they stick.