Thursday, March 31, 2011

Chocolate toffee cracker bark

Chocolate toffee cracker bark

Yay, I made something candy-based and I didn't screw it up!

I always worry when I try to make something that involves cooking sugar in a saucepan. I'm sure I'll burn it, and in the process, I end up leaving it gritty, which isn't good, either. But this time, I got it right. I can heartily recommend this recipe for people who are paranoid about candy-making, 'cause despite my worrying that the toffee wouldn't turn out or would burn, and also despite my worrying that it was too liquid when it came out of the oven and surely, the chocolate wouldn't layer properly, it turned out just fine, delicious, in fact, and it didn't even take that long.

Best of all, it was fairly well-received by the coworkers. That's a win-win-win, right there.

Chocolate Toffee Cracker Bark
From Smitten Kitchen

4 to 6 sheets of matzoh, or around 40 Saltines
1 c butter
1 c brown sugar
Pinch of sea salt
1/2 tsp vanilla
1 1/2 c chocolate chips
Sea salt for sprinkling (omit if using Saltines)

1. Line a cookie sheet with foil, then place a sheet of parchment on top of that. Arrange the matzoh or crackers in a single layer covering the entire bottom of the pan.
2. Melt the butter and brown sugar together in a saucepan on medium heat. Once it comes to a boil, cook for 3 minutes, stirring well.
3. Pour the sugar mixture over the crackers, spreading it quickly to cover the crackers evenly before it hardens.
4. Bake at 350 degrees for 10-15 minutes, turning the heat town if the corners start to burn.
5. Take the pan out of the oven and sprinkle the chocolate chips over the top (the toffee will be a bit liquidy still, but it's alright, don't panic). Let the pan sit for 5 minutes, so the chips can melt and the toffee can harden.
6. Spread out the now-melted chips evenly over the crackers, then sprinkle with sea salt.
7. Chill or let sit to harden the chocolate, then break into pieces.

White batter bread

White batter bread

I've been on the lookout lately for a white sandwich bread that doesn't take all day to make. So when I came across this recipe, which promised a bread that only rises once, in the pan, and doesn't even need to be kneaded, I was in.

I was really careful with the yeast, making sure to proof it properly, and after the flat Irish soda bread, I even made sure to let the bread rise plenty, enough that it wouldn't need to have oven spring to be passably tall.

And yet. And yet. Well, it went into the oven the height of the pan... and it came out short. Mind you, it still tastes pretty decent. But it's half-height, and seeing as I followed the directions perfectly, I don't know why. Maybe I'll try this again sometime with a full packet of yeast -- the recipe said to use less, so I did, but y'know, what've I got to lose? Just the ingredients for another loaf, really.

White Batter Bread
Recipe from Smitten Kitchen

1 c warm milk
1 1/8 tsp yeast
1 tbsp sugar
1 tsp salt
2 tbsp butter, melted
2 c flour

1. Proof the yeast in the warm milk with a sprinkling of the sugar.
2. Whisk together the rest of the sugar, salt and butter. Once the yeast is proofed, whisk it into the butter mixture.
3. Stir in the flour, half at a time, until a smooth batter is formed.
4. Pour into a greased 9-by-5 loaf pan. Cover with plastic wrap and let rise for an hour.
5. Preheat oven to 400 degrees. Place pan inside, drop the heat to 375 degrees and bake for 30 minutes.

Wednesday, March 16, 2011

Irish brown soda bread

Irish brown soda bread

While I'm getting in touch with my heritage, I figured I'd move on to another country my people are from: Ireland. This is appropriate, seeing as it's the time of year when St. Patrick's Day rolls around -- I've got a craving for corned beef, so I figured, why not make traditional soda bread for corned beef sandwiches?

That's traditional soda bread, mind you. You may think that soda bread is sweet stuff with raisins in it, but the truth is that while that kind is delicious, it's not traditional. Soda bread, really, is just bread made with baking soda, as opposed to yeast -- it reacts with an acidic ingredient, usually buttermilk, and that reaction makes the bread rise.

I have to say, this recipe's delicious. And it's healthy, too, which is always a plus. And it's easy. The only issue I had was that I overbaked it a bit, again, 'cause I got distracted while it was in the oven. And it didn't rise so much -- but seeing as it's a wheat bread, and hard flours inhibit rising, that makes sense. I might alter the flour ratio a bit next time, just a bit, just to see if I can get a better rise.

Irish Brown Soda Bread
From "Cooking Light"

2 1/2 c wheat flour
1/2 c all-purpose flour
1/2 c steel-cut oats
2 tbsp brown sugar
1 tbsp wheat germ
1 tsp baking soda
1 tsp baking powder
1/2 tsp salt
1 egg, lightly beaten
2 c buttermilk

1. Whisk all of the dry ingredients together in a large bowl.
2. Whisk the egg and buttermilk together in a small bowl, then pour it into the other bowl. Mix until just combined.
3. Spoon into a greased 9-by-5 loaf pan.
4. Bake at 325 degrees for about an hour, until a toothpick inserted in the center comes out clean.
5. De-pan and cool on a rack.

Pączki

Pączki

It's always sad when a family loses their culinary heritage because somebody didn't think to write their recipes down. This happens with a lot of families, including mine -- while my dad remembers his Polish mother making a lot of things, he was a boy, so it never really occurred to him that he should be writing these recipes down. About the only recipe we have from his Polish heritage is pierogi, and that recipe actually came from someone my mom met who was Polish and willing to share her recipe.

Every once in a while, I get the urge to try to rediscover the recipes from my heritage. And so, when I learned that Mardi Gras is actually Pączki Day to the Polish, a day for eating what's basically a Polish doughnut, well, I was up for the challenge.

By the time I was done making these, though, they were pretty much dead to me.

First, I had to buy the ingredients. I found a seemingly authentic recipe, and it called for rum, so a trip to the liquor store was in order. (I couldn't find Polish run, but I figured that once it was baked into something, there's probably no difference anyway.) Then, I found an Eastern European grocery store around here, so I could get cherry jam and powidła (plum butter), which are traditional fillings. (Rose hip jelly would also be traditional, but it only came in huge jars, so that was out.)

And then came the actual baking. I mixed the ingredients together, and I set them aside to rise. And I waited.

And I waited.

And I started consulting friends online, who assured me that eggy, sweet doughs sometimes take longer to rise.

And I waited some more.

And many hours later, I realized that this stuff probably wasn't going to rise. I had followed the recipe to the letter, as I always do when I've never made something before. But the recipe had told me to "soften yeast in warm water," which didn't sound right to me. Perhaps I ought to go with my own experience instead of trusting the recipe so much.

So I started over, this time proofing the yeast properly with a bit of sugar. And oh, what a difference it made. That'll teach me to trust a recipe instead of my own instincts.

One caveat for anyone who tries to make these: This dough is weird. Really weird. Like, you'll think you screwed up, 'cause it starts out in the bowl as a really stick, stringy mess. And then, when you roll it out, well, it's still very sticky and very weird-feeling, very light and delicate and sticky and, well, almost like the Blob, oddly enough -- it oozed out of the bowl.

Overall, I'm glad I tried to make these. They did come out edible, though the last rise didn't rise so well, so they were a bit flat. They tasted decent, though. People seemed to like them. Would I make them again? Eh... I don't know. But I'm glad I tried them.

Pączki (pronounced "pownch-kee," by the way)
From Food.com

12 egg yolks
1 tsp salt
2 envelopes yeast
1/4 c warm water
1/3 c butter, softened
1/2 c sugar
4 1/2 c flour
1/3 c rum
1 c whipping cream, warmed
Jam/preserves/fruit butter
Oil for frying

1. Beat egg yolks and salt together in a small bowl until thick.
2. In another small bowl, combine the yeast and warm water, then sprinkle a few pinches of the sugar over the top. Let sit until foamy.
3. Cream together the butter and sugar in a large bowl until fluffy.
4. Beat in ingredients, in this order: the yeast mixture; a quarter of the flour; the rum; half of the cream; more flour; the rest of the cream; half of the flour that's left; the eggs. Mix in the rest of the flour (you'll probably need a big spoon for this -- I tried using the mixer, and the dough climbed the beaters).
5. Cover the bowl with plastic wrap and let rise in a warm place until doubled.
6. Punch down, cover and let double again.
7. Punch down, dump onto a floured surface and roll to about an inch thick. Cut out 3-inch rounds.
8. Cover and let rise about 20 minutes.
9. Fry in 350-degree oil until golden on both sides, then drain.
10. Dust with powdered sugar while warm, if using. Or let cool, then mix up glaze (see below) and dunk them in to coat, draining on a wire rack until hardened.
11. Cut a slit in the side of each and pipe in the filling.

Doughnut Glaze
1/3 c butter, melted
2 c confectioners' sugar
1 1/2 tsp vanilla
2-4 tbsp hot water

Whisk all ingredients together until combined, adding water if needed to reach the right consistency.

White sandwich bread

White sandwich bread

Bread should be a common food. Bread should be cheap to make and delicious to eat, and most of all, bread should be worth the effort. Too many yeast-raised recipes aren't worth the time and energy, not to mention the intimidation factor, 'cause way too many people are scared to work with yeasted doughs in the first place, afraid that they'll screw them up.

As for yeasted doughs, a little knowledge goes a long way. But that doesn't mean that you have to pick the most difficult recipe to get a good result.

Take this one, for instance. "Baking Illustrated" promised a good, basic white sandwich bread in just a couple of hours. Did it deliver? Well, I'll admit that I may have overbaked it a bit, and I'll admit that perhaps the long-risen kind has a better texture and somewhat more yeasty flavor. Still, this recipe's pretty good, and the savings in time and energy definitely make it worth making again. This might just be the recipe that converts me to becoming a weekly bread-baker.

White Sandwich Bread
From "Baking Illustrated"

3 3/4 c flour, plus more for the counter
2 tsp salt
1 c warm whole milk
1/3 warm water
2 tbsp butter, melted
3 tbsp honey
1 envelope instant (rapid-rise) yeast

1. Turn your oven on to 200 degrees. Let it pre-heat, then, after it's at 200 for a few minutes, turn it off.
2. Meanwhile, whisk 3 1/2 cups of the flour and the salt together in a large bowl.
3. In another bowl, mix together the milk, water, butter and honey. Take the temperature of your mixture if you're not sure what "warm" is -- it should be 110 degrees. Once you've checked the temperature, mix in the yeast.
4. Mix the wet stuff into the dry stuff. If you've got a stand mixer with a dough hook, use it. Me, I used a big wooden spoon and lots of elbow grease. If the dough seems really sticky after you've got it all mixed, add in up to a 1/4 cup of flour.
5. Turn out onto a floured surface and knead until smooth. Form into a ball.
6. Place in a big, lightly oiled bowl. Flip it over, so all of the outside gets a little bit of oil on it. Cover the bowl with plastic wrap, pop it into the warm oven and let it double in size -- this will take 40-50 minutes or so.
7. Take out the dough, turn it out onto your counter and flatten it into a rectangle that's 9 inches wide (the length of your 9-by-5 bread pan). Roll the dough up into a log, starting at one of the 9-inch sides, then pinch the seam closed. Turn it over so it's seam-side down and place it in your greased loaf pan, pressing down so it touches all of the sides and corners of the pan.
8. Cover with plastic wrap and let rise until almost doubled, 20-30 minutes.
9. Heat the oven to 350 degrees and place a small pan of hot water inside (not underneath where your loaf will be).
10. Bake your loaf about 40-50 minutes, until a thermometer reads 195 degrees in the center of the loaf. De-pan and cool on a rack.

Freezer biscuits

Freezer biscuits, baked

Before you get all excited, these are not the perfect biscuits, either. My biscuit quest continues. However, these have become my go-to recipe in the meantime, because they're make-ahead biscuits -- you make them up, you freeze them, and then, when you want biscuits, pop 'em in the oven and you have fresh-baked biscuits, right then, no mixing or measuring required.

They're cream biscuits, granted, so the flavor's a bit different than a buttermilk biscuit. But they're still pretty tasty, and also, they're all cream, no butter, which means no cutting in butter, which makes them even easier.

Freezer Biscuits
From "The Best Make-Ahead Recipe"

6 c flour, plus a little extra for the counter
2 tbsp sugar
2 tbsp baking powder
1 1/2 tsp salt
4 1/2 c heavy cream

1. Whisk all of the dry ingredients together in the biggest bowl you've got.
2. Stir in the cream with a wooden spoon until it comes together into a dough.
3. Turn the dough out onto your floured counter and knead a little, just until smooth.
4. Pat out so it's 3/4 inch thick, then cut out biscuits with a 2 1/2-inch cutter. Form the scraps into a ball and cut up to two more times.
5. Place biscuits on a clean cookie sheet (lined with parchment is nice but not absolutely necessary), wrap well with plastic wrap (foil also works alright) and freeze until hard. Transfer to freezer bags and store.
6. To bake, place on a cookie sheet and bake at 450 degrees for 20 minutes or so, until golden and puffed.

Wednesday, March 2, 2011

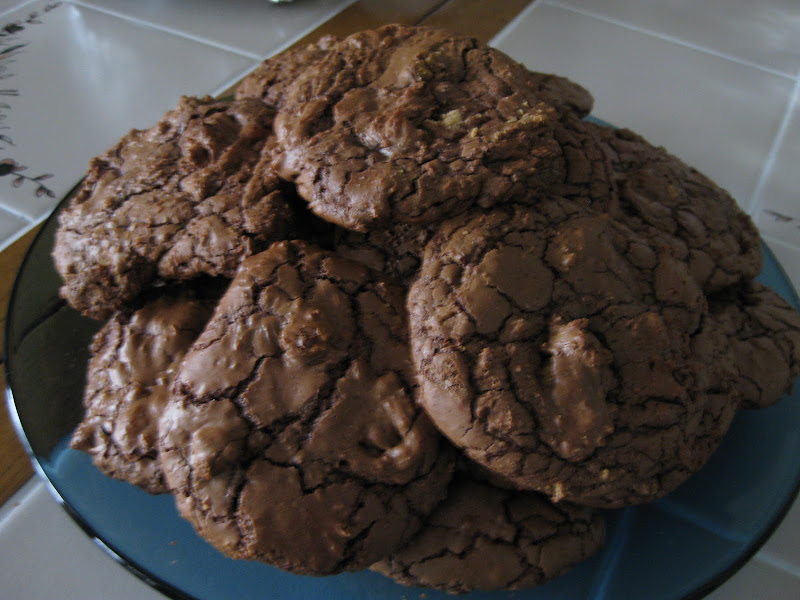
Chocolate peanut butter cup cookies

Chocolate peanut butter cup cookies

I'm sorry, Martha Stewart. I'm sorry I doubted you.

See, I've always thought of Martha Stewart as a crafter, a home-decor maven, someone who will show you how to make something pretty with some paint and some cardboard. I knew that she had recipes posted online, and I'd heard people talking about her cookbooks, but she hadn't really earned any cred with me. I knew she could work with wicker, but flour and shortening and such? I was dubious.

But I also have a stockpile of candy to use up. (Yay for after-holiday sales -- they're a good time to stock up on things you can bake with later. And don't forget about those miniature chocolate bars and pieces, 'cause there's no difference between those and chocolate chips except their size.) And I thought, y'know, I have yet to find a good chocolate cookie recipe that's all-purpose, something to throw chocolate chips in, or nuts, or candy, or anything that might go in a cookie. So I typed in "chocolate cookies." And Google gave me a Martha Stewart recipe. Sure, what the heck.

These are gooooood. They're the sort of cookies where when you're baking them, you just sort of have to trust that they'll be alright once they're cooled. But they're chewy and delicious and take well to mix-ins, and they don't even require you to cream butter and sugar together, which is nice. They were also very well-received when I took a plate of them to a homemade banquet with my boyfriend's family. After all, who doesn't like chocolate and peanut butter? I'll definitely hang onto this recipe.

Chocolate Peanut Butter Cup Cookies
Adapted from Martha Stewart

8 ounces (1 1/3 c) semisweet chocolate chips
4 tbsp butter
2/3 c flour
1/2 tsp baking powder
1/2 tsp salt
2 eggs
3/4 c brown sugar
1 tsp vanilla
About 12 ounces of mix-ins -- I used chopped-up miniature peanut butter cups, but you could use chocolate chips or chunks, any chopped-up candy that sounds good to you, nuts or a mix of the above

1. Place chocolate chips and butter in a small bowl and set aside.
2. Whisk together the flour, baking powder and salt in another bowl.
3. In a third, larger bowl, beat together the eggs, brown sugar and vanilla on high speed until light and fluffy.
4. Microwave the chocolate and butter, stopping and stirring every 30 seconds or so, until melted. Beat this into the egg mixture on low.
5. Beat in the flour mixture, then mix in whatever chunky ingredients you're using.
6. Drop heaping tablespoons 2 inches apart and bake in a 350-degree oven for about 12 minutes, until cookies are shiny and crackly but still soft in the centers.
7. Let cool on the cookie sheet for 10 minutes, then remove cookies to a rack to finish cooling.

Naan

Naan

Well, they can't all be winners.

It's true that you can make anything at home, anything you might order from a restaurant or bakery. But sometimes, it takes special equipment or a certain skill that you just don't have yet. And this was one of those times.

I got so excited when I saw this recipe on the Tasty Kitchen blog. Homemade naan! I love naan! And it's one of those things that I just never thought about making at home, assuming that it couldn't be done well.

I was half-right -- it couldn't be done well by me. I attribute this to a few factors. First, the recipe calls for a heavy-bottomed skillet, then doesn't make it clear whether you're supposed to grease said skillet or not. I imagine that what you should actually use here is a well-seasoned cast iron skillet. But I don't own one (a skillet I have, but it doesn't have a good level of seasoning on it yet). So I used a regular frying pan, which did not work out well at all -- the dough stuck to the pan and then didn't want to release, ultimately scorching my pan. The recipe also calls for cooking the second side over the flame of a gas stove. Sadly, all I have now is an electric stove, so none of that for me.

Ultimately, after the first few of these failed entirely (burnt on the outside, doughy on the inside), I put the rest of them on a cookie sheet in a 475-degree oven. That seemed to cook them alright, but there was still something really lacking about the flavor. I don't know whether it was the lack of ghee (clarified butter used in Indian cooking -- I didn't have any or feel like buying or making any) added at the end, or the lack of a tandoori oven, or what. Or maybe my standards are just too high. I noticed that on the page where I read about the recipe, the rave was "this is so much better than the kind you buy at the grocery store!" Honestly, I've never bought grocery-store naan -- I've always just ordered it at Indian restaurants. Maybe this is better than the packaged kind, but it's not as good as what you get at a restaurant.

So I figured I'd put this recipe here with ample caveats. I mean, a lot of reviewers on that site thought this recipe was awesome. And maybe, if you have a cast-iron skillet and a gas stove, or if your standards are lower than mine, you'll love this, too. Me, I'll probably wait a while before attempting naan again, and if I do, I'll probably look for another recipe. Or maybe I'll just resign it to the short list of things that are best ordered out.

Naan
From Tasty Kitchen

2 c flour
3/4 tsp baking powder
1/2 tsp baking soda
1/2 tsp sugar
1/4 tsp salt
1/2 c warm milk
1/2 c plain yogurt
1/2 tbsp oil, as needed (I never did figure this part out, seeing as it's not mentioned in the recipe...?)

1. Whisk all of the dry ingredients together in a good-sized bowl.
2. Mix together the milk and yogurt in another bowl. Then, make a well in the center of the dry ingredients and pour the wet stuff in, mixing together.
3. Cover the bowl with a damp cloth and let sit for at least 2 hours.
4. Knead the dough for a few minutes, then divide it into 8 parts.
5. Flatten the pieces out.
6. Heat a thick-bottomed skillet. Brush one side of your naan with water, then place it wet side down onto your hot skillet and cover for 30 seconds, until you see bubbles in it (good luck... I never did).
7. Flip with tongs and cook on the other side, or use tongs to hold the other side over the flame of a gas burner until it has charred spots.

Tuesday, February 15, 2011

Chocolate-hazelnut macarons

Chocolate-hazelnut macaron

For Valentine's Day this year, I decided to try the latest, hippest thing in baked goods, at least according to the Internet -- macarons. That's macarOns, one O, as in a meringue-and-nut-based sandwich cookie, as opposed to macarOOns, which are the coconut ones most people are familiar with.

Wouldn't you know, they ended up being way more of a pain than I suspected, and my quick afternoon baking project became "sorry I'm not ready to go out to dinner yet, honey, but I'm piping, and then these have to sit, and then I have to bake them... but here's a nice card and some chocolate-dipped strawberries to occupy you in the meantime, okay?"

As it turns out, as I was fussing over the meringue, Google-ing "macaron meringue texture" to try to figure out how this stuff was supposed to look, I realized that almost every recipe out there uses an easier meringue, the kind I'm familiar with and have made a bunch of times. Apparently, I picked the hardest macaron recipe on the Internet. Leave it to me to get sucked in by "ooh, chocolate, hazelnuts, Nutella!" and not notice the details until I was halfway into the recipe. Also, I hate piping. It looks good, but I always seem to forget how much it makes my hand hurt. Ah, well.

I have to say, these did come out pretty tasty, though they didn't spread like I thought they would, so they ended up being a bit small and fat. Next time, I think I might look for a simpler recipe, then just substitute like ingredients to get what I want. Or maybe I'd just try a different kind altogether, maybe some traditional almond ones.

Macaron

Chocolate-Hazelnut Macarons
From Baking Bites
2 1/4 c ground hazelnuts
2 c confectioners’ sugar
1/2 c cocoa
4 egg whites, room temperature
1 c sugar
1/4 c water
Nutella (the original recipe calls for a cup, but I totally didn't need that much)

1. Set 2 of the egg whites aside in a large bowl.
2. In another large bowl, whisk together the hazelnuts, confectioners' sugar and cocoa. Add the other 2 egg whites and mix until you have a stiff dough (I ended up using my hands for this task, 'cause a spoon wasn't cutting it).
3. Put the sugar and water in a small saucepan and turn on the burner to bring the mixture to a rolling boil.
4. Meanwhile, beat the 2 remaining egg whites until frothy. Once the sugar comes to a boil, keep beating the egg whites until soft peaks are formed.
5. With the mixer running on medium, slowly drizzle the hot sugar mixture into the bowl. Beat until about the texture of shaving cream.
6. Spoon about a third of the meringue into the bowl with the chocolate-nut mixture and beat them together. Then, fold in the remaining meringue a bit at a time. (Note: This totally didn't work for me -- the dough was just too stiff and thick to get the meringue to combine delicately. I ended up beating the whole mess together. They still came out tasting alright in the end. *shrugs*)
7. Line two baking sheets with parchment paper. Do NOT skip this, or you'll never get them off the pan.
8. Spoon the batter into a piping bag fitted with a 1 cm round tip, then pipe 1-inch circles about an inch apart on your baking sheets. If you get peaks on the tops of them (I did, 'cause my piping technique is far from perfect), just wet your finger with a bit of water and push those peaks down flat.
9. Turn on the oven to 350 degrees. Then, walk away for about 20 minutes -- the cookies need to sit so they'll develop a skin on top, so they're the right shape once they bake (smooth tops with little "feet" on the bottoms).
10. Bake the cookies for 11-12 minutes, until the tops are set. (One site I looked at recommended checking for doneness by grabbing the top of one and wiggling it from side to side -- if it shifts just slightly against the bottom of the cookie, it's done.)
11. Let cool on pan for 2 minutes, then remove to cooling racks. Once cooled, sandwich with Nutella.

Tuesday, January 25, 2011

Wheat bread

Wheat bread

Sometimes, a recipe is just more trouble than it's worth. Usually, this happens when you're working with a recipe that aims for complete and utter perfection -- sure, whoever created the recipe (in this case, the folks at America's Test Kitchen) might have gotten a result that was "perfect," but who says that'll be how it comes out when you make it, and for that matter, who says that it has to be perfect, anyway? In quite a few cases, "close enough" tastes just as good to the average person.

So it was with this recipe. After hunting all over the grocery store to pick up such specialized ingredients as wheat germ and rye flour, I made this recipe, and the result was... eh. It was alright. I didn't get the oven spring I'd expected, so the loaves came out awfully flat, which I read later could actually be due to the fact that it's wheat bread, made with a harder flour -- perhaps I should've let it rise more than double the second time, but the recipe didn't say that, so what I got were loaves that were the same size out of the oven as they were going in. And for all of this fussing, the taste is pretty standard, not the yeasty deliciousness I'd expected -- again, this could be because I've only ever made white bread, so I'll admit, my expectations may have been too high. What this is, to my taste buds, is a standard wheat bread, unexceptional except for the crispy homemade-tasting crust. I suppose that at least it's all-natural, 'cause it's homemade. But I'm not sure if I'd bother making this again. Wheat might be healthier, but white just tastes better.

Wheat Bread
From "Baking Illustrated"

2 1/3 c warm water
1 1/2 tbsp instant yeast
1/4 c honey
4 tbsp melted butter
2 1/2 tsp salt
1/4 c rye flour
1/2 c toasted wheat germ
Scant 3 c wheat flour
2 3/4 c regular all-purpose flour

1. Mix the yeast with the water in a large bowl. Add the honey, then the butter, salt, rye flour and wheat germ.
2. Mix the two remaining flours in a separate bowl.
3. Add the flour mix into the wet mix, half at a time, then knead together on a lightly floured surface until the dough is soft and smooth. (Keep in mind that doughs can vary based on the temperature and humidity in your kitchen -- you may not need all of the flour, or you may need a little more. Use your own judgement as to whether it's too sticky.)
4. Form into a ball and place in a large, lightly oiled bowl. Let rise in a warm, draft-free place for about an hour, until doubled in volume.
5. Press the dough down and divide it into two equal parts. Form each into a rectangle about 1 inch thick and 9 inches long, then roll up from a long side and pinch closed. Place seam-side down into greased 9-by-5-inch loaf pans. Cover and let rise another 20-30 minutes, until doubled in volume.
6. Bake in a 375-degree oven for 35 to 45 minutes, until they sound hollow when tapped. (To be extra-sure, you can stick a meat thermometer into the center of one loaf -- if it gets up to 205 degrees, it's done.) Depan and cool on rack.