Sunday, December 18, 2011

Espresso fudge cookies

Espresso fudge cookies

I went to my first From Scratch Club food swap last week, and since it's December, it was a cookie-themed swap. As I'd hoped, I went home with lots of cookies and a few ideas for my holiday baking, and when I got home and taste-tested all of my swap booty, these were the clear winners.

I added them to my cookie list for this year, and I'm really glad I did -- they're amazing, sinfully rich and fudgy and delicious, with the espresso serving to deepen the chocolate flavor even more. These cookies would be on Santa's naughty list for sure, 'cause they're simply decadent. :)

Espresso Fudge Cookies
Adapted from a recipe from Love & Olive Oil via @talkanatalka

3 ounces unsweetened chocolate, chopped
2 c semisweet chocolate chips
8 tbsp butter, cut into pieces
3 eggs
1 c plus 2 tbsp sugar
2 tsp instant espresso powder
3/4 c flour
Heaping 1/4 tsp baking powder
1/4 tsp salt

1. In a microwavable bowl, melt the unsweetened chocolate, 1 cup of semisweet chocolate and butter (do not overcook -- microwave it for a minute or 30 seconds or so, stir and repeat until just melted).
2. In a separate bowl, whisk together the flour, baking powder and salt.
3. In another, large bowl, beat the eggs, sugar and espresso powder on high until very thick and pale. Beat in the chocolate mixture, then beat in the flour mixture until just combined. Stir in the remaining chocolate chips.
4. Drop heaping tablespoons about 2 inches apart on a cookie sheet.
5. Bake at 350 degrees for 10 minutes, until puffed and cracked on top. Cool on the pan for 1 minute, then remove to a cooling rack.

Saturday, December 17, 2011

Russian teacakes

Cashew teacakes

I remember eating these as a kid, when my mom would buy packaged ones at the grocery store. But years later, we stopped being able to find them at the store anymore, and when I got into baking, I decided to make some myself.

The problem was, I couldn't remember what they were called, and every recipe I found that sounded similar had a different name -- Russian teacakes? Mexican wedding cookies? Something like these, it seemed, was what I was looking for, but I distinctly remembered the cashews. I also remembered calling them Russian teacakes, though, which is what I continue to call them to this day, even though the recipes I turned up for those weren't quite the same. So I adapted a Russian teacake recipe to produce this one, which is pretty much like what I remembered eating as a kid.

Of course, now, just to add further confusion, I've been coming across "cashew nougats" at the grocery store, and they look similar to, if not the same as, the ones from my childhood. So maybe they've brought them back. Or maybe this is just another layer of confusion. Whatever -- I've got my own recipe now. I don't need that packaged stuff.

Russian Teacakes

1 c butter
1 tsp vanilla
6 tbsp confectioners' sugar, plus a lot more for rolling
2 c flour
1 c chopped cashews

1. Melt the butter and mix in the vanilla. Add in the confectioners' sugar and flour and mix until blended. Mix in the nuts. Chill.
2. Carefully break off bits of the dough (it will probably be crumbly) and form into 1-inch balls, placing them on a cookie sheet (these won't spread, so spacing doesn't matter much).
3. Bake at 350 degrees for 12 minutes, until they are a bit dry-looking and just slightly browned on the bottoms.
4. Immediately roll in confectioners' sugar. Let cool, then roll in sugar a second time.

Friday, December 16, 2011

White chocolate-clementine cookies

White chocolate-clementine cookies

Sometimes, you buy ingredients for a recipe. And sometimes, you find a recipe to rationalize buying the ingredients. :) That was what happened here: There was a sale on boxes of clementines at the store, and I wanted to take advantage, but did I really need to buy a box of clementines, honestly? Well, no... unless... unless I used them for one of my Christmas cookies! Yeah, that's it!

So I Googled around a bit, and I found this recipe, which was even better because it also has white chocolate, and I had a few bags of white chips lying around. They came out... well, not bad, but the baking directions weren't terribly accurate, I don't think. But with a little fussing, they came out alright, fairly tasty, though with so many great cookie recipes out there, I don't know whether I'd make this one again. Maybe I would if I wanted to justify buying clementines again, though. :)

White Chocolate-Clementine Cookies
Adapted from a recipe at Hot Polka Dot

1 c butter, softened
1 c sugar
2 tbsp clementine zest
2 tbsp clementine juice
2 eggs
1/2 tsp baking soda
1/2 tsp baking powder
1 tsp salt
2 1/2 c flour
2 c white chocolate chips

1. Beat together the butter and sugar until fluffy. Beat in the clementine juice, zest and eggs.
2. In another bowl, whisk together the baking soda, baking powder, salt and flour. Beat this mixture into the wet ingredients.
3. Stir in the chocolate chips.
4. Drop rounded tablespoons of dough an inch or so apart on a cookie sheet.
5. Bake at 350 degrees for about 15 minutes, until they are browned around the edges and don't look wet in the centers. Cool on a rack.

Thursday, December 15, 2011

Maple-walnut fudge

Maple-walnut fudge

You know I can never do things the shortcut way. And I had a whole bunch of maple syrup in the house from a trip to Vermont a while back -- real maple syrup, not the fake Aunt Jemima stuff. So I couldn't just use one of those fudge recipes with chocolate chips in it, or marshmallows, oh no. I had to make candy from scratch, boil sugar and create fudge.

This came out pretty tasty, but I think I overbeat it a little, 'cause I was paranoid about not beating it enough -- it was a little on the firm side, a little leaning toward maple candy instead of creamy maple fudge. I'd try making it again, though, and just stop beating it a little sooner.

Maple-Walnut Fudge
Adapted from a recipe on Food.com

1 1/2 c maple syrup
Scant 1 3/4 c sugar
1 tbsp corn syrup
2/3 c heavy cream
1/4 tsp salt
1/4 c butter, cut into pieces
1 tsp vanilla
1 c chopped walnuts

1. Line an 8-by-8 pan with foil, then liberally grease/butter/spray the foil.
2. Place the maple syrup, sugar, corn syrup, cream and salt in a decent-sized saucepan. Stir or whisk together, then put the spoon/whisk away -- you won't need it again.
3. Get the butter and vanilla ready in a small dish or cup. Get the walnuts all measured out and ready, too. Once you start this, you don't want to be fumbling for ingredients. Get the mixer out, too, and a really big mixing bowl, so you don't have to stop and get them out later.
4. Put your saucepan on medium to medium-high heat and place a candy thermometer in the pan. Bring the mixture to a boil and drop the heat so it's just high enough to stay at a boil. Cook until the thermometer reads 238 degrees (or soft-ball stage -- an extra degree or two won't kill you, though any more than that might).
5. Turn off the heat, let the pan sit a second, then pour the contents into the bowl. Add the butter and the vanilla, then start to beat the mixture. Beat until thickened and lighter in color and no longer glossy.
6. Stir in the nuts and spread in the prepared pan. Let sit until cooled.

Tuesday, December 13, 2011

Snickerdoodles

Snickerdoodles

It's cookie time!

I love December, 'cause it gives me an excuse to make lots and lots of different cookies, at least some of which must always be kinds I've never tried before. I started off with these snickerdoodles as a warmup, a prelude to the full-on Cookie Weekend that I just wrapped up (whew!). And I'm kicking myself now, because I should've been making these for years, and instead, I only made them for the first time this holiday cookie season. They're really, really good, and they make the house smell awesome -- so awesome, in fact, that my boyfriend was roused out of bed by the smell, at 1 a.m., powerless to resist eating one, even though he was nearly asleep. :)

I'll be blogging the rest of what I made on Cookie Weekend as I get the time. For now, enjoy this one, and do make it -- it's delicious, it's not hard and you probably have everything in the house already, except maybe the cream of tartar.

Snickerdoodles
From "Baking Illustrated"
2 1/4 c flour
2 tsp cream of tartar
1 tsp baking soda
1/2 tsp salt
12 tbsp butter, softened
1/4 c shortening
1 1/2 c sugar
2 eggs
3 tbsp sugar
1 tbsp cinnamon

1. Whisk together the flour, cream of tartar, baking soda and salt and set aside.
2. In a large bowl, beat together the butter, shortening and 1 1/2 cups of sugar until combined. Beat in the eggs, then the dry ingredients until combined.
3. Mix together the 3 tablespoons of sugar and cinnamon in a wide bowl.
4. Roll the dough into balls, a heaping tablespoon at a time. Roll the balls in the cinnamon sugar and space about 2 inches apart on a baking sheet.
5. Bake about 10 minutes at 400 degrees, until the edges are beginning to set and the centers are soft and puffy. Let cool on pan 2 to 3 minutes, then move to a rack to cool.

Sunday, December 4, 2011

Gingerbread cake

Gingerbread cake

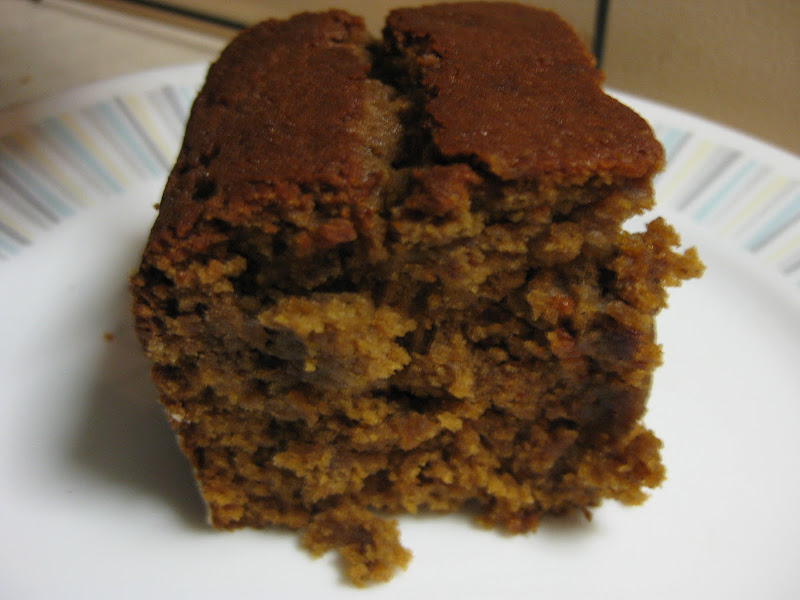
'Tis the season for deliciousness -- the sweet peppermint of candy canes, the melty sweetness of chocolate and of course, spice-laden baked goods, like that most classic of holiday cookies, gingerbread. But why should the drool-inducing combination of spices and molasses and sugar be saved for just cookies? After all, gingerbread started as, well, bread, a quick bread, more cake than cookie.

This stuff was really good and highly addictive. I totally recommend it, especially if you really crave gingerbread but don't feel like doing the work of making cookie dough, rolling it out, cutting it and so forth -- this cake comes together in just minutes.

Gingerbread Cake
From "Baking Illustrated"

2 1/4 c flour
1/2 tsp baking soda
1/2 tsp salt
2 tsp ground ginger
1 tsp cinnamon
1/2 tsp cloves
1/2 tsp nutmeg
1/2 tsp allspice
1 tsp cocoa
8 tbsp butter, melted and cooled
3/4 c molasses
3/4 c sugar
1/2 c buttermilk
1/2 c milk
1 egg

1. Grease and flour a 9-by-9 or 11-by-7 pan.
2. Whisk together all of the dry ingredients and set aside.
3. Beat together all of the wet ingredients in a large bowl. Beat in the dry ingredients until the batter is smooth and thick.
4. Scrape the batter into the pan and bake at 350 degrees for about 40 minutes, until the top springs back when lightly touched and the edges pull away from the pan sides. (I used the toothpick test, which seemed to work alright, too.)
5. Cool in pan on a wire rack for at least 10 minutes. Serve warm or at room temperature.

Tuesday, November 29, 2011

Dinner rolls

Dinner rolls

Every year, I like to contribute something different for Thanksgiving dinner -- I'm trying to slowly feel out what recipes I'll want to use when I have my own Thanksgiving dinner someday, when it's my turn to cook the whole meal. Last year, I made the pumpkin pie. The year before, I made an awesome green bean casserole (from scratch, which makes all the difference in the world -- no canned soup here!). And this year, well, I was running out of options, 'cause certain things are sacred in my mom's Thanksgiving dinner.

Well, strike that -- almost EVERYTHING is sacred. And to some extent, I don't blame them, 'cause Thanksgiving is partly about tradition, about time-honored recipes you pull out every year. So the turkey was settled (though I actually did get my hands on that one year, discovering that brining wasn't really worth the effort), and so was the stuffing, the carrots, potatoes, cranberry sauce (always from a can, though I've been itching to try making that some year), even the pumpkin pies (though I contributed an apple pie, largely because my boyfriend likes it way better than pumpkin).

What wasn't already carved-in-stone tradition, not to be tinkered with? The dinner rolls. Every year, they're the typical store-bought brown-and-serve variety. They're not BAD, per se. They're alright. But they're not particularly good, either, so I figured, why not try making my own?

I attacked these with some trepidation, 'cause it seems like bread doughs never want to rise for me quite as quickly as they should, and then I get impatient with them. On top of that, the recipe for these swore that you could freeze them and then bake them from frozen with no ill effects. And y'know, it was right. I popped these in the oven at Mom's, and a little while later, we had fully cooked, golden brown rolls, slightly flaky around the edges and a bit yeasty in the middle, maybe not the greatest bread product known to man, but perfectly good rolls, good enough to earn compliments from everyone at the table. I might even make these again for Christmas dinner, though I can be a bit of a magpie-ish baker, so my attention might move on to trying something else by then (and hey, cookie season's nearly upon us! And there's gingerbread, and cakes, and candies, and, and...).

Dinner Rolls
From "The Best Make-Ahead Recipe"

4 1/4 c flour
2 tbsp sugar
1 envelope rapid-rise yeast
1 1/2 tsp salt
1 1/4 c whole milk, warmed to 110 degrees
12 tbsp butter, melted, plus a little extra for brushing on before baking
2 egg yolks
1 egg

1. Whisk together 4 cups of the flour with the sugar, yeast and salt.
2. In another bowl, whisk together the milk and butter, then the egg. Combine with the dry ingredients and mix until a dough comes together.
3. Knead until smooth and elastic, adding the remaining 1/4 cup of flour if it's too sticky. (The mixing and kneading can be done in a stand mixer, if you've got one, but I don't, so I did it all by hand.)
4. Form a smooth, round ball, place in a large, oiled bowl, cover with plastic wrap and let rise until doubled, about an hour.
5. Divide the dough into 24 even pieces, form into smooth, tight balls and place on a parchment-lined baking sheet. Cover loosely with plastic wrap and let rise until double, about an hour.
6. At this point, you can pop the tray into the freezer, freeze the rolls until firm and transfer them into a zip-top bag for storage.
7. To bake, arrange the rolls on a greased or parchment-lined baking sheet and brush with melted butter. Bake at 375 degrees until golden, 15 to 25 minutes. Cool for 10 minutes before serving.

Friday, November 25, 2011

Applesauce

Applesauce

It's the day after Thanksgiving, and everyone's thoughts have now turned to leftovers. Well, that and holiday shopping, of course. But food is my focus, most of the time, and now that it's late November, we've got lots of leftover turkey and stuffing and whatnot to deal with... not to mention the remnants of the fall harvest.

Did anyone else buy waaaaay too many apples this fall? *raises hand* Yes, definitely. But fret not, 'cause those leftovers can be turned into something yummy, too, no matter how bad they're starting to look -- not rotten, mind you, but the bruised ones are just fine here, the ugly ones, the ones that look like they really need to be used up right now, today, before it's too late, before they go bad.

Applesauce is the perfect fix for this situation. It's delicious, it's really simple to make, and you can can it, which means that you can taste September even in January or May.

Applesauce
Loosely adapted from "The Ball Complete Book of Home Preserving"

Apples, peeled and cut up, enough to fill a large saucepan (this will depend on the size of your apples, obviously)
Water, just a splash
2 tbsp lemon juice
1 1/2 c sugar (but feel free to use a lot less if you're using sweeter apples -- I only used 2/3 c or so in mine)

1. Splash a little bit of water into the pan containing the cut-up apples. Bring to a boil over high heat, then turn down the heat and boil gently for 5 to 20 minutes, until the apples are tender.
2. Mash up the apples with a potato masher until of the right consistency (if you like it chunky, leave chunks; if you like it super-smooth, hit it with a stick blender or put it through a food mill).
3. Add the lemon juice and sugar and bring to a boil to dissolve the sugar.
4. Pour into sterilized canning jars, leaving a half-inch of headspace. Add lids and rings, screwed on fingertip-tight.
5. Process jars in a large, covered pot of boiling water for 20 minutes. Remove the pot's lid and wait 5 minutes, then remove the jars of applesauce and place them somewhere out of the way to cool, making sure not to tilt them.

Tuesday, November 22, 2011

Cornbread

Cornbread

Sometimes, it's the simple things where I find myself lacking.

Sure, I can whip up some pretty good cookies, or even a cake or two, but had I ever made something as simple as cornbread? No, no I had not. Not unless you could those little blue and white boxes, of course.

But there was chicken and chorizo stew in the slow cooker (a dish that makes me think I should talk my boyfriend into blogging, too, 'cause that stuff is awesome), and cornbread sounded like a nice accompaniment, so I pulled out my trusty "Baking Illustrated," 'cause that's always my fallback for baking something I've never made. The result? Well, it was alright. It wasn't quite sweet enough for my taste, though. (Maybe I'll throw more sugar in next time. Or maybe I'll try a different recipe.) But it was plenty corn-y and had a nice texture. I also learned a new use for cornbread, besides just eating it straight (thank you, Interwebs!) -- it's pretty tasty for breakfast if you fry it in a little bit of butter (or bacon fat, if you happen to be cooking bacon) and pour some syrup over it. I never would've thought of that.

Cornbread
From "Baking Illustrated"

2 tbsp butter, melted
1 c yellow cornmeal
1 c flour
2 tsp baking powder
1/2 tsp baking soda
4 tsp sugar
1/2 tsp salt
2 eggs
2/3 c buttermilk
2/3 c milk

1. Whisk together the cornmeal, flour, baking powder, baking soda, sugar and salt in a large bowl. Push the mixture up the sides of the bowl to form a well in the center.
2. Crack in the eggs and mix lightly, then add the buttermilk and milk. Stir until almost combined, then mix in the butter and stir until just combined.
3. Pour into a greased 9-by-9 or 8-by-8 pan.
4. Bake at 425 degrees for about 20-25 minutes, until the top is golden brown and lightly cracked and the sides have pulled away from the pan.
5. Cool on a rack for 5-10 minutes, the cut and serve warm.

Thursday, November 17, 2011

Pumpkin chip cookies

Pumpkin chip cookies

Have you ever tried cinnamon chips? I hadn't, but I came across a few recipes for pumpkin cookies that included them, so I decided to get some. What I discovered, though, is that apparently, at my grocery store, they're a seasonal item -- they didn't have them when I looked a few weeks ago, but then later on, they did. And they were worth the wait -- they add just the right spicy-deliciousness to these classic pumpkin cookies. I'm definitely going to buy a bunch more bags to stock up before the holidays are over, not to mention plenty of pumpkin. Some people may say that pumpkin cookies are a fall thing, but I'd eat these all year, they're that good. In fact, I think they might be my new favorite cookie.

Pumpkin Chip Cookies
Adapted from Libby's

2 1/2 c flour
1 tsp baking soda
1 tsp baking powder
1 tsp cinnamon
1/2 tsp nutmeg
1/2 tsp salt
1 1/2 c sugar
1/2 c butter, softened
1 c pumpkin
1 egg
1 tsp vanilla
10 ounces cinnamon chips (one bag)

1. Whisk together the flour, baking soda, baking powder, cinnamon, nutmeg and salt in a bowl.
2. In another, larger bowl, beat together the butter and sugar until fluffy. Beat in the pumpkin, egg and vanilla. Then, beat in the dry ingredients.
3. Stir in the cinnamon chips.
4. Drop tablespoon-sized dollops onto a parchment-lined (or greased) cookie sheet.
5. Bake at at 350 degrees for 15 minutes, until the edges are firm.
6. Let cool on pans for 2 minutes, then remove to a cooling rack.